


Have you ever looked at your walls and noticed that they have collected more than just family photos and artwork? Dust, dirt, daily grime, and the occasional scuff mark can turn even the brightest walls dull. If you find yourself dreading the task ahead, fear not! In this Complete Guide To Washing Walls, we’ll walk you through how to wash walls fast and give you lots of other great tips (there’s even a free printable PDF checklist to download). So grab your cleaning supplies, and let’s get started on making those walls shine with minimal cost or elbow grease.

Discovering This Cleaning Method
As with any task, I’m a big fan of first mastering doing it the hard, or traditional, way first…and then once I have that method down, immediately the gears in my brain start churning about what is going to be the easiest/least strenuous, least time consuming, or cheapest way to get the same results.
It’s just how I happen to be wired, and so that is what was going on in my head when I was faced with a clients cleaning job that had walls and ceiling that were so bad that my first instinct was to cry over having to be the one to clean it.
I know that sounds extreme, or you’re thinking that maybe I was just being a baby…but it was stressful.
Let’s just say that it was bad enough that I didn’t even know how a hallway, in a home, getting that dirty could even happen.
My eternally childish mind was definitely going over some pretty silly scenarios on how that mess was made…
Anyway, ultimately I decided that I needed to stop focusing on how it happened, and get figuring out a solution that I so desperately needed…because I was on a cleaning job, and I wasn’t getting paid to sit there imagining how the mess was made.
So, to get a handle on my thought process, I literally had to step away…breathe a little bit, and then come up with a plan of action because I just plain wasn’t willing to spend hours and hours scrubbing an entire corridor hallway, and ceiling, that was caked with dark cola dried onto every possible crevice.
So, I went upstairs to the clients utility closet, poked around a bit to see if I could figure out a hack for the job, and here’s what I came up with.
*Please note that I originally shared this cleaning method in August of 2013 (& it has since become my most popular cleaning article of all time) but I have since improved even further on the best way to do it, so even if you maybe read this article years ago, I highly recommend scrolling through it to see if you can glean any new information out of it to improve your skillset further too.*
Let’s dive right in!
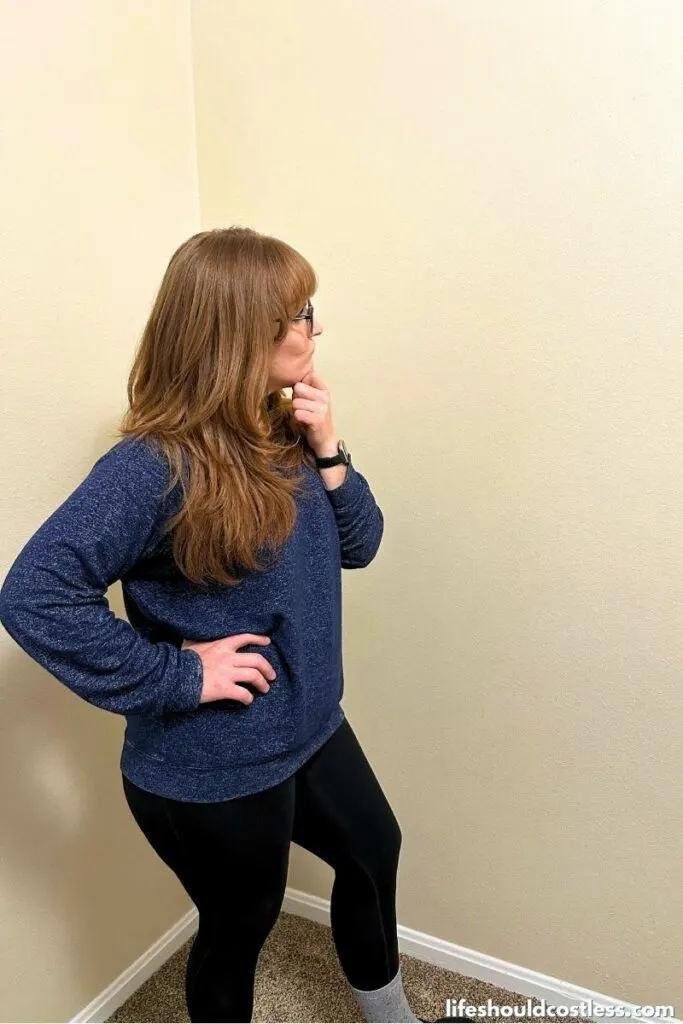
*Warning, cheesy photos of a camera-shy ginger ahead.
What Kind Of Walls Is This Cleaning Method Suited For?
This cleaning method is designed to be gentle yet effective, making it suitable for a variety of wall finishes.
Here’s a breakdown of what materials you should be able to clean this way (same goes for ceilings):
- Painted Walls: Ideal for walls painted with latex or oil-based paints, this method works well on both flat and semi-gloss finishes with various textures. However, it’s best to avoid vigorous scrubbing on flat or matte finishes to prevent wearing down the paint sheen.
- Wallpapered Walls: You can safely do this to clean walls covered with washable wallpaper. You will want to ensure the wallpaper is labeled as “scrubbable” or “washable” before you proceed. Try to avoid using too much water on delicate or non-washable wallpapers as it can cause peeling or discoloration.
- Tiled Walls: Common in bathrooms and kitchens, tiled walls can handle more rigorous cleaning. This method effectively removes grime from grout lines without damaging the tile’s glaze. However, for grout that is extra stubborn, you may want to check my article on how to deep clean grout using only water, found here.
- Wooden Walls: For painted or sealed wood paneling, use this method to lift dirt without stripping moisture from the wood. Avoid soaking the wood and ensure to dry the surface thoroughly to prevent warping.
- Plastered Walls: This approach is suitable for plaster walls if they are painted or sealed. Bare plaster should be treated with care, using minimal water to avoid soaking and potential damage.
Before using this cleaning method on any wall, it’s recommended to test in an inconspicuous area to ensure the finish remains intact.
This way, you can tackle cleaning with confidence, knowing your walls are well protected.
If you need additional tips on how to clean the baseboards, I suggest checking out my ultimate guide to clean baseboards, and you can find that here.
How To Clean Walls (including the easiest, fastest way)
Here’s the order of steps that I take to tackle my wall cleaning as efficiently as possible, it may seem like a lot at first, but you’ll find that it becomes second nature very quickly once you get a good rhythm going:
*Please note that lower down in this article I have pictures with links to all my favorite Amazon products to get the job done, so make sure to check that out too.
Step 1: Assessing The Task
Before you start any job, it’s important to take a good hard look at what even realistically needs to happen to do a good job, but not get too carried away.
I typically just like to look to see if there is dust, scuffs, caked on grime, or oily finger prints…though if it’s a home with small children or indoor pets you’re going to want to see if there are any unmentionable messes too (actually nothing is “unmentionable” to me…I’m talking about poop or other dried-on body fluids…and try not to gag while you’re assessing).

It’s also a good idea to look at the tops of the walls to see if there are any of those black spots that get left behind by any flies or other various insect droppings.
Once you have assessed the job, then you know if you can safely skip over any steps, which may save a considerable amount of time later.
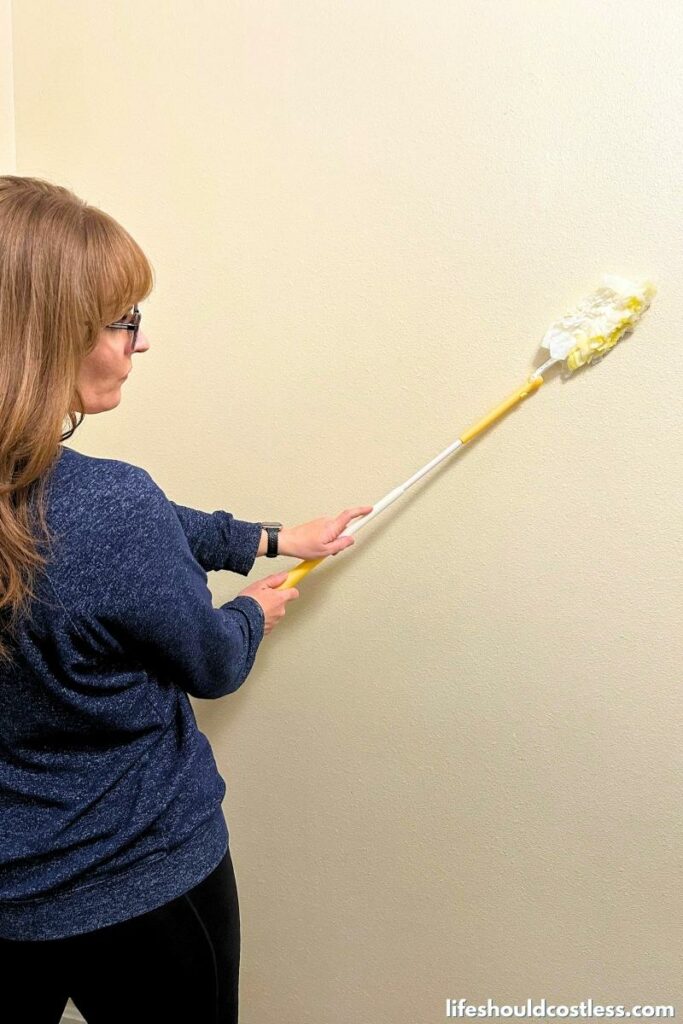
Step 2: Dusting
If your wall assessment showed that the walls were dusty, it’s important to take care of the dust before you go “hog-wild” cleaning your walls.
The dusting step is crucial because it clears away any loose dirt, stray cobwebs, and miscellaneous debris that might be clinging to your wall surfaces.
A thorough dust-down sets the stage for the real cleaning magic to happen. Plus, if you don’t take this step and you really should have…your walls could potentially become a muddy mess later in the process.
Before I start dusting, I choose the correct tool for the job.
So, I typically pick between a standard telescoping duster, a disposable duster with a telescoping handle (these ones trap the dust so there’s less clean-up later), or even a standard tea towel will work.
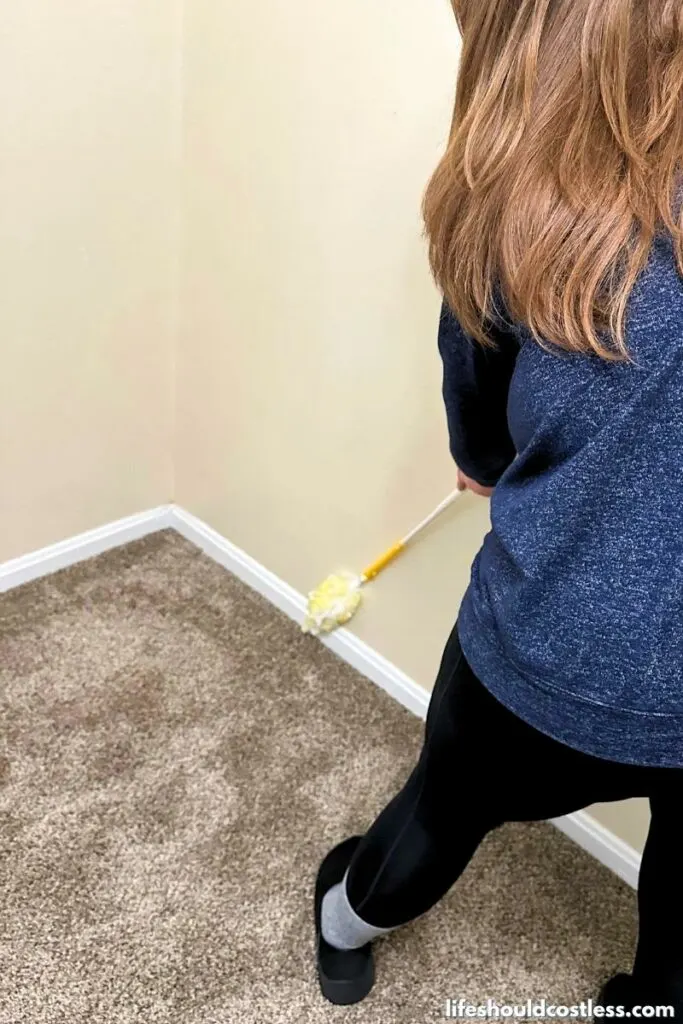
To dust my walls, I start at the ceiling (because we don’t fight with gravity…gravity will always win 😉 ) and work downward.


Apply pressure and wiggle your way down the wall. I find it best to work in sections, or rows to ensure that I don’t miss anything while working my way to the bottom.

Make sure to pay special attention to areas that dust typically like to collect such as window frames, door frames, baseboards, shelving, and anything hanging on the wall.

*When I am deep cleaning walls I actually remove any and all artwork or window treatments before I start dusting…you may want to do that too.
**Any time your duster gets too dusty make sure that you are taking it outside and shaking it out, or swapping it for a new duster cloth.
Step 3: Ventilation
This step is only necessary if you are going to use a cleaning product or solution that puts off fumes.
I typically use a fairly natural cleaning product, so I rarely have to worry about this step, but I needed to mention it for those of you that like to clean with chemicals.

To ventilate I either open windows nearby getting a good cross breeze going, or I run a fan.
Just be mindful of your personal situation and health as you are determining whether or not this step is necessary.
If there are fumes, and ventilating isn’t an option for whatever reason, you may want to think about using some sort of mask.
Step 4: Prepare A Cleaning Solution
For typical wall cleaning you don’t really need any super fancy or expensive cleaning products. Just a bit of dish soap and water will do the job.

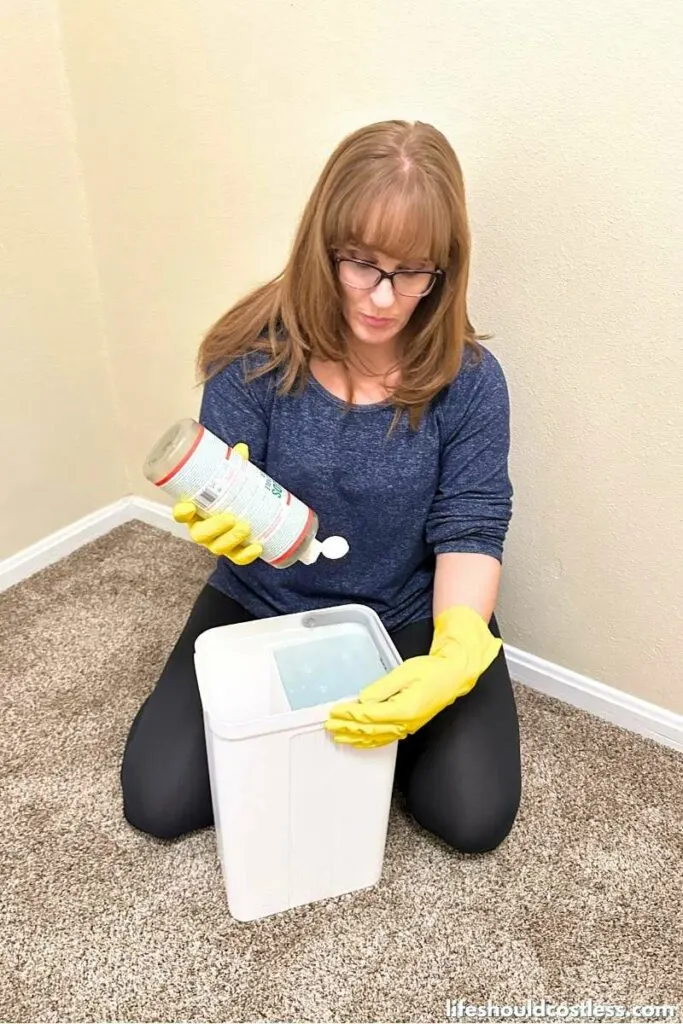
However, a good multi-purpose cleaner will be a better choice for tougher messes.
Just follow the directions on the back of the bottle for the product that you pick, and you should be good to go.
*Make sure to use some quality gloves to protect your skin if you are working with chemicals.
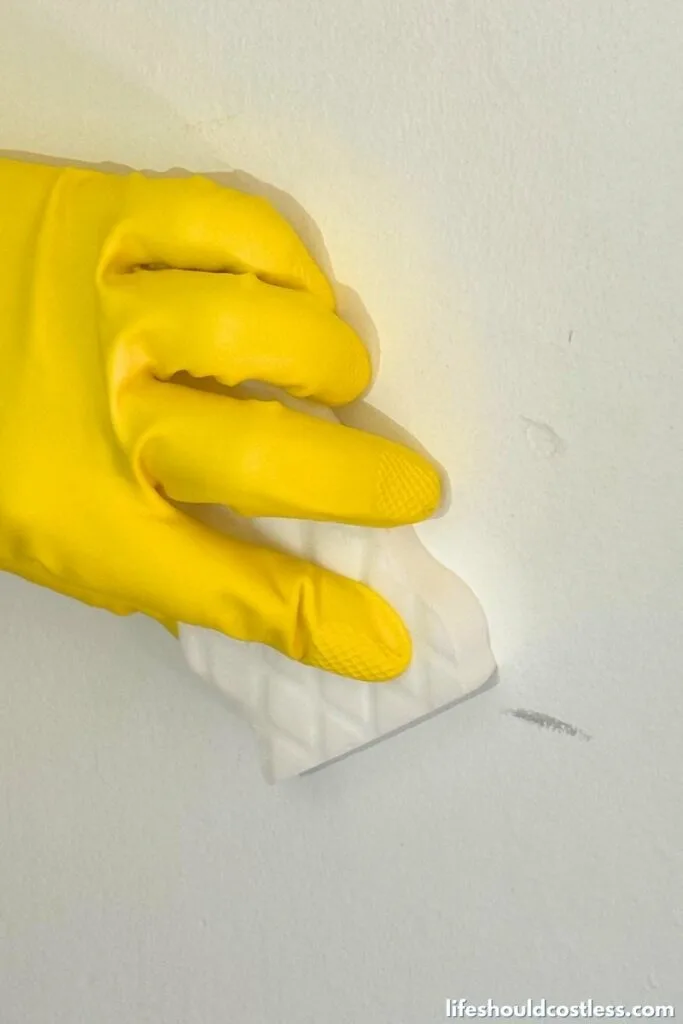
Step 5: Spot Cleaning
Scuff marks and caked on grime may need a bit more attention than the quick cleaning trick I use in step 6.
If this is the case, I like to pre-treat my dirty areas. So, for example, if I’m dealing with scuff marks, I will gently use a Magic Eraser to spot clean it.

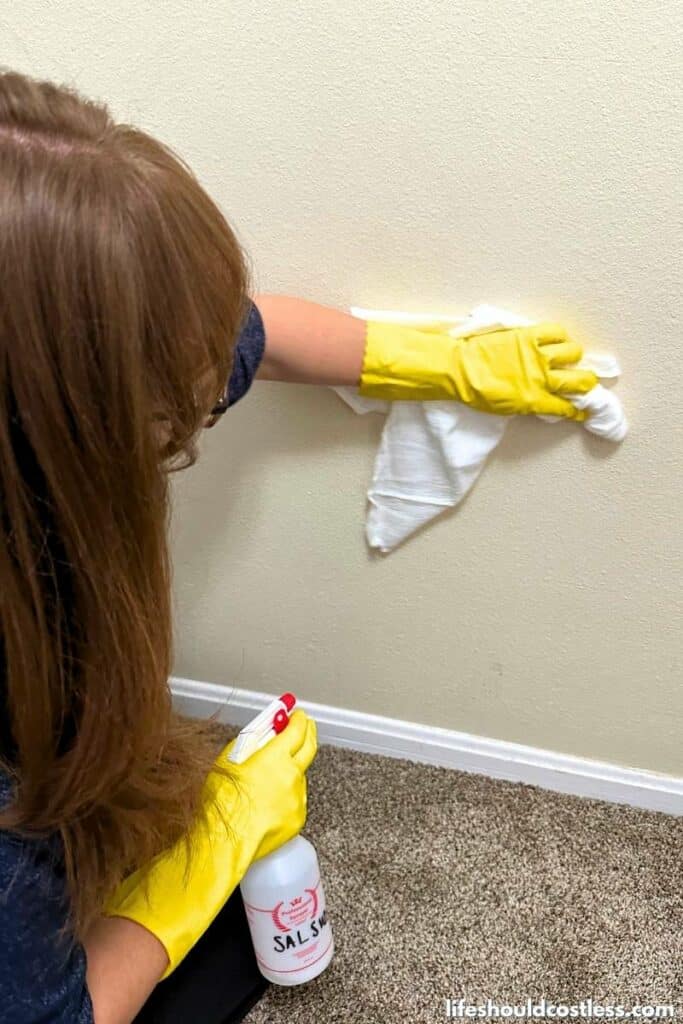
For other particularly nasty areas, I like to use some of my cleaning solution in a professional grade spray bottle and spritz it (making sure that it’s not dripping down the wall).

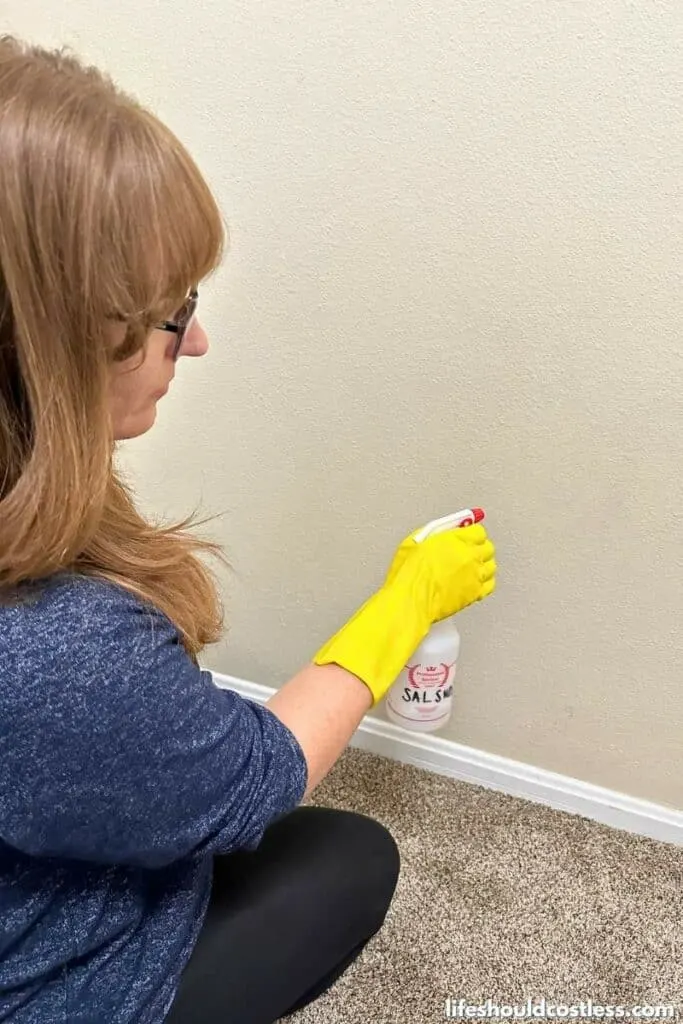
Then I let it soak for at least 30 seconds, and gently wipe it off with a rag.

If you clean often, most walls that you encounter are only going to need the basic full-wall cleaning though.
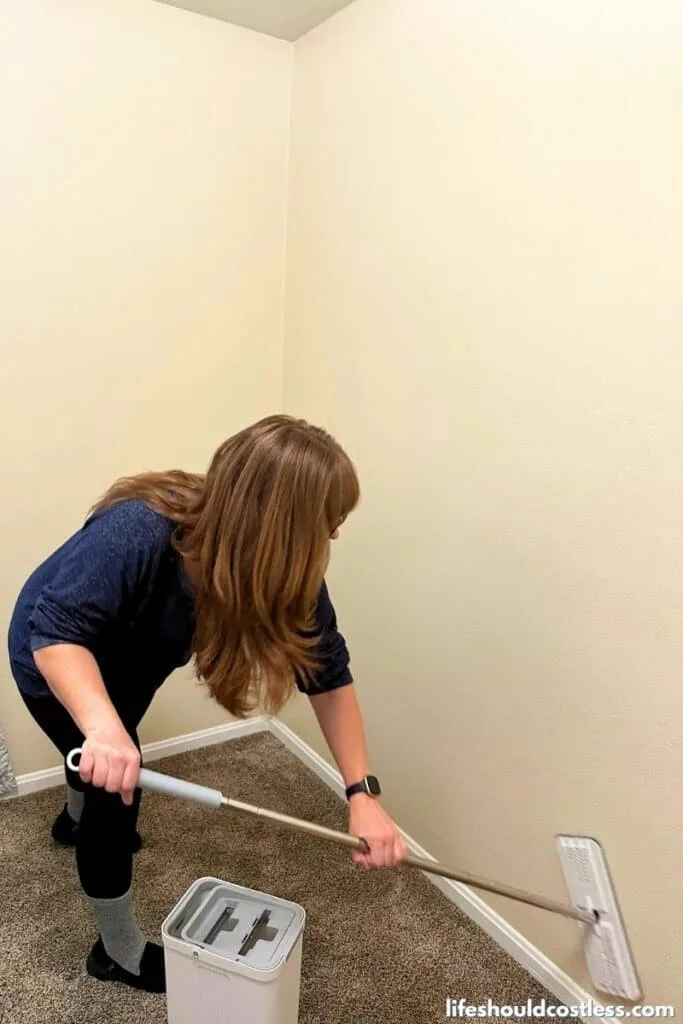
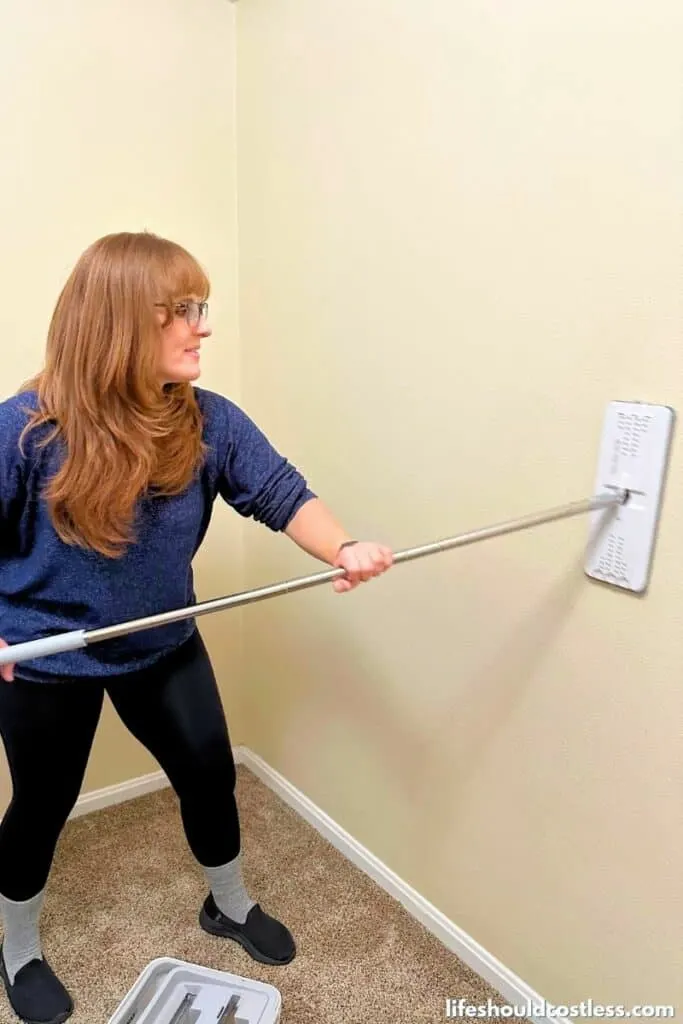
Step 6: Mopping The Walls (the fastest, best way to wash them)
If there is no other useful information that you get from reading that article, this is the part that I hope you use the most.
I discovered that if I use a sturdy large pad mop to scrub down the walls, instead of a rag and soapy water, it cuts my wall cleaning time down to a fraction of what it used to take me…and it saves this old body of mine from lots aches later on too.
The best way to do it is to soak the mop pad in the previously prepared cleaning solution, and then wring it out (I used to use a cheaper pad mop that required me to wring it out by hand, I have since upgraded to this mop and it wrings the pad out for me).
Then, working top to bottom.

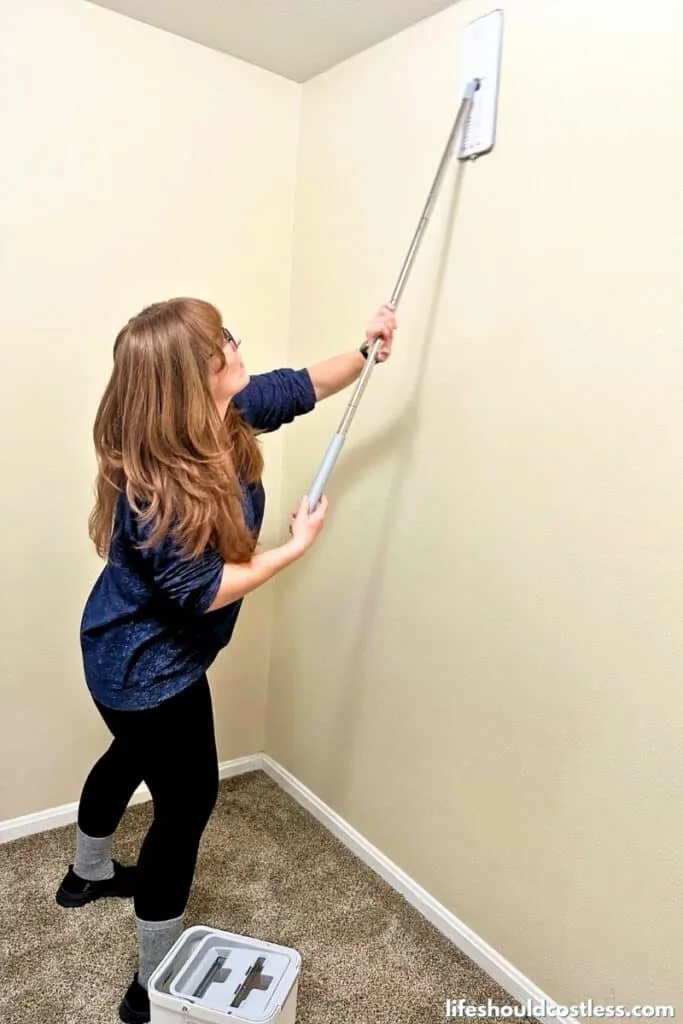
I mop the wall in sections, applying pressure and scrubbing firmly enough to do a good job, yet gently enough that I’m not going to rub off any paint.
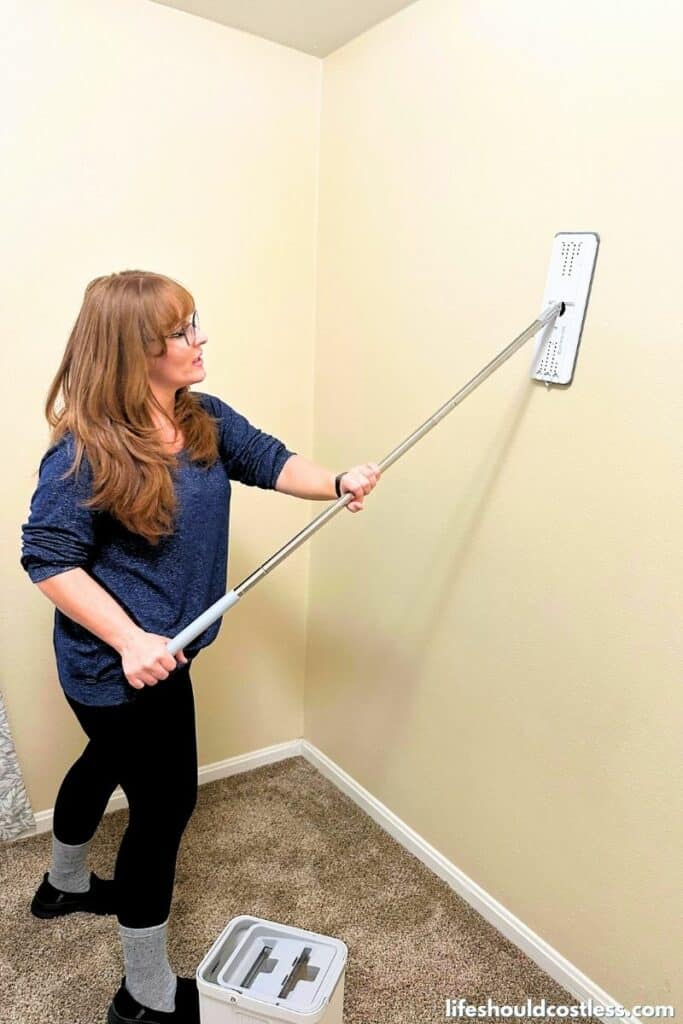

Literally just try to push as hard as you do when trying to do a good job mopping your floors and you should be fine.

Make sure that any time that your mop pad or cleaning solution get dirty to swap them out for fresh because you can’t make something clean when you’re wiping it with something that is dirty.
*When I first shared this cleaning tip in 2013, I used to spray my entire wall down with cleaning solution first and then mop it… however, I have since discovered that it is much less messy and still as effective to just wring out the reusable mop pads after soaking them in the cleaning solution. It does an excellent job, cleans just as well with no added mess, and leaves a much better end result than the previous method.
**Some of my readers have told me that they prefer to use a more circular self-wringing mop instead of the large pad kind that I love. They say that it will get into crevices more so yes, it covers less surface area at a time, but it will leave you with less scrubbing later if you are mopping extra dirty walls, so keep that in mind as you go to purchase your mop.
Step 7: Rinsing & Drying
Once you have the entire wall washed (or sometimes the whole room that you’re working on) it’s a good idea to take one more step and rinse the cleaning solution off of the walls.
The easiest way to do so is to use fresh water in place of the cleaning solution you used previously, and mop the walls one last time using a fresh mop pad.

You can totally skip this step, however you’re more likely to have dust clinging to the detergent on walls in the future if you do choose to skip it.
At this point, I like to just let my walls air-dry…but I have heard some of my readers like to use a dry fresh mop pad and mop the walls one last time.
It’s totally up to you, but as a desert-dweller, I personally feel that a “drying” step is completely unnecessary for my personal situation.
Well, the only other thing that I have to add about the actual process of cleaning walls is that you may occasionally run into a super dirty job that requires you to repeat some of the steps… that’s totally normal.
If that’s the case, just remember that you are essentially taking off one layer of filth each time you go through the steps, so super dirty walls may be caked with filth…plan accordingly and try not to get discouraged.
Pro Tips
Prepare The Appropriate Cleaning Solution: For most painted walls, a mild cleaning solution will suffice. Mix a few drops of dish soap or a gentle all-purpose cleaner with warm water in a bucket. Avoid using harsh chemicals or abrasive cleaners that can harm the paint.
Test in an Inconspicuous Area: Before cleaning the entire wall, test your cleaning solution on a small, inconspicuous area to ensure it doesn’t damage the paint or cause any discoloration.
Focus on High-Traffic Areas: Pay extra attention to areas around light switches, door handles, and other high-traffic spots that may require more frequent cleaning.
Protect the Baseboards: When cleaning the lower parts of the walls, be mindful not to damage or soak your baseboards, especially if they have not been properly caulked or grouted into place.
Safety first: When you are cleaning cigarette smoke or anything else off of walls in a room that has had a lot of chemical exposure, make sure to wear gloves at the very least & any other protective gear that you deem necessary.
Remember, regular dusting and occasional gentle cleaning are the keys to maintaining the appearance of painted walls without causing any harm. Always use soft materials and avoid abrasive scrubbing to preserve the paint finish for years to come.
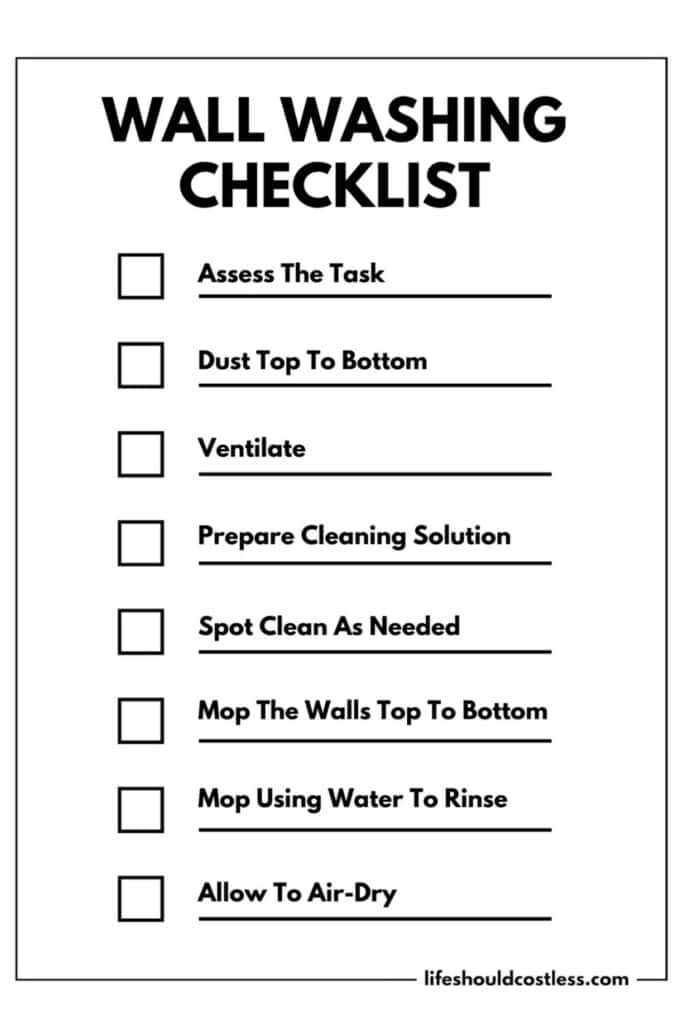
Free Printable PDF Wall Washing Checklist
I know that tutorial was more than a little bit of a novel…I feel like if a person comes to my site to learn something, I didn’t do a good enough job if they still have questions after reading what I wrote.
So, I thought it would be helpful to create a simplified printable checklist for you all to easily remember the steps.

Recommended Tools And Products
Please note: I am an affiliate with Amazon.com. When you purchase through my suggested product links, the cost for you is the same, but I do receive a small commission for everything in your shopping cart. Thanks so much for helping me support my kids!
Dusting Tools:

DELUX Microfiber Feather Duster Extendable Duster with 100 inches Extra Long Pole, Bendable Head & Long Handle Dusters for Cleaning Ceiling Fan, High Ceiling, Blinds, Furniture & Cars Gray
For those of you that prefer re-usable cleaning products, this is the best option for an extendable duster.

Swiffer Duster Heavy Duty Dusting Kit, Cleaning Supplies, 3 ft Extended Handle, 1 Duster, 12 Refills
To get those walls dusted in a hurry, without leaving a mess below, these are my favorite!

Swiffer Dusters Heavy Duty Pet Multi-Surface Duster Refills for Cleaning, With Febreze Odor Defense, 11 Count
Make sure to have refills on hand too.

Simpli-Magic 79374 Flour Sack Kitchen Tea Towels, Pack of 14, White, 24"x24"
These are a household staple items for both cleaning and baking, so make sure you always have some handy.
Favorite Mops:

JOYMOOP Mop and Bucket with Wringer Set for Home, Flat Mop and Bucket System, Mops for Floor Cleaning and Wall Cleaner, with 4 Reusable Microfiber Mop Pads
My all-time fave large pad mop! I got the one that comes with several mop pads. This mop is especially handy to have in general if you have lots of hard floors too.

O-Cedar Easywring Microfiber Spin Mop & Bucket Floor Cleaning System with 3 Extra Refills
This kind of mop get deep into nooks and crannies, which is great for super dirty walls. It does cover less surface area than a flat head mop, but also does a great job.

O-Cedar EasyWring Spin Mop Microfiber Refill, White Packaging May Vary
Don't forget to have extra mop heads on hand for super tough jobs.

O-Cedar Hardwood Floor 'N More Microfiber Mop,White
This is the original mop that I used when I figured out that washing my walls with a mop was the best way to do it. It's a little more affordable than my fave, so give it a shot if you need a budget-friendly option.

O-Cedar Hardwood Floor 'N More Microfiber Mop Refill
If you get the O-Cedar mop, you're going to want to have a couple extra mop pads handy.
O-Cedar Replacement Handle for Dual-Action Flip Mop, Hardwood Floor ‘N More
If you tend to angry-clean and snap your mop, here's where to get a new handle without replacing the whole thing.
Other Wall Washing Faves:

Professional Grade Plastic Spray Bottles (4 Pack, 24 Oz, All-Purpose)
I will never buy a grocery store spray bottle ever again after finding these. They make the perfect "mist", and truly live up to their high star-ratings.

Dr. Bronner's - Sal Suds Biodegradable Multi-Purpose Cleaner (16 oz, 2-pack)
This is my favorite, natural, multi-purpose cleaning product that I use for wall washing. I wrote an entire article about it, and how to use it. You can find that article here.

Mr. Clean 2X Concentrated Multi Surface Cleaner with Unstopables Fresh Scent, All Purpose Cleaner, 41 fl oz
The multi-purpose cleaning product that I choose to use for clients that don't like "natural" products being used.


Rubbermaid Roughneck Square Bucket, 14-Quart, Blue, Comfortable/Durable Pour Handle, Sturdy Pail Bucket for Household Cleaning/Mopping
This is a great option when you need a mop bucket for a large pad mop.

3M P95 Particulate Respirator 8577, 2 Pack,
The masks that I recommend if you don't have the ability to ventilate your space but still need to protect yourself from chemical fumes.

Mr. Clean Large Reusable Latex Gloves, 2 Color, 2 Pairs
If you clean a lot, especially with chemicals, you need to invest in some quality reusable gloves for long-term safety.

2 Pack Distilled White Vinegar Jug, Total 2 gal
For those jobs when you want to "naturally" disinfect the walls.

Clorox CloroxPro EcoClean Disinfecting Cleaner Refill, 128 Fluid Ounces
Another great option when want to an eco-friendly way to disinfect the walls as you are at it.

OdoBan Professional Disinfectant and Odor Eliminator Concentrate, 2-Pack, 1 Gallon Each Original Eucalyptus and Lavender Scents
This is my sisters favorite disinfecting product, she's a professional cleaner too.
How To Maintain Clean Walls
Some of you are not going to like what I have to say about this, but really the best way to keep your walls clean is to avoid some bad habits…
Here are my thoughts on what to do to keep those walls and ceilings looking great as long as possible:
- No smoking or vaping indoors.
- No burning candles with a wick indoors (the soot gets all over your walls and makes them turn a black color. It’s good to just use wax warmers as an alternative).
- Use a high quality furnace filter, or air purifier to help keep the level of indoor airborne impurities down. Things won’t cling to your walls if they’re filtered out.
- Train your family to not drag their hands along the walls when they walk by (easier said than done, but it makes the biggest difference on how clean your walls are on a daily basis.
Also, just like how I mentioned in my post about spot mopping your floors, it is a good idea to just spot clean your walls in between the big jobs when you tackle the whole wall.
That’s about all that you can do, realistically, to keep your walls looking as clean as possible for as long as possible.
How To Disinfect Walls
Using Vinegar:
Mix a solution of equal parts distilled white vinegar and water. For tougher jobs, use vinegar undiluted but first check on a small area to ensure it won’t damage the surface.
Apply the mixture using a soft cloth or sponge, wring out excess liquid to avoid saturating the wall, and gently wipe down the walls.
Let the vinegar sit for a few minutes to break down grime and kill microbes. Rinse the walls with a clean, damp cloth, then dry them thoroughly to prevent moisture damage.
Using Commercial Cleaning Products:
Choose a wall-safe disinfectant like Lysol, Clorox Eco-clean, or Odoban, and read the label for specific use and dilution guidelines.
Prepare the area by removing nearby items and wearing protective gear as recommended.
Apply the disinfectant lightly either by spraying directly onto the wall or using a dampened sponge with the solution, ensuring not to oversaturate the walls.
Allow the disinfectant to sit for the duration specified on the product’s label to ensure effective germ killing. Wipe off any excess cleaner with a damp cloth and dry the walls completely with a towel or let air dry.
General Tips For Disinfecting:
When disinfecting walls, maintain good ventilation throughout the process to ensure safety, especially in enclosed spaces.
Regularly cleaning and disinfecting high-touch areas like walls can help maintain a healthier environment by reducing the spread of germs. Always follow product instructions carefully to maximize effectiveness and safety.
FAQ’s
How Often Do I need To Clean My Walls?
The frequency of needing to deep clean walls can depend on several factors including the environment, the room’s usage, and personal preferences…plus, let’s face it, we all have a certain level of filth that we’re willing to live with, so there isn’t just a blanket answer.
However, here are some general guidelines:
- Kitchen Walls: Because they are exposed to cooking vapors, grease, and food splatters, kitchen walls might need a deep clean every three to six months.
- Bathroom Walls: High humidity and the potential for mold and mildew growth make it advisable to deep clean bathroom walls about every two to three months.
- Living Rooms and Bedrooms: These areas generally require less frequent deep cleaning, typically once a year, unless the walls become visibly dirty or dusty sooner.
- High Traffic Areas: Hallways or children’s rooms may need more frequent cleaning due to marks, fingerprints, and other residues, perhaps every six months.
- Smoking or Pets: If someone smokes indoors or if there are pets, walls may require more frequent cleaning to remove odors and buildup.
In general, a good practice is to incorporate light cleaning (like dusting) into your regular cleaning routine, and to inspect walls periodically for spots that might need spot cleaning or a deeper clean. This can help extend the time between necessary deep cleanings
*I will add more questions and answers as they get sent to me.
Thanks so much for stopping by my blog and supporting my endeavors to make people’s lives a little easier/better/more affordable.
If you liked this post, or found it helpful in any way, please make sure to share it with your family, friends, and co-workers via social media.
Or you could even send them the direct link via email. Whichever way you choose to spread the love, I super appreciate it! ~Sarah

How To Follow & Support This Site
- If you would like to subscribe to my email list, go here.
- Make sure to follow along via social media, by going here.
- If you would like to learn how to really show your support to this site (at no cost to you), go here.
- If you would like to make a direct donation to the site, go here.
Check Out My Other Cleaning Tips
My most popular laundry & cleaning articles
Other Good Resources For Wall Cleaning
Maybe you don’t wanna go the way that I showed you how to do this…if that’s the case, here are some other good reputable resources that you could try instead:
- https://www.architecturaldigest.com/story/how-to-clean-walls
- https://www.maids.com/cleaning-hacks/tips-on-how-to-clean-walls/
- https://www.thespruce.com/how-to-clean-walls-4846969
*This cleaning article was originally shared to this blog on August 3rd 2013, and has since been updated to improve user experience, possibly add video instruction, as well as to make it as shareable as possible across the social medias.
**As time continues to march on, I’m not going to keep updating the photo’s or any videos for how to do this because the concept will remain the same, but I will however always try to keep the links to the best products that I know about, fresh and updated.
***Please note that I do try my hardest to provide factual, but easy to understand, information about each topic. If you notice a discrepancy in my methods, facts, or see something that you deem “misinformation/incorrect” please make sure to notify me about it. I would prefer that you send me an email with a link to a more reputable resource on that subject, so that I can correct it as soon as possible. Thanks so much for helping this site become the best that it can be!