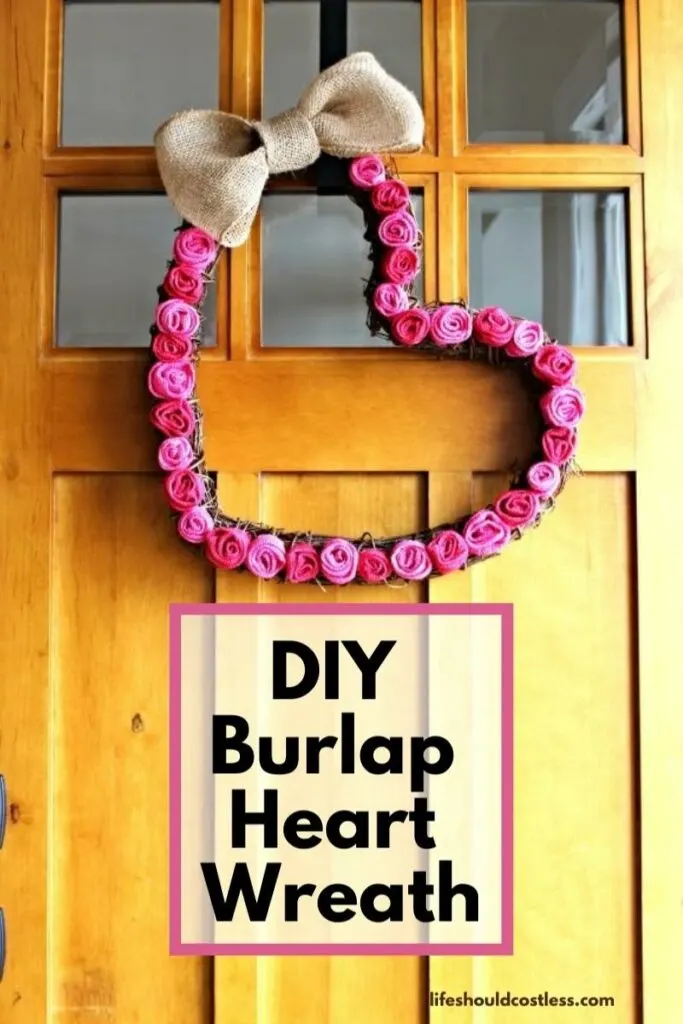
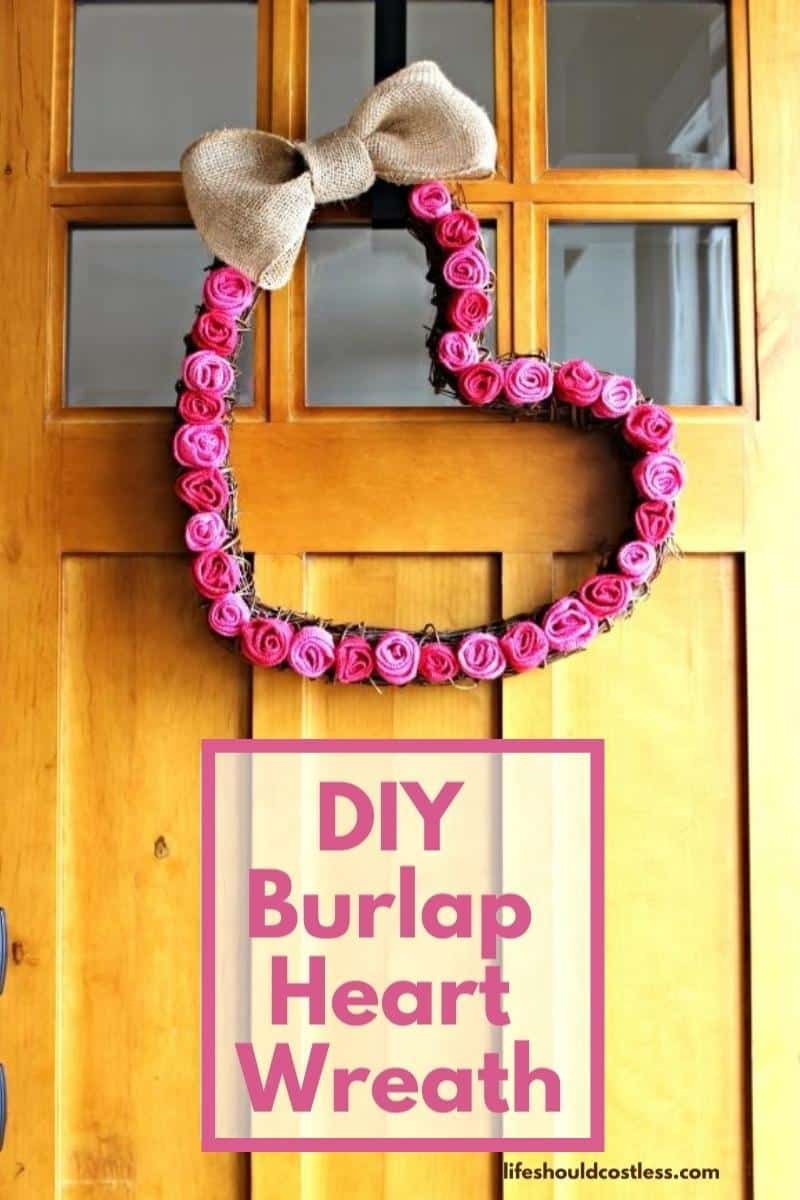
Learn to make your own darling Valentine’s Day heart shaped wreath with this fun and simple burlap rosette and grapevine wreath DIY tutorial.

I don’t know why it is, but I had much more fun creating this wreath than I have with any of the others. It is also the least expensive one that I’ve made so far (less than $6 total because I had most of the stuff on hand, if you can believe it)…I wonder if there is a connection?
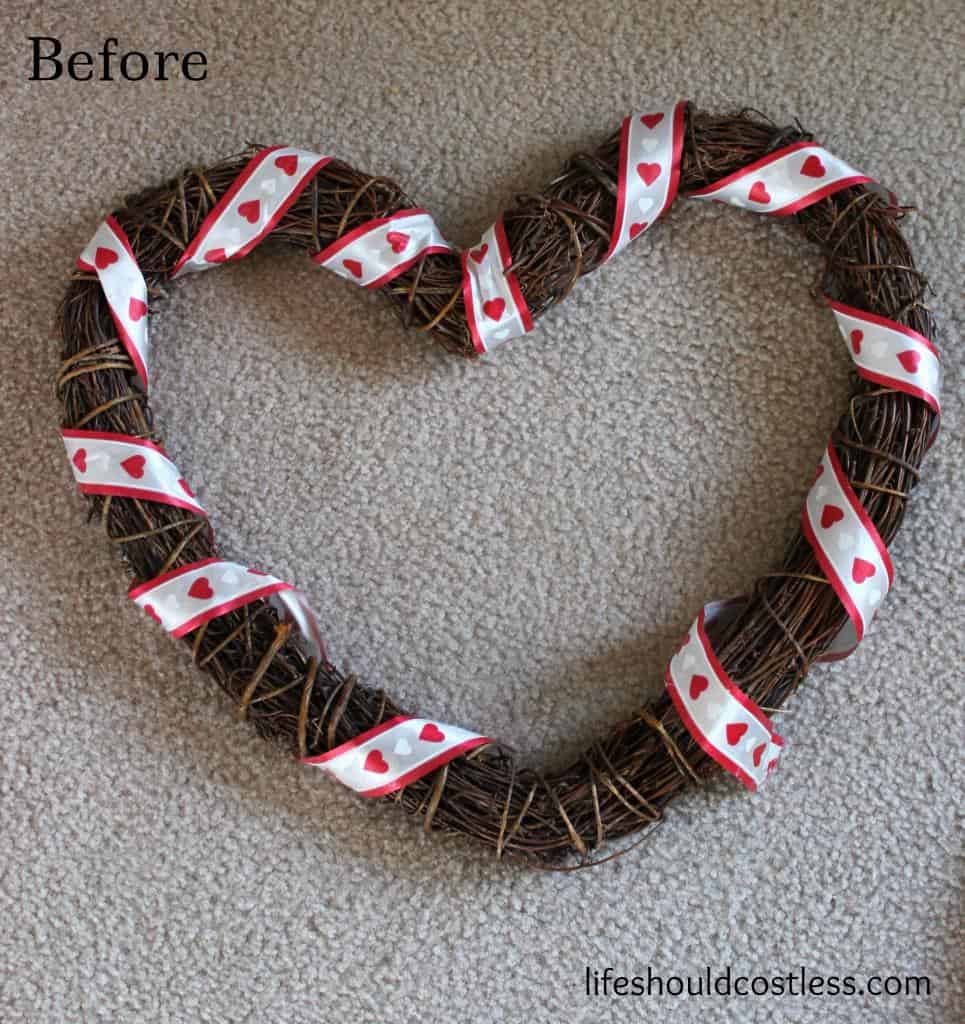
The best part about this wreath is that I was able to do a before and after because I found the form second-hand at a thrift shop for one dollar. It really was not much to look at before, but with a bit of work, some burlap, dye, felt, and a ridiculous amount of hot glue (and a blister or two), I was able to transform it into something that I love!
My goal in showing you all this wreath is to inspire you to to create and to do so inexpensively. You don’t need to spend much to make something beautiful. There is even a YouTube video down below that will teach you how to make your own wreath form if you want to DIY to that extent.
Like I had said before, I found this heart shaped wreath form at a thrift store for one dollar. Thankfully, all it took was about one minute of removing the ribbon and I was ready to start.

If you don’t happen to be as lucky as I was to find one for so cheap…Hobby Lobby or Joann Fabrics should have heart-shaped forms around Valentine’s Day…or you can get one on Amazon here. Or of course, you could make your own if you’re that crafty.
How to make a heart shaped grapevine wreath form:
I’m not giving you a full on tutorial this time, just a little instruction and some links/embeded video’s to the tutorials that I watched in order to make it.
I started out with some pink and red burlap that I had previously dyed in preparation for this post.
If you’d like me to teach you How To Dye Burlap Fabric Any Color, go here.
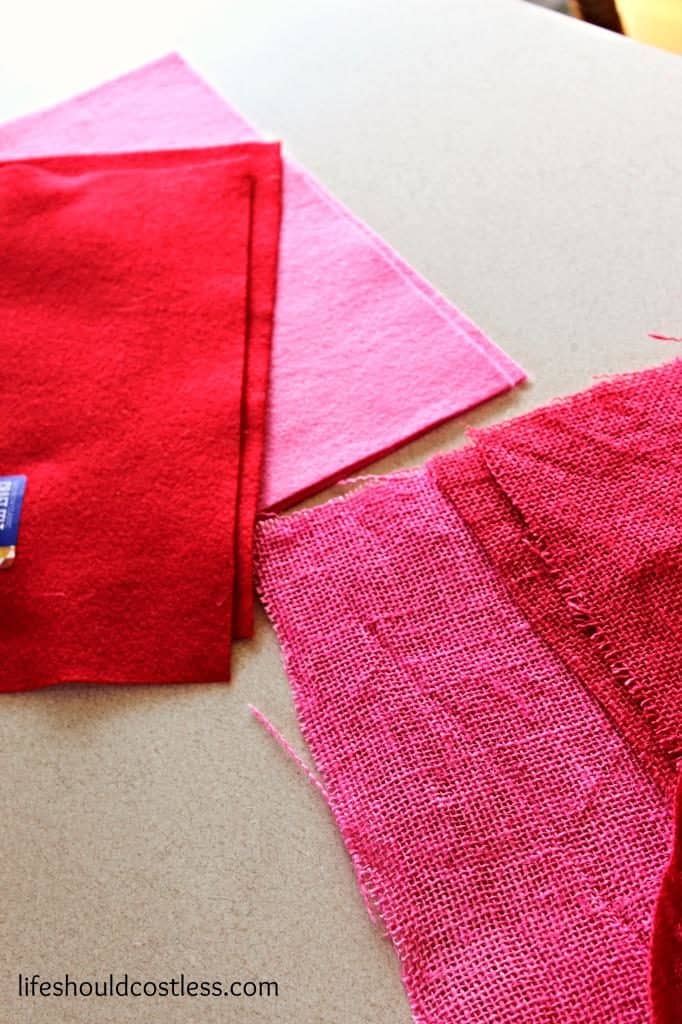

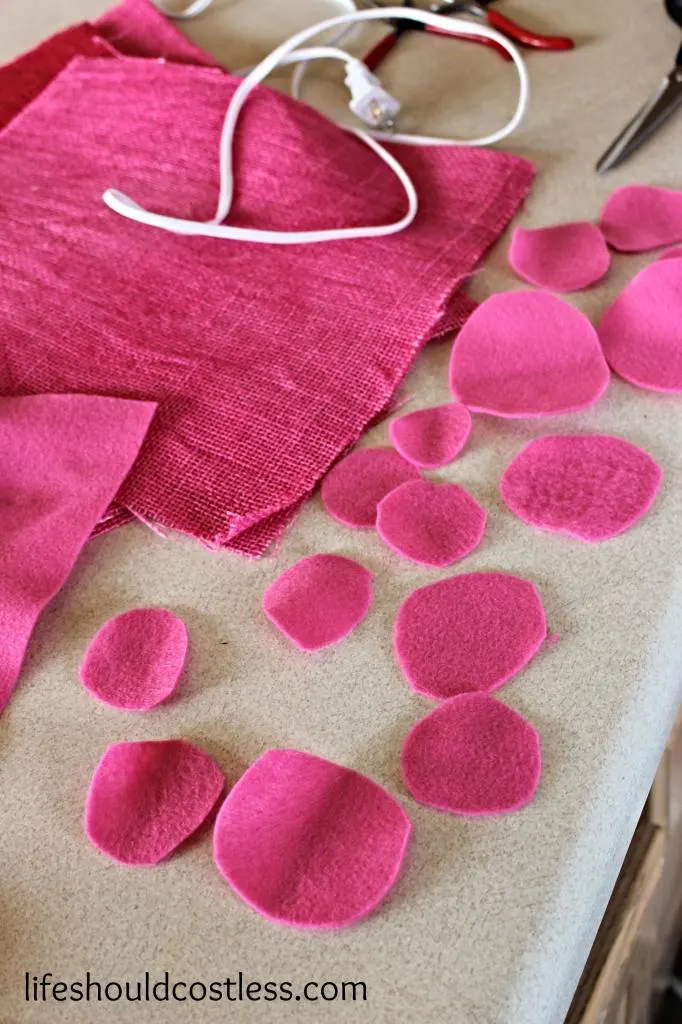
Next, I had also bought two pieces of felt in both pink and red. The felt provided the backing for the rosettes.
I would have only needed one piece of felt in each color, but I’m a little special and can’t cut out a decent circle to save my life ;).
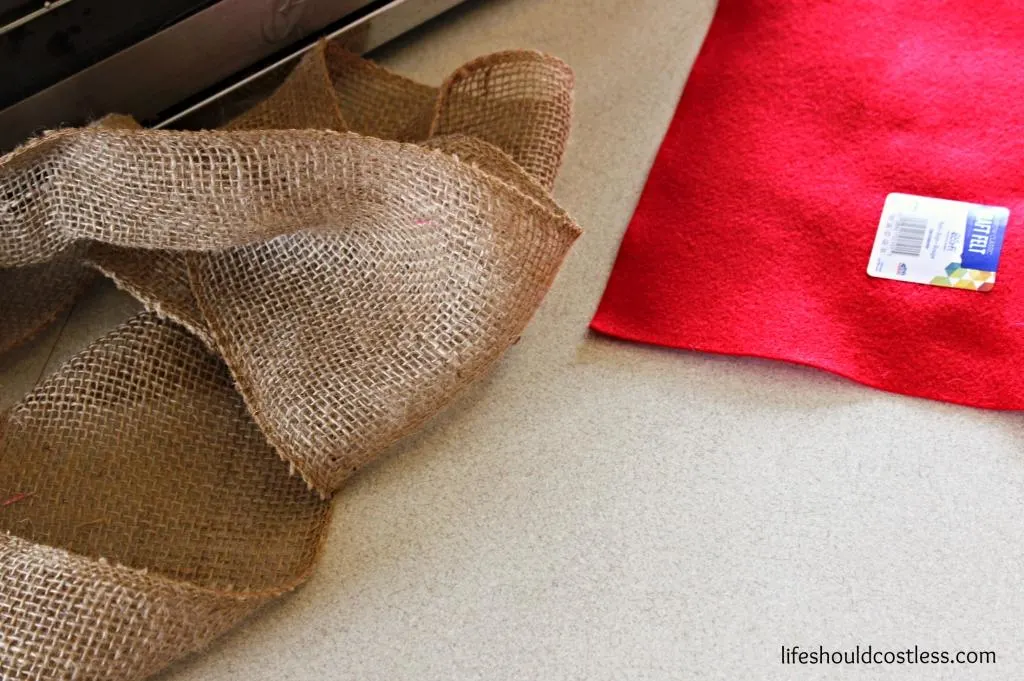
I also had a little over three feet of standard colored burlap ribbon left over from a previous project that I was able to use to create the bow.

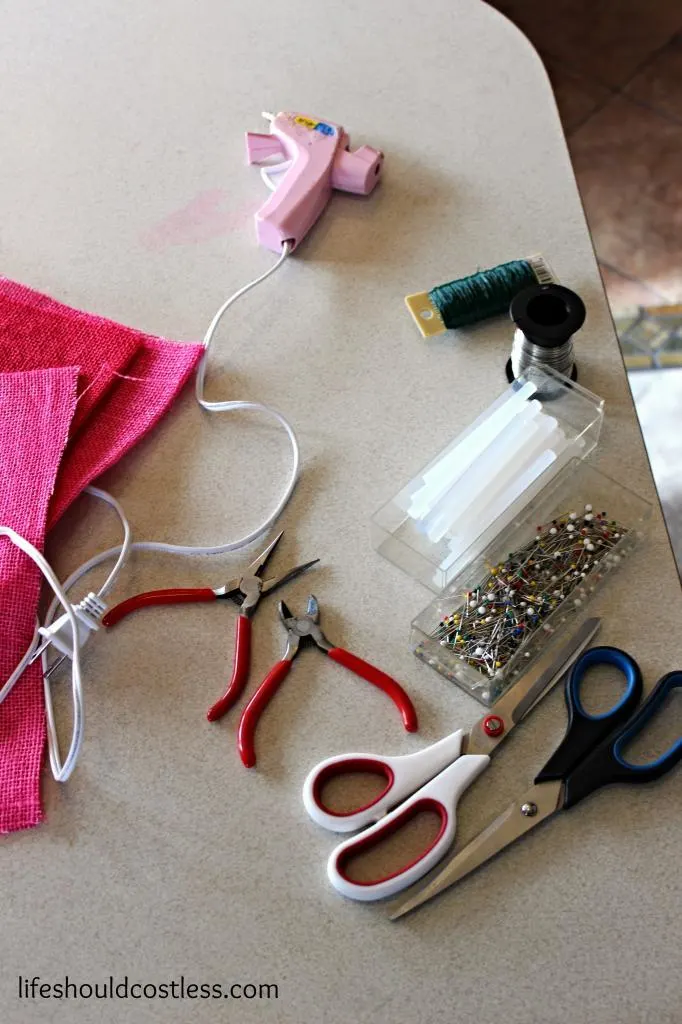
Tools used to make a burlap heart wreath:
- Heart Shaped Grape Vine Wreath Form
- Needle Nosed Pliers
- Wire Cutters
- Hot Glue Gun & Glue Sticks
- Crafting Wire
- Fabric Scissors
- 3-4″ Burlap Ribbon (not wired)
- Burlap in Red & Pink
- Felt Sheets in Red & Pink
These are the tools, all laid out, that I used for this project. *Remember that needle-nosed pliers are your best friend when working with hot glue and burlap. It’s much easier to get the glue off of the pliers than it is off of your burned skin* I suggest buying a cheap pair (hey have them at Dollar Tree, Harbor Freight, or any local craft store) just to use for hot glue projects.

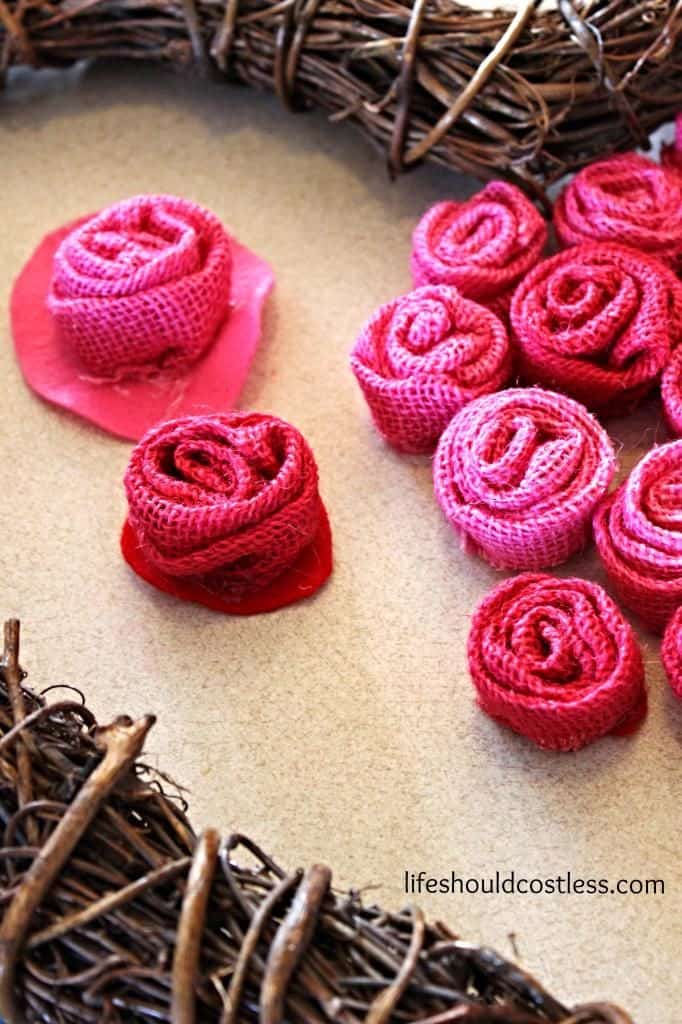
To make the base for the rosette’s I started out by cutting the felt down into circles that were about 2.5-3″ in diameter.
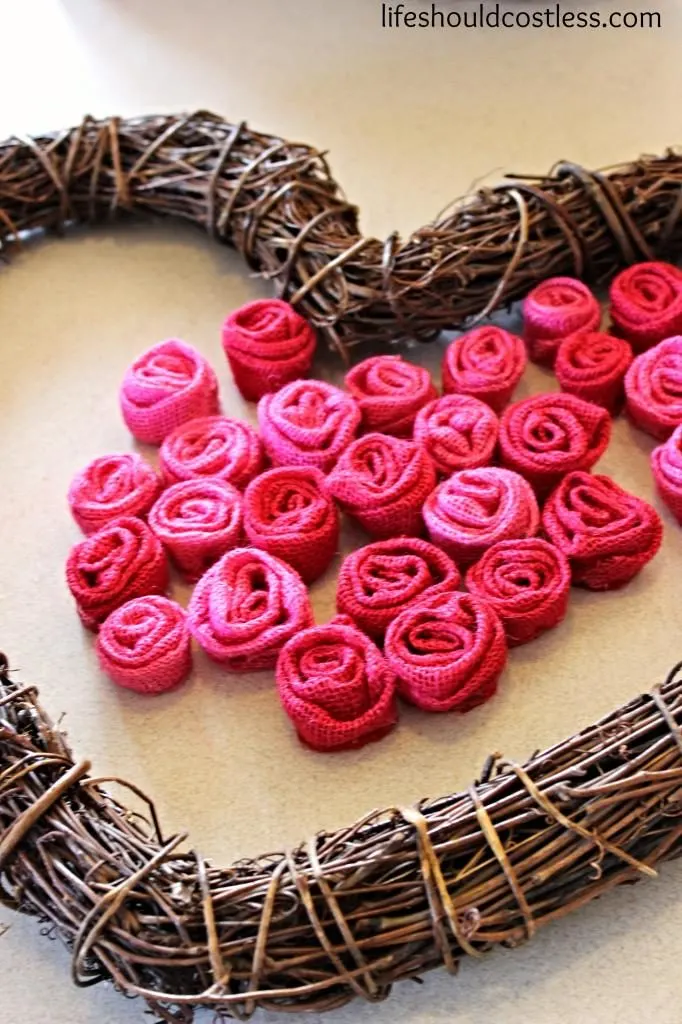
The burlap rosette’s were created with 1.5″X 9″ strips of burlap for the smaller ones, and 2″ X 12″ for the larger ones. I didn’t realize that I forgot to get a picture of the strips until I was already editing photos…sorry.
There are about a million tutorials out there that teach you how to make rosettes, so I’m not going to show you, but if you would like to see how, this is the tutorial that I used when creating mine (the rosette’s are a bit down the page and it shows you how to use the felt as a base too).
This was my first experience making rosette’s and I must say…it is tedious…so buckle up for a bit of a time consuming, but still fun project.

As I was making the rosette’s I placed them side-by-side just to see about how many I would need to make.

This was before I trimmed down the excess felt on the bottoms.
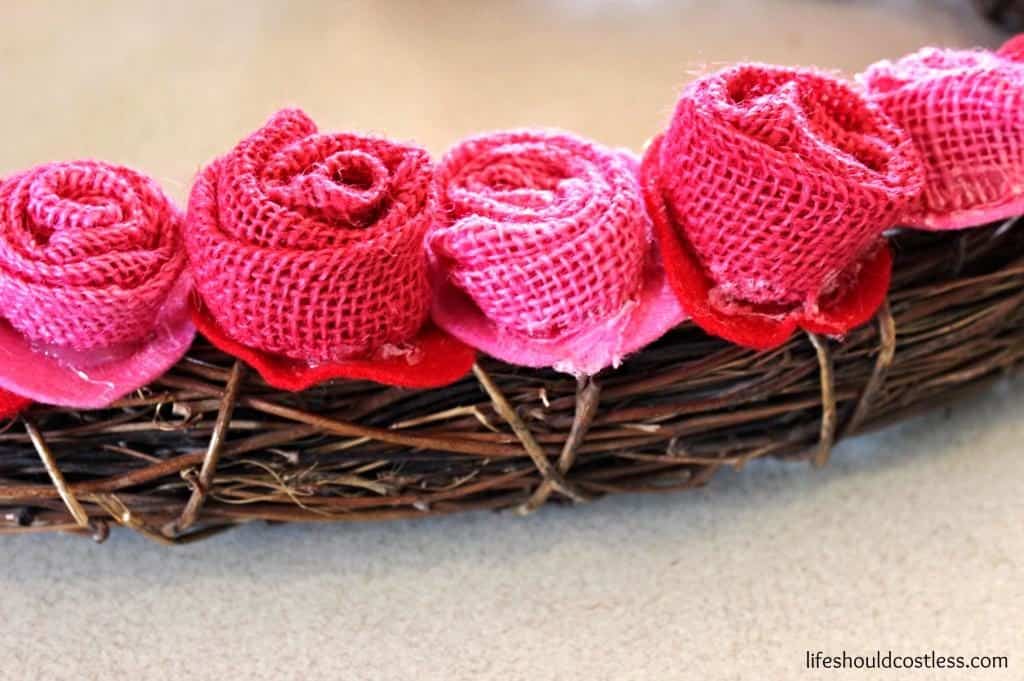
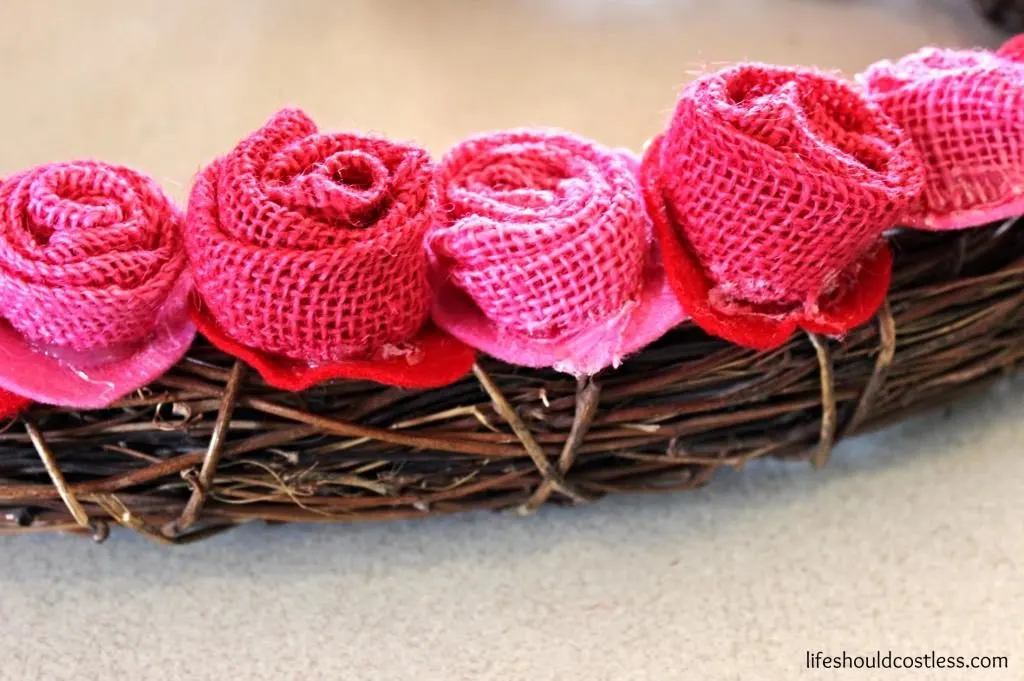
And a comparison to how they looked before I trimmed down the felt, to after.


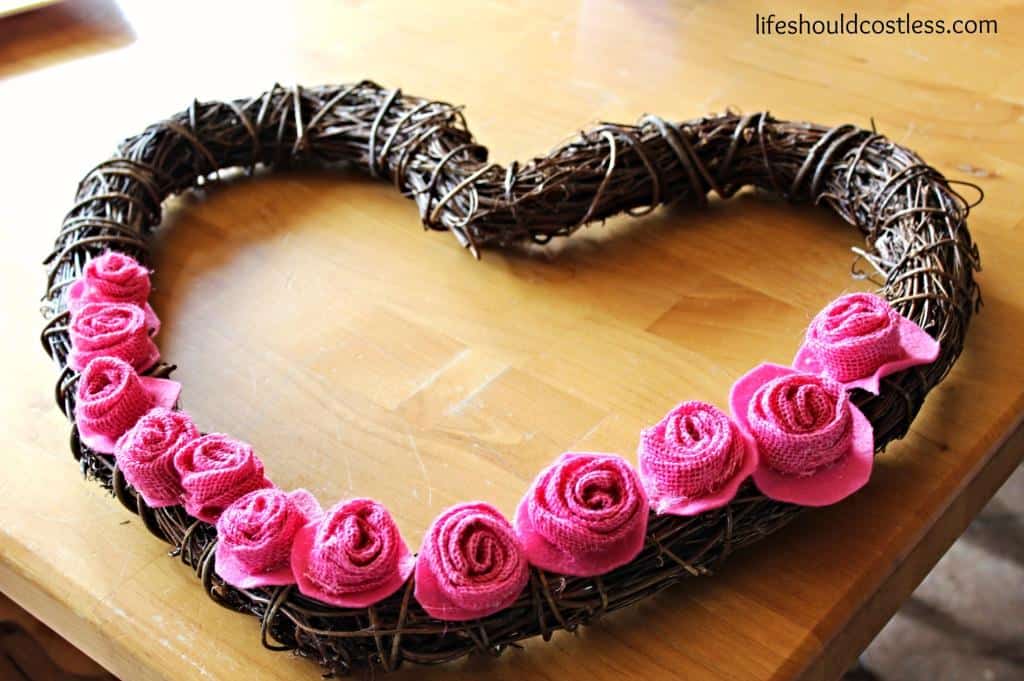
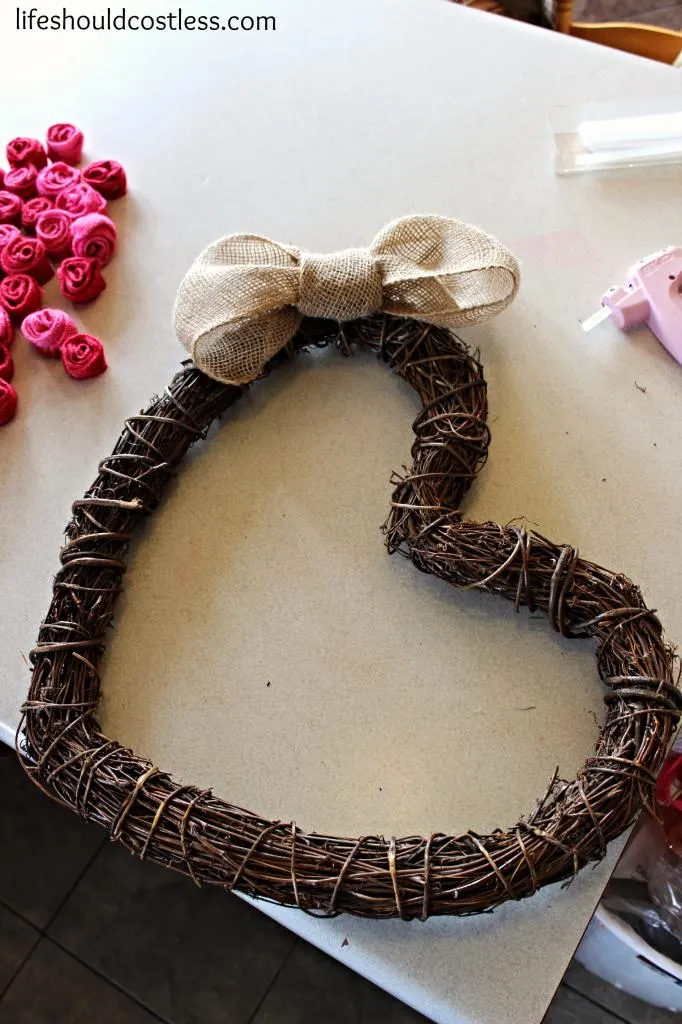
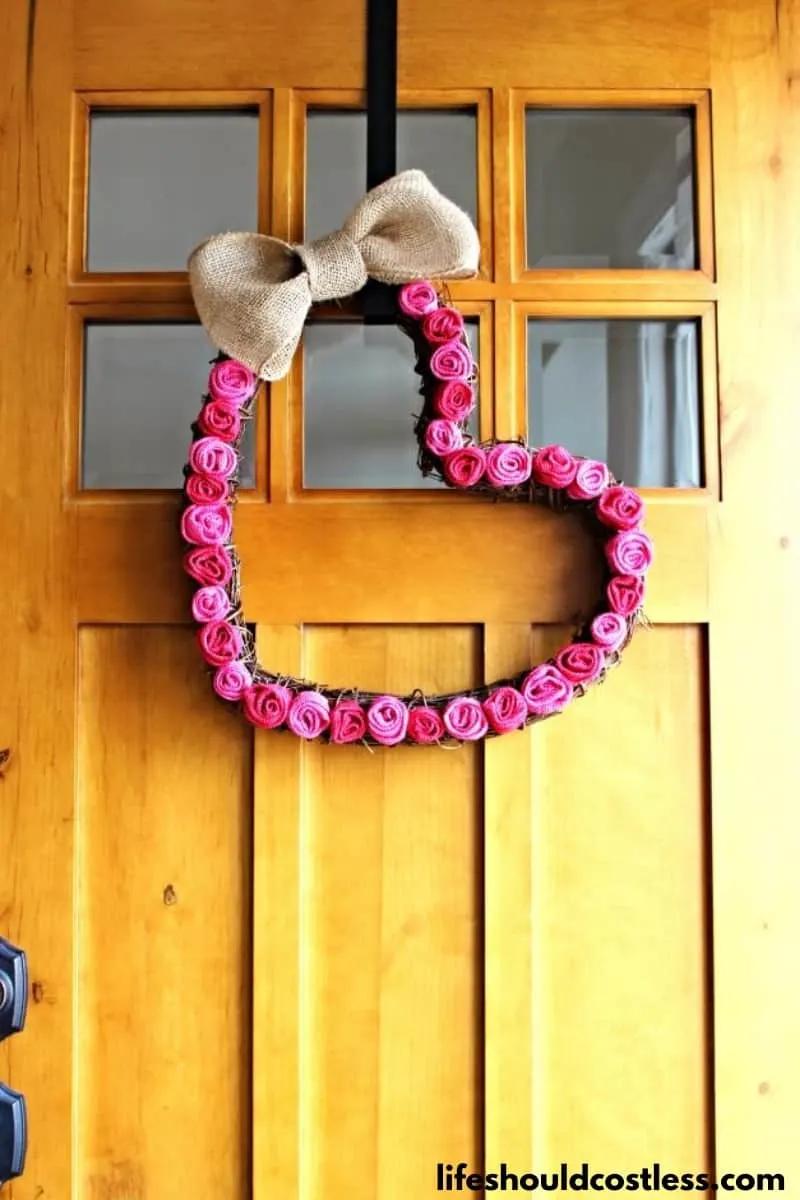
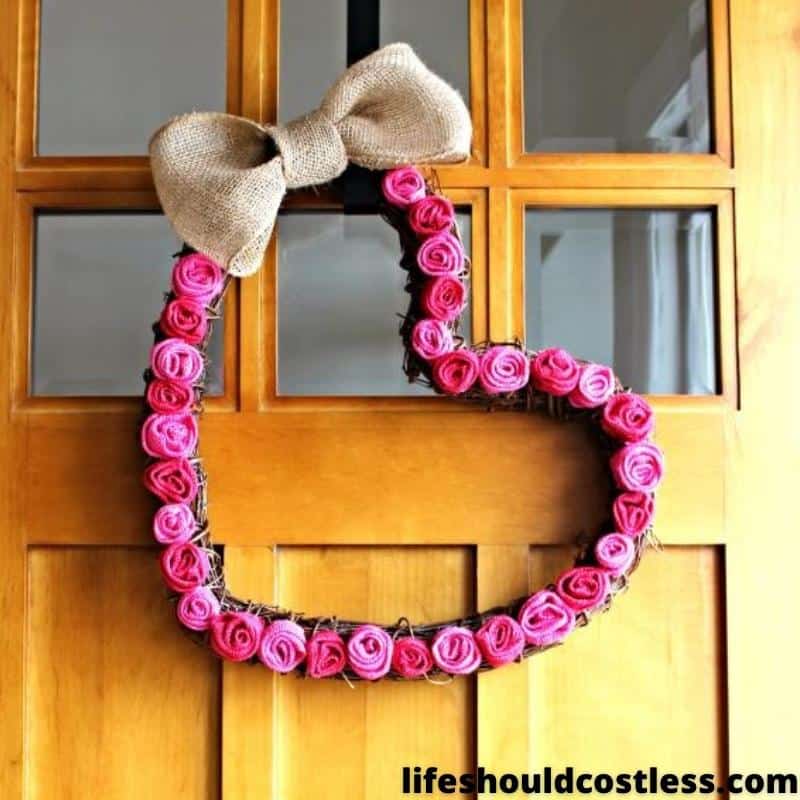
Before I started gluing on the rosette’s I made a basic burlap bow with some burlap ribbon. Then attached it with both crafting wire and hot glue.


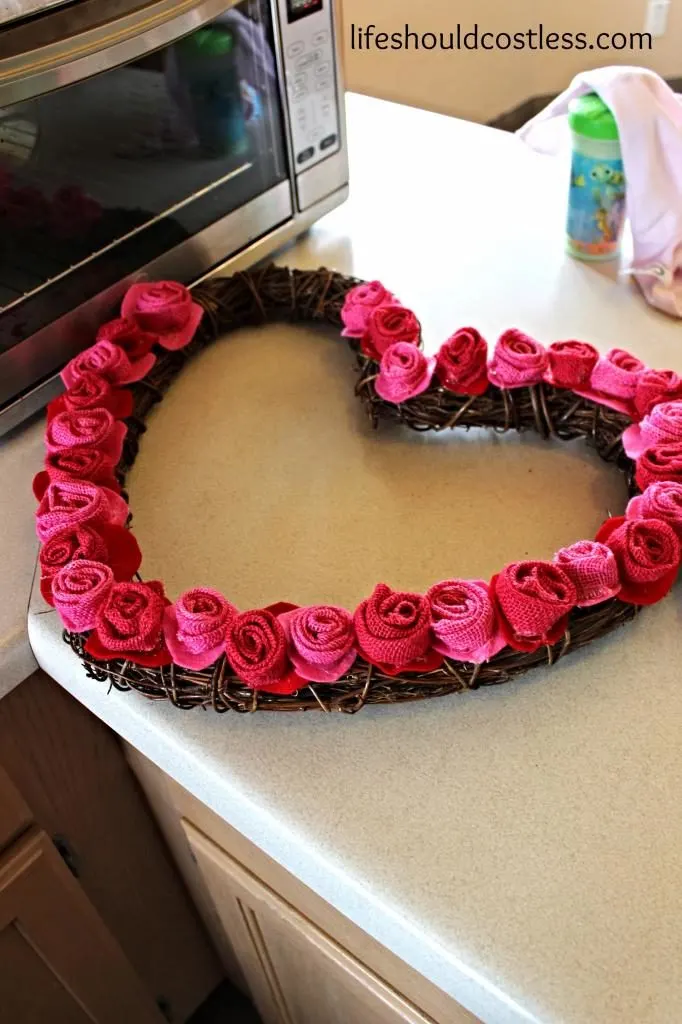
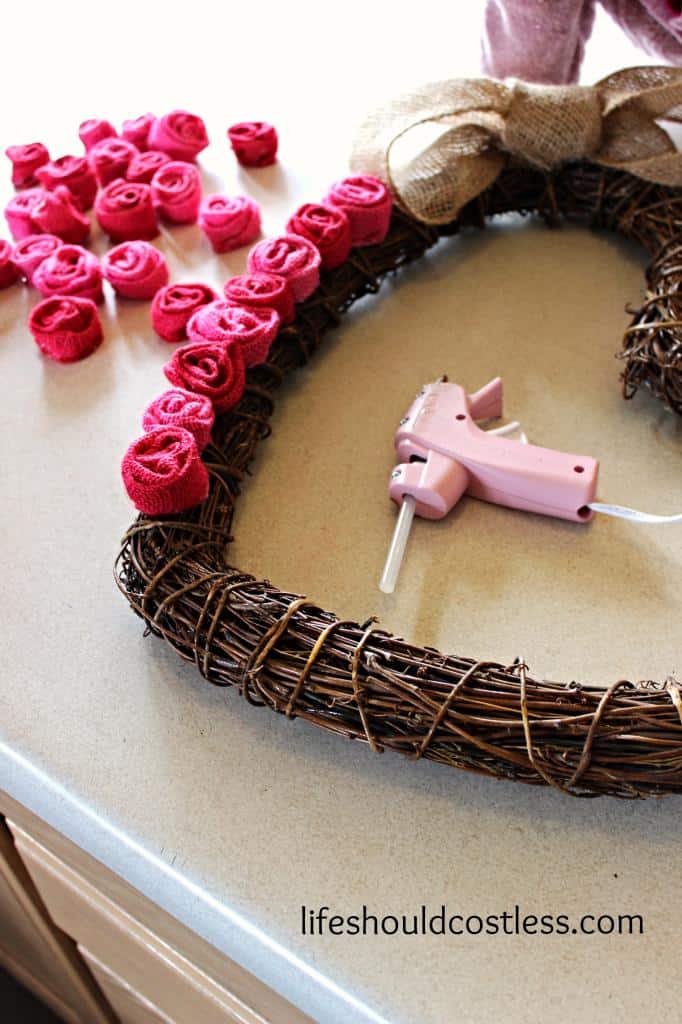
Next, I used a generous/ridiculous amount of hot glue and attached the rosette’s.

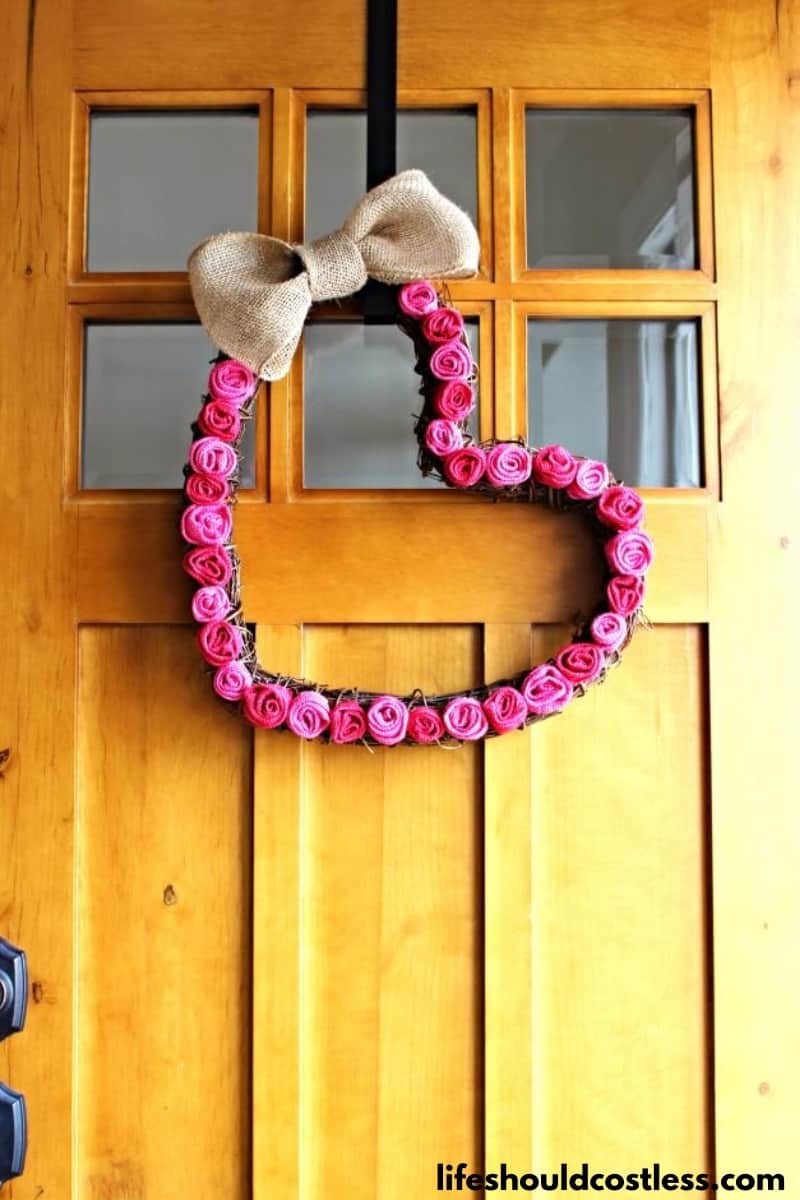
Then it was finished, and I couldn’t be more happy with it! It’s just my style… which is on the minimalistic side, and shabby/farmhousy/chic.


Once you figure out how to make the rosette’s it pretty much goes really fast to make the rest… and it’s pretty self- explanatory at that point… let’s just say that by the end you have a love/hate relationship with hot glue.
That’s really all that I have to share with y’all today. I hope it made enough sense that you can recreate it fairly easily if you want to. If you love it, please make sure to share this post via social media. Thanks so much for the support!~Sarah

How To Follow & Support This Site
- If you would like to subscribe to my email list, go here.
- Make sure to follow along via social media, by going here.
- If you would like to learn how to really show your support to this site (at no cost to you), go here.
- If you would like to make a direct donation to the site, go here.
If you liked this post, make sure to check out some of my other DIY/Craft posts:

*Please note that this tutorial was originally posted to this website on February 7, 2015 & has since been updated/refreshed for a more user-friendly experience.