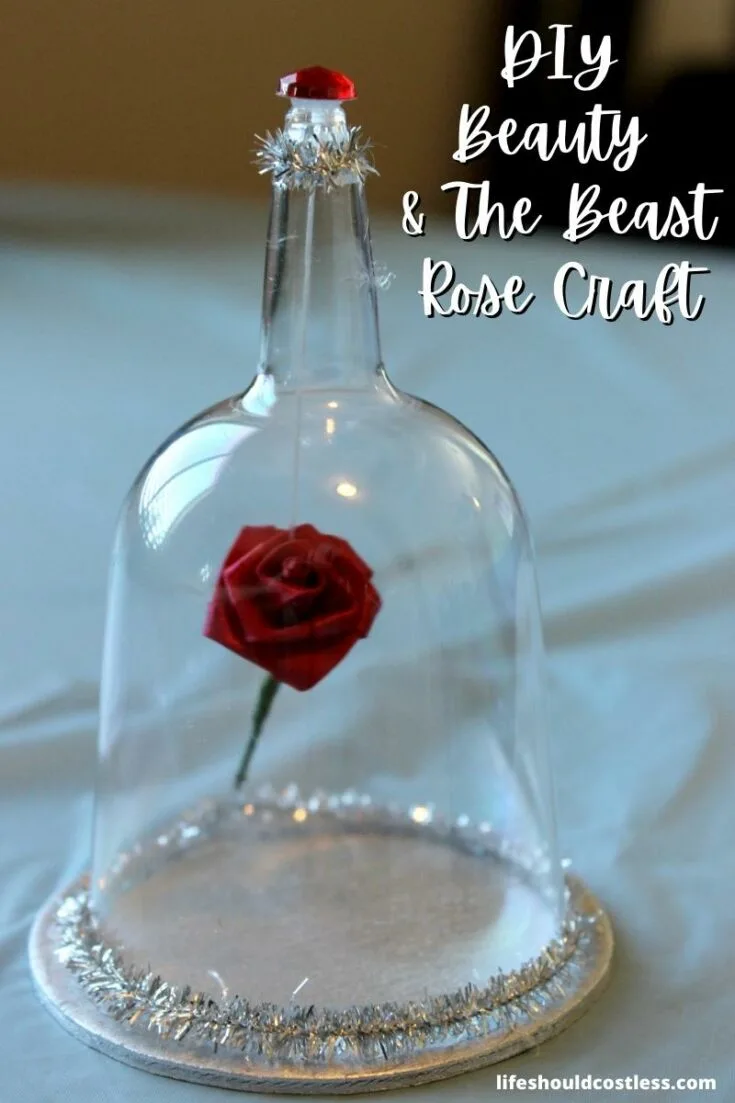
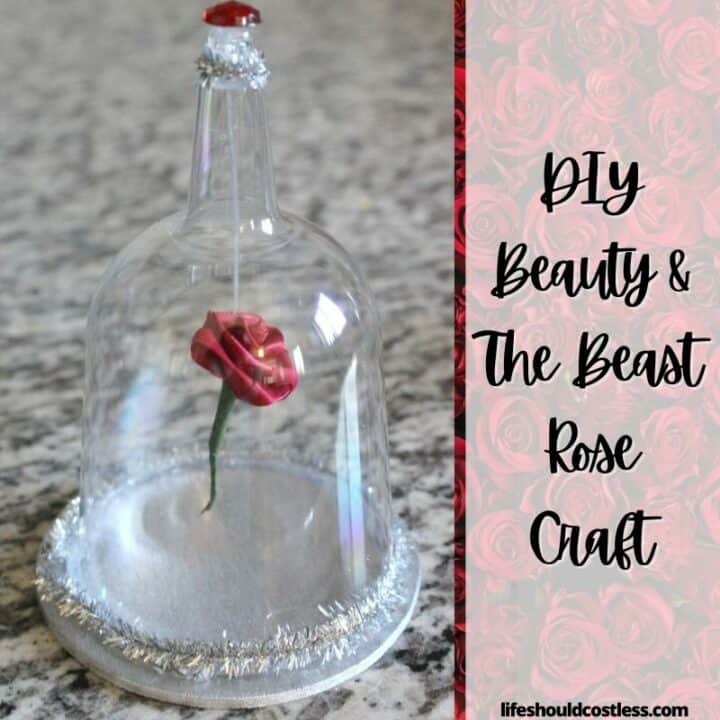
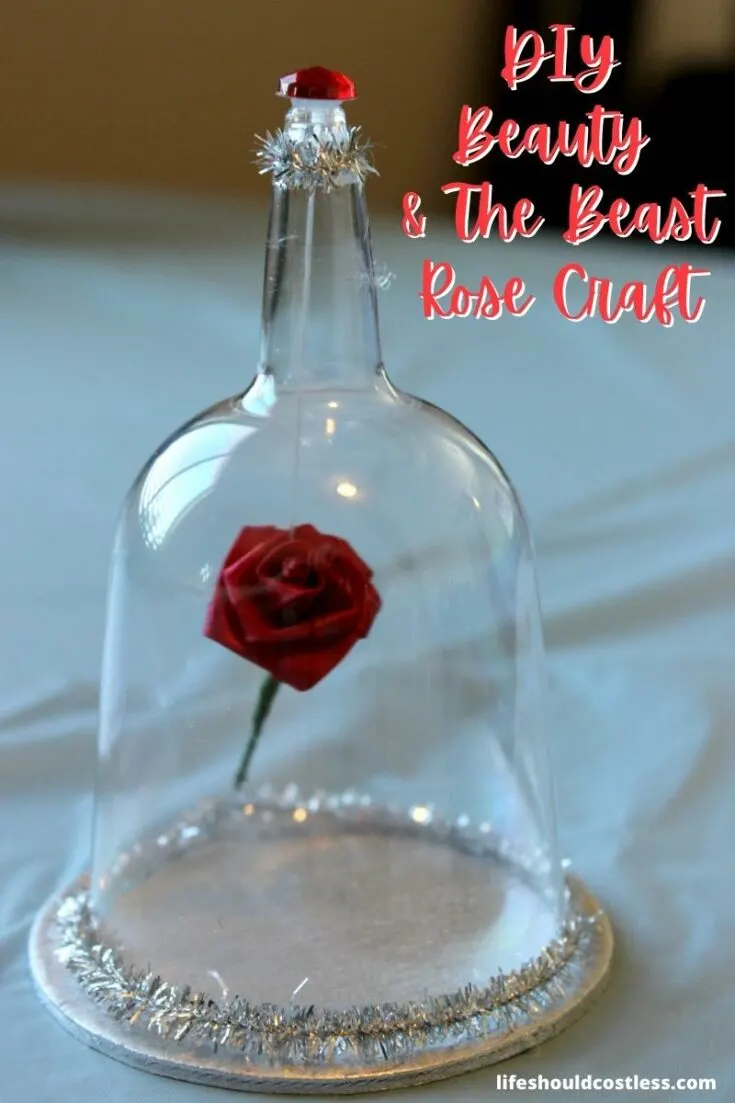
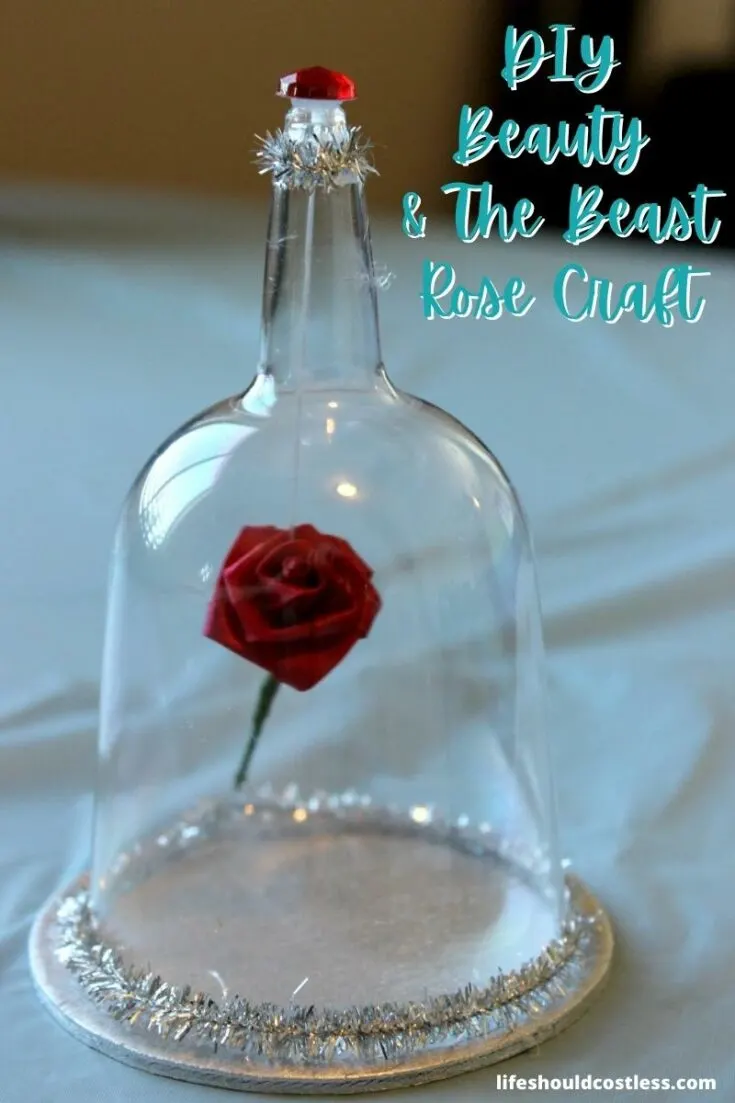
Kids and adults alike will have fun creating this enchanted “floating” eternal rose in glass case craft inspired by the Beauty And The Beast story. This DIY project is easy to personalize, to create your own unique version, and would be a perfect craft to make for a Princess themed party with this step-by-step tutorial for the intermediate level crafter.

I came up with these little Beauty And The Beast Rose Crafts around the same time that Emma Watson graced the silver screen as Belle.
I was trying to figure out something fun and original to do with my girls and had the idea while walking around a Dollar Tree store.
This project turned out to be really fun. It was also just the ticket that kept us all busy and using our imaginations… and it could be perfect for you too if you are looking for a fun and fresh idea for craft time or a themed party.
They are fairly easy to make, and are perfect for kids between eight and twelve years old and up.
I suggest that age-range because my eight year old caught right on and took off with little instruction, but I had to guide my six year old quite a bit…
Plus, I don’t really like letting younger kids work with hot glue as it’s a higher burn risk and requires good coordination.
Anyway, I made a pretty in depth tutorial and also tried to tell you where I ended up getting everything to make them. They are a fairly inexpensive craft, but it may be a little more than some of you want to spend on an everyday craft, so save the idea for your kids princess themed birthday party if that is the case.
Just remember, to save the most money on this craft, see what you have on hand that will work first, and then only buy what you need and get as much of it in bulk to keep the cost down.
You could even reuse some old costume jewelry for much of it.
My tutorial is as step by step as I could manage (I don’t have a videographer, so I do the best that I can)…but I think that between my pictures and the guidance that I provide you should have no problem figuring out how to make them yourself…heck, you might even figure out a better way to do some of the steps than I did.
How to make this Beauty And The Beast Rose:
I have two options to teach you how to make these. First, here is a little video tutorial that I made… but if you need it slowed/broken down there is also still images below to show you how.
Here I have everything laid out and ready to go:
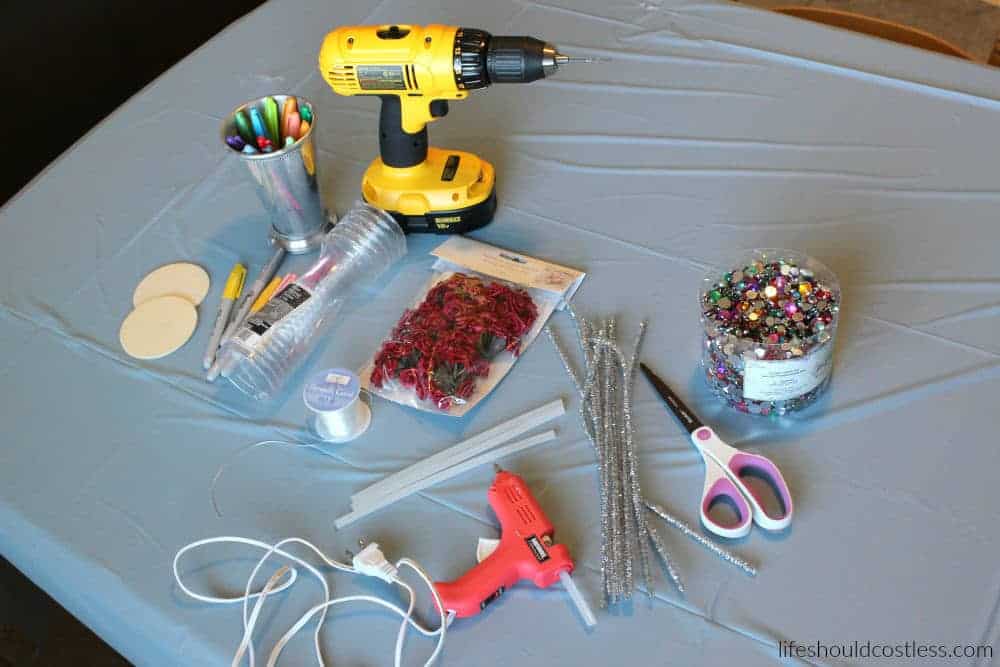


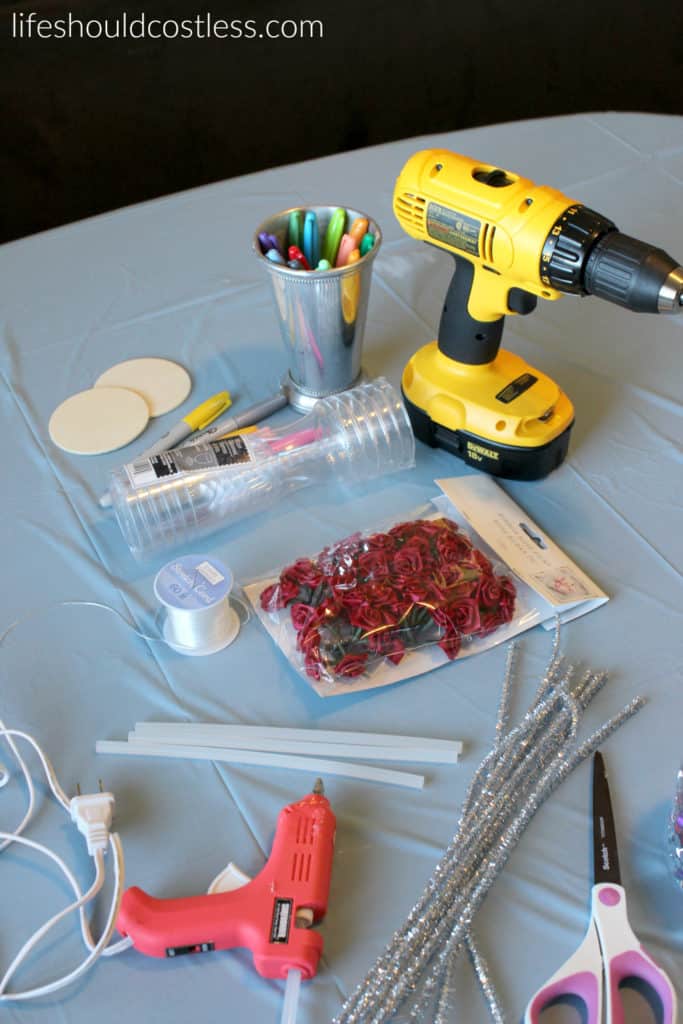
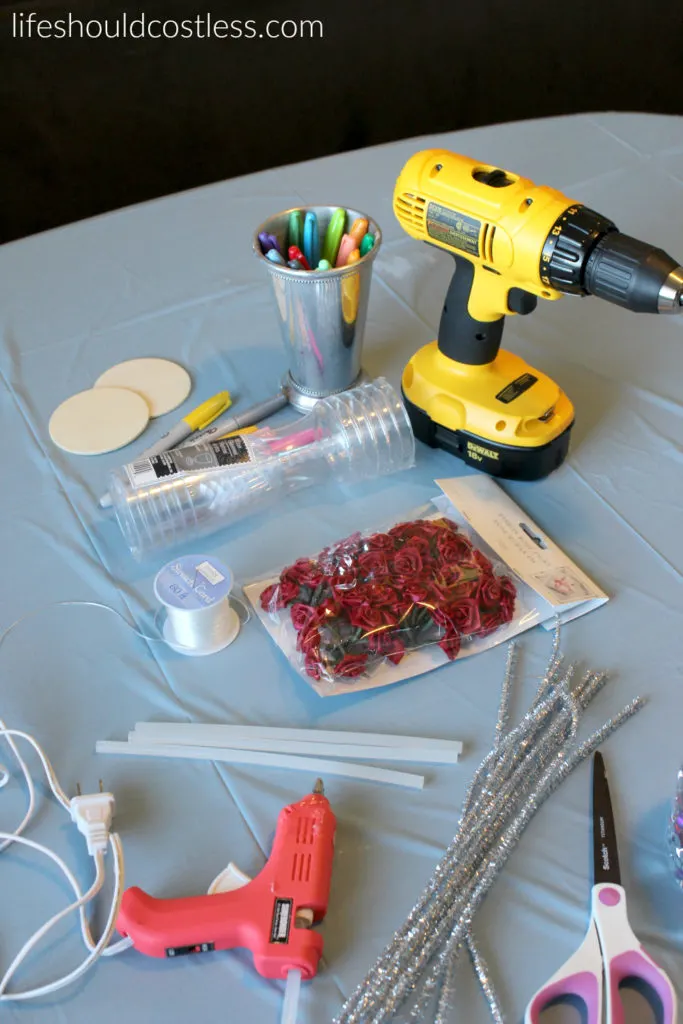
Let me start you out with a supply list for the floating rose in glass case. Here’s what I used and where I got it:
- Cheap table cloth (Dollar Tree or Walmart)
- Hot Glue Gun
- Glue Sticks
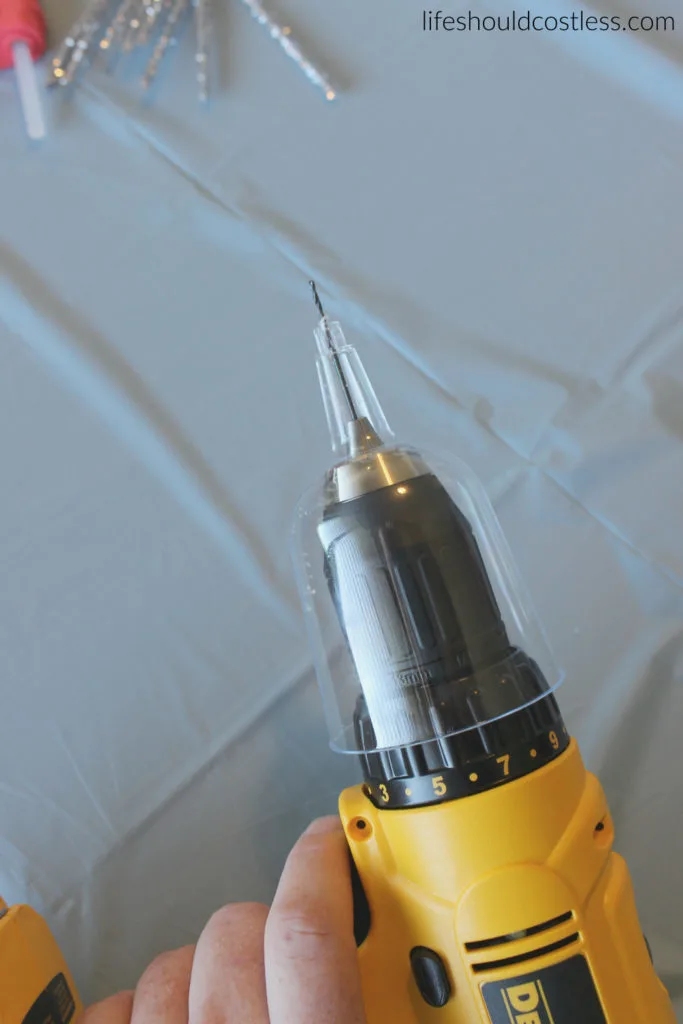
- Cordless Drill with smallest drill bit
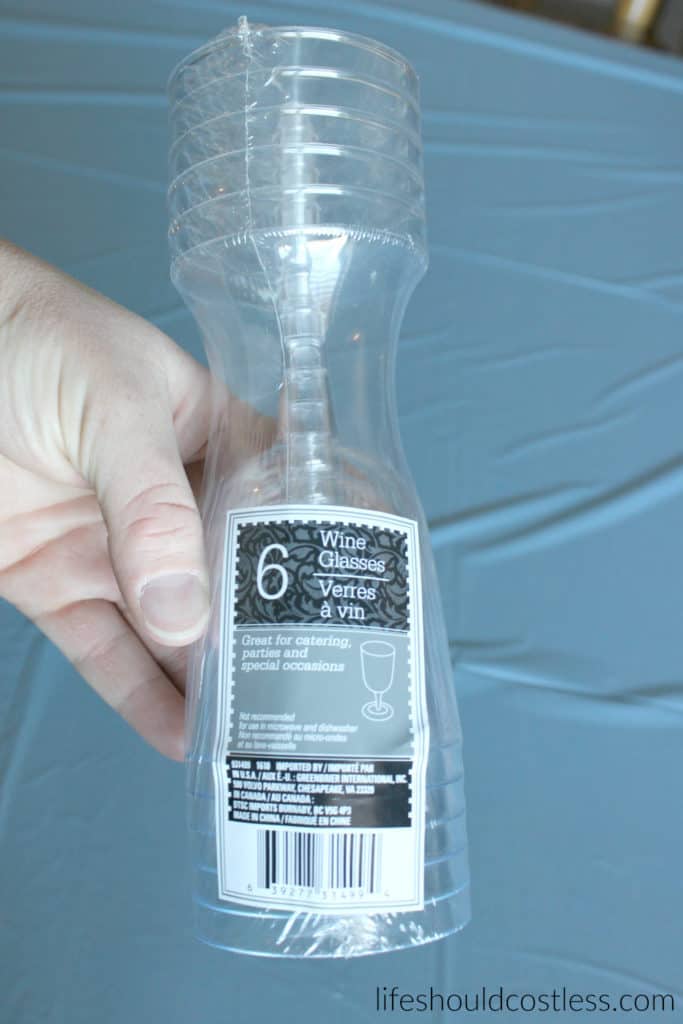
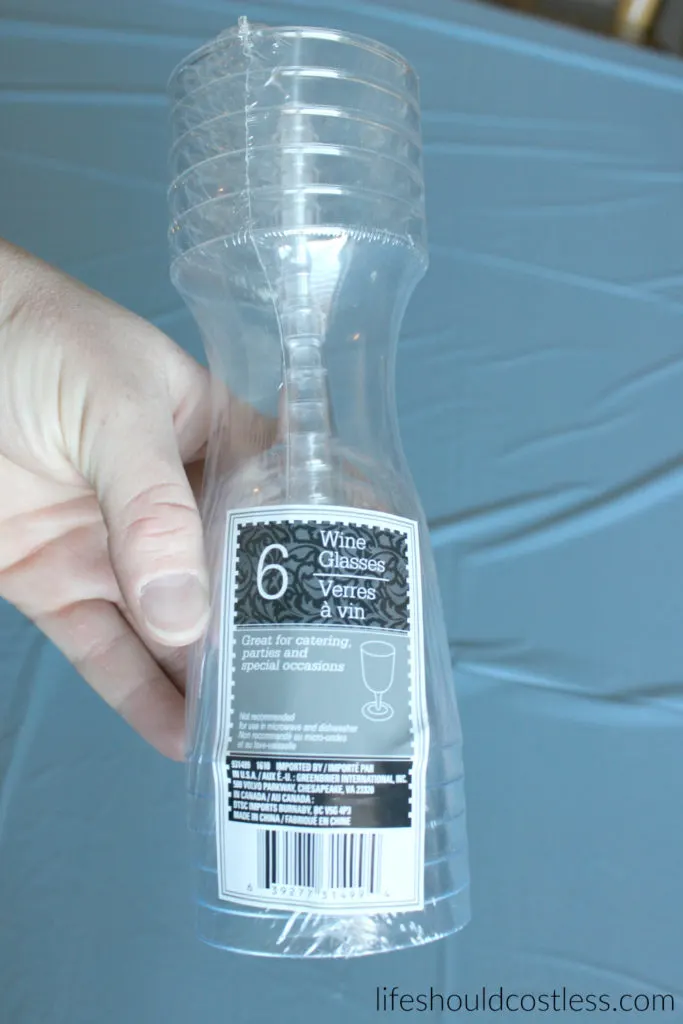
- Plastic Wine Glasses (Dollar Tree)
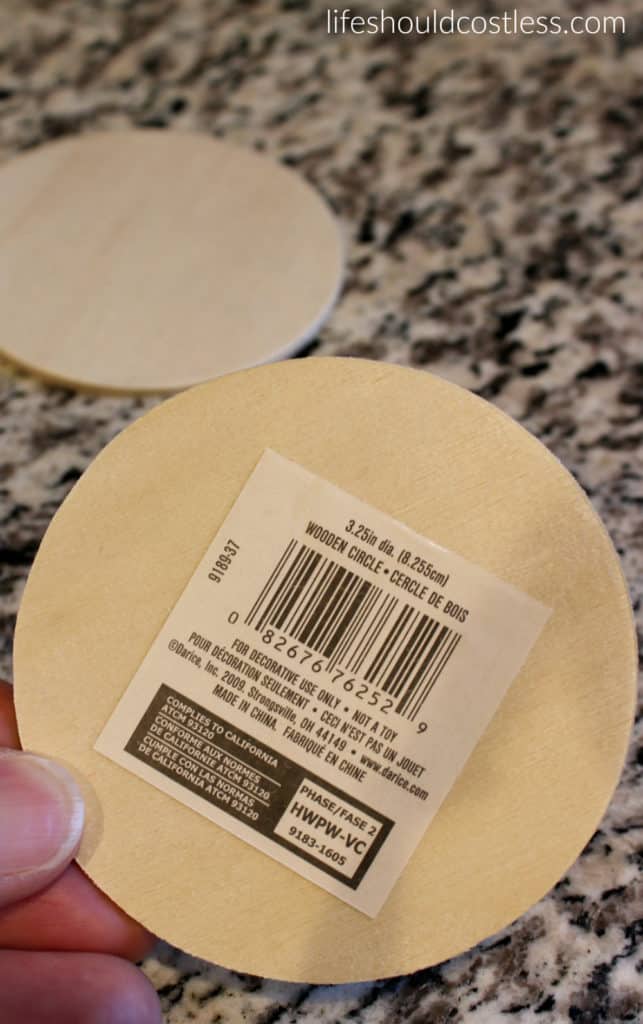
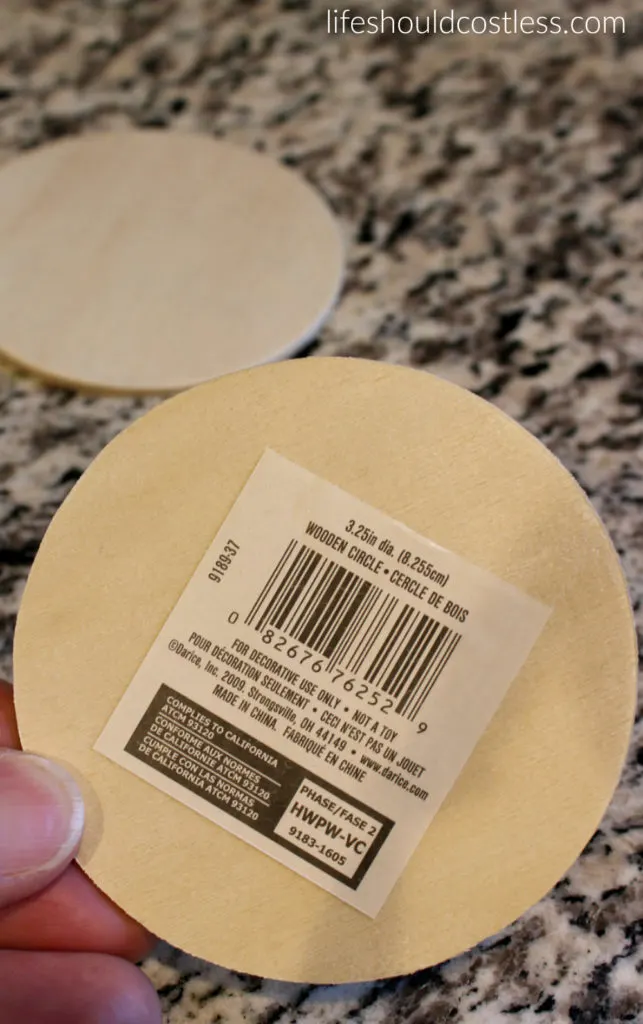
- 3.25″ Diameter Wood Circles (Craft store)
- Multi-Colored Sharpies
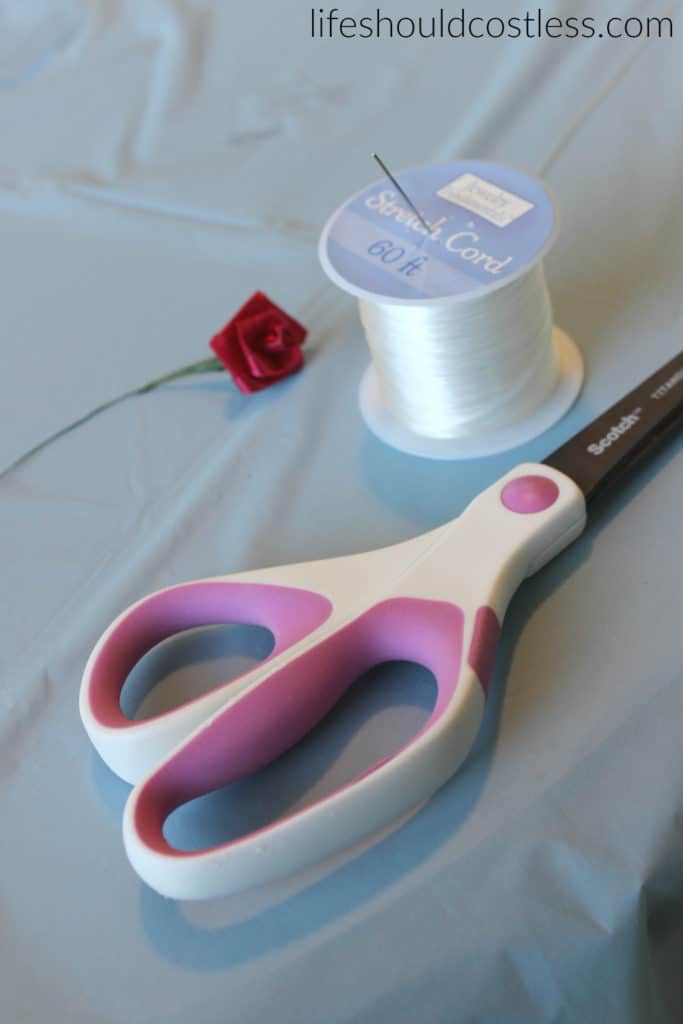
- Clear thread or fishing line
- Needle
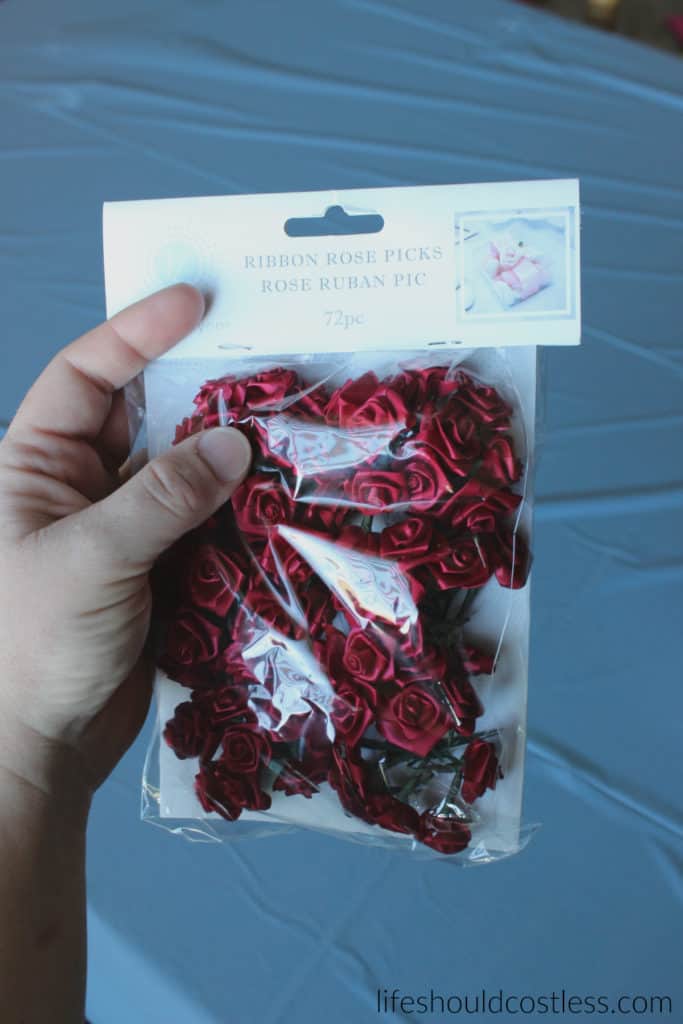
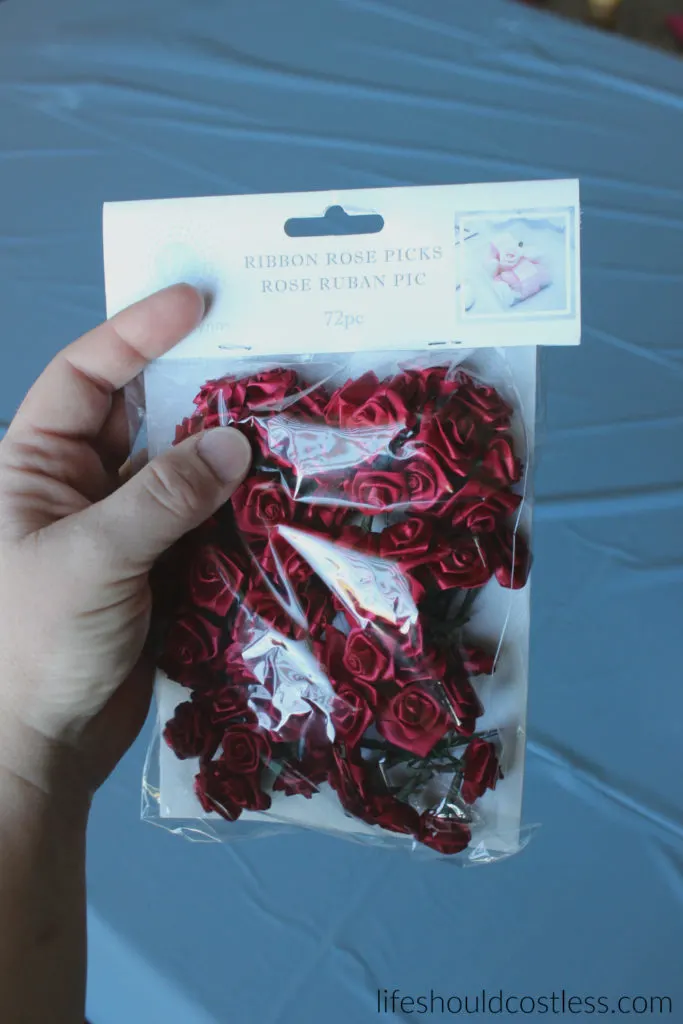
- Ribbon Rose Picks (Joanne’s in bridal section or Amazon, found here)
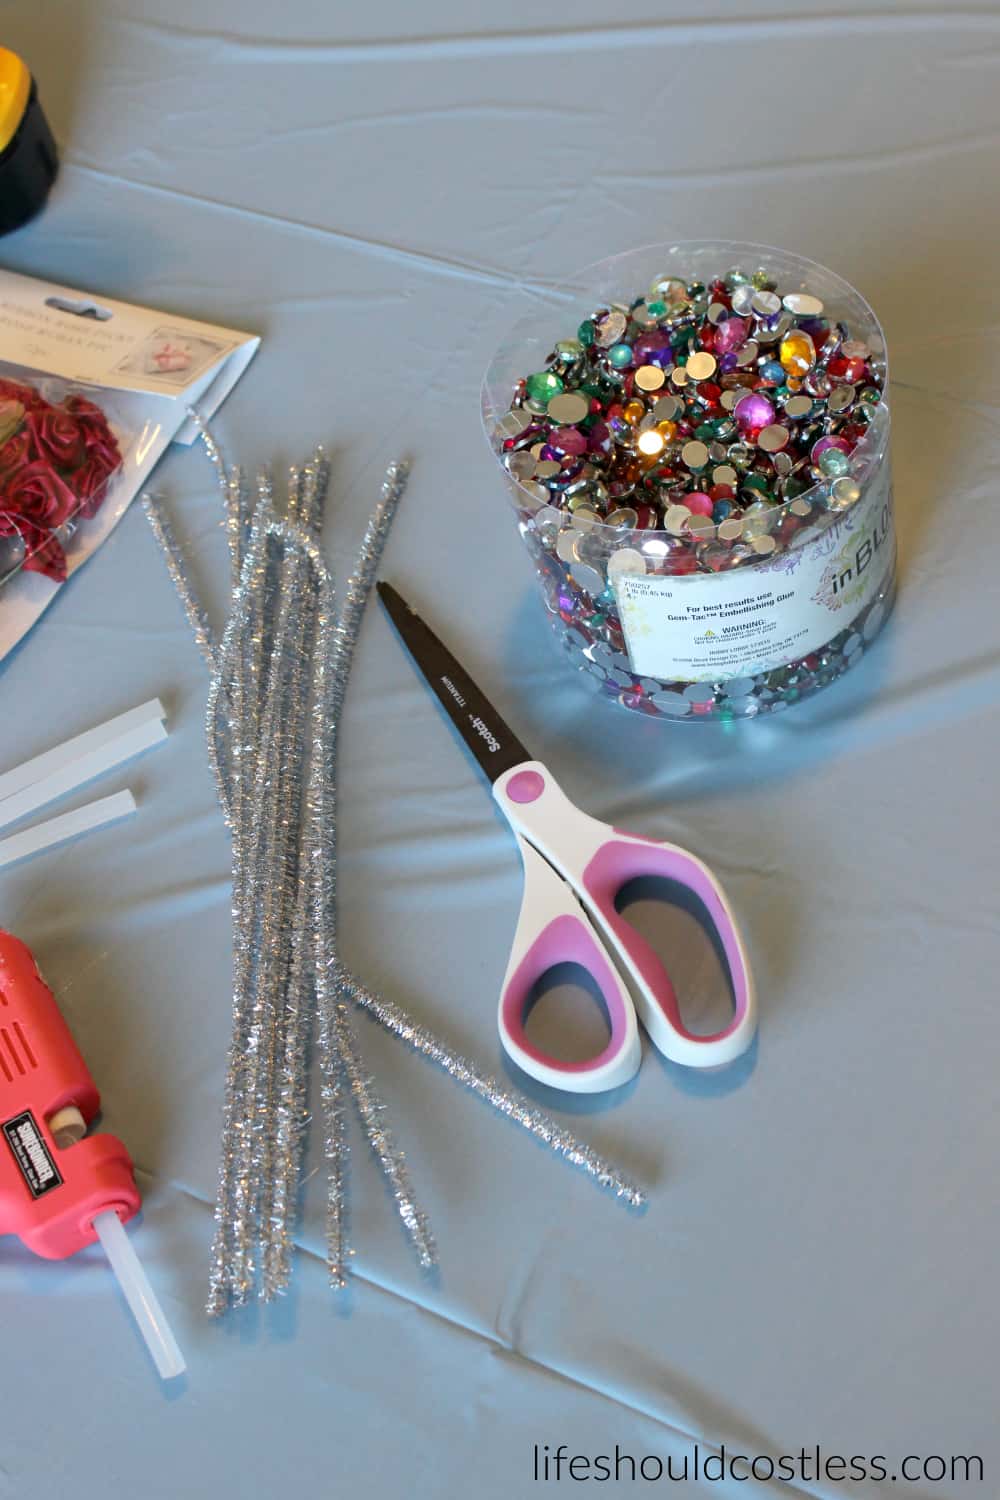
- Pipe Cleaners
- Scissors (not your best pair)
- Little Craft Jewels
Here we go…for reals now ;).
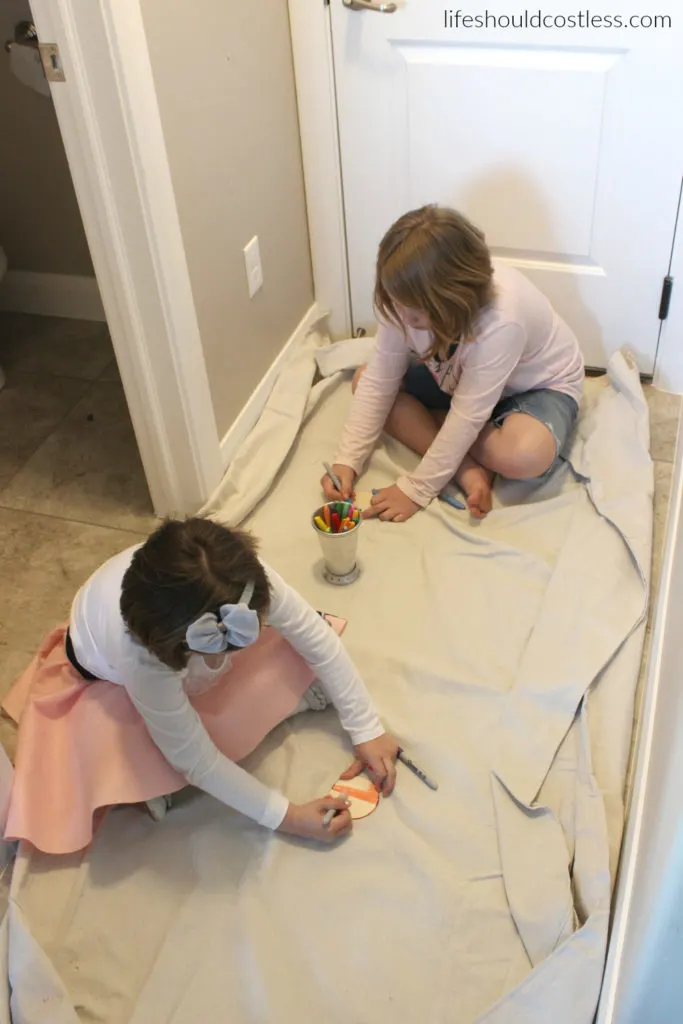
We started off with the little wooden circles and I just used my multi-colored sharpies to let the kids color them however they wanted. These served as a base for the craft.
They started out coloring the wood rounds on my canvas drop cloth at first, but we soon moved the project to the table.

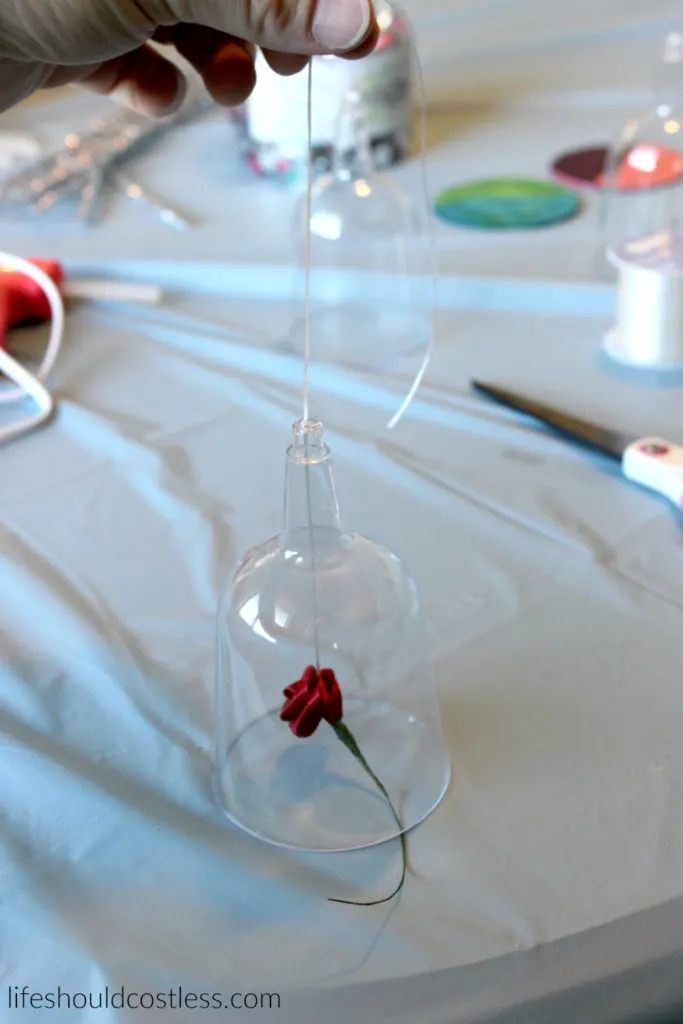
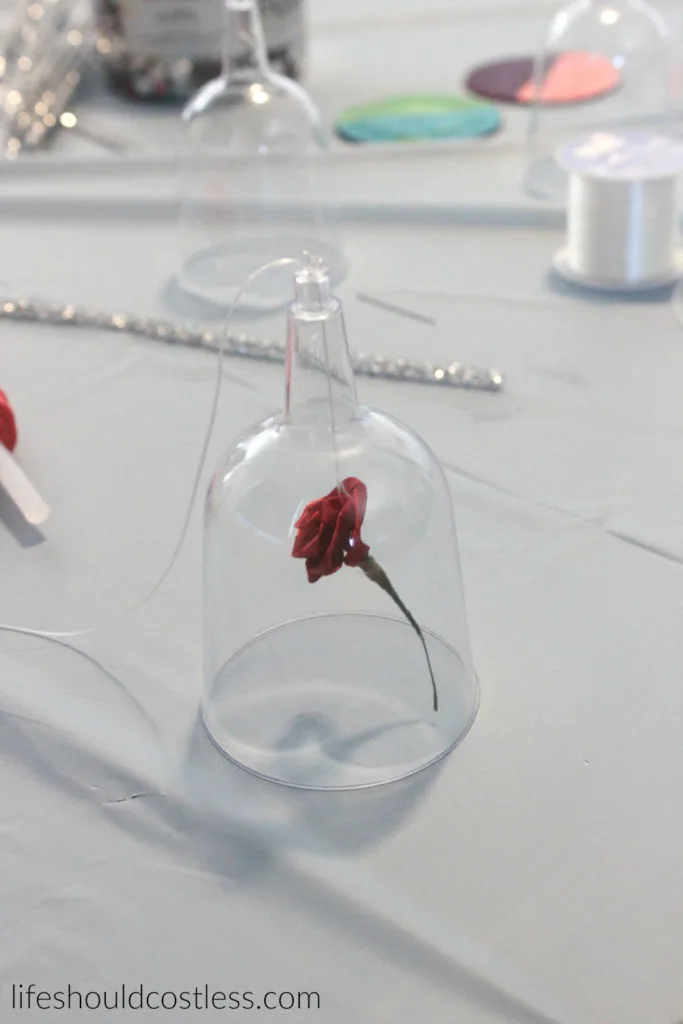
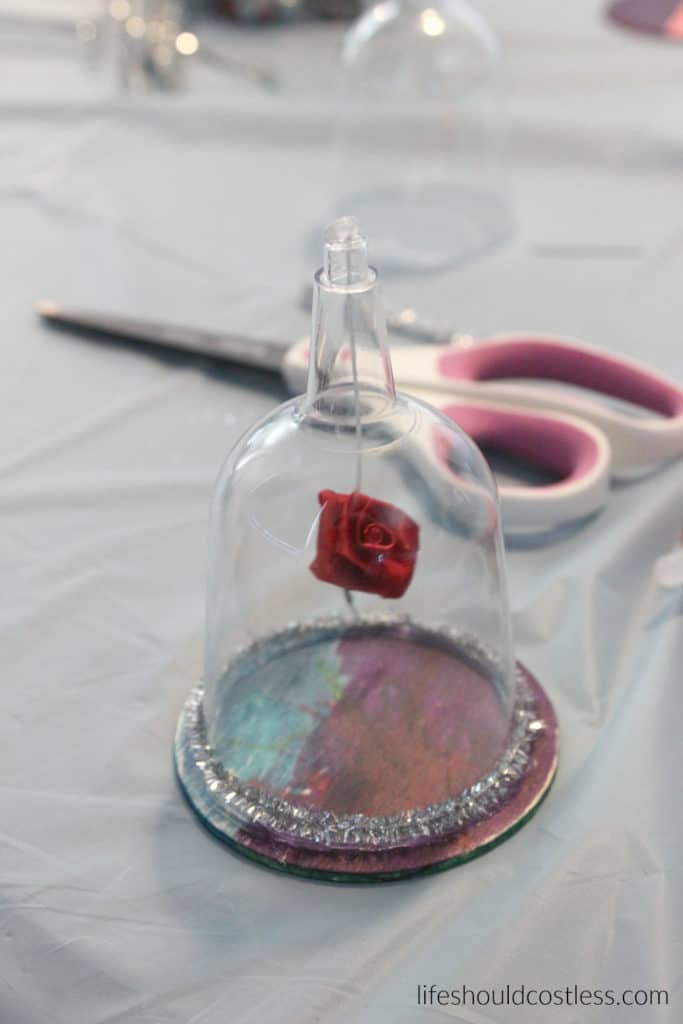
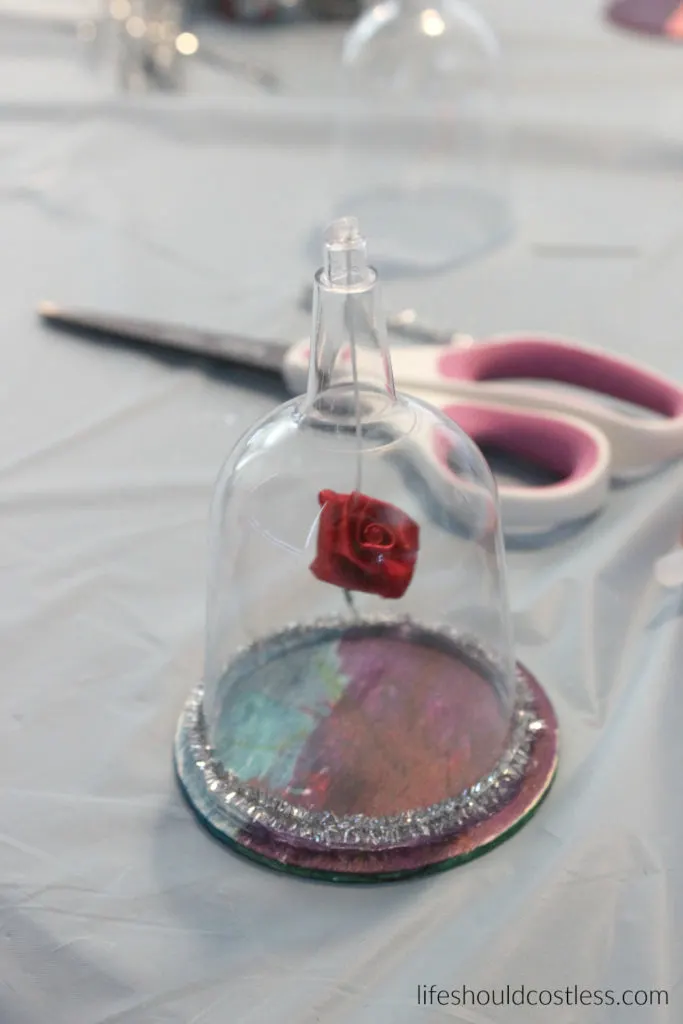
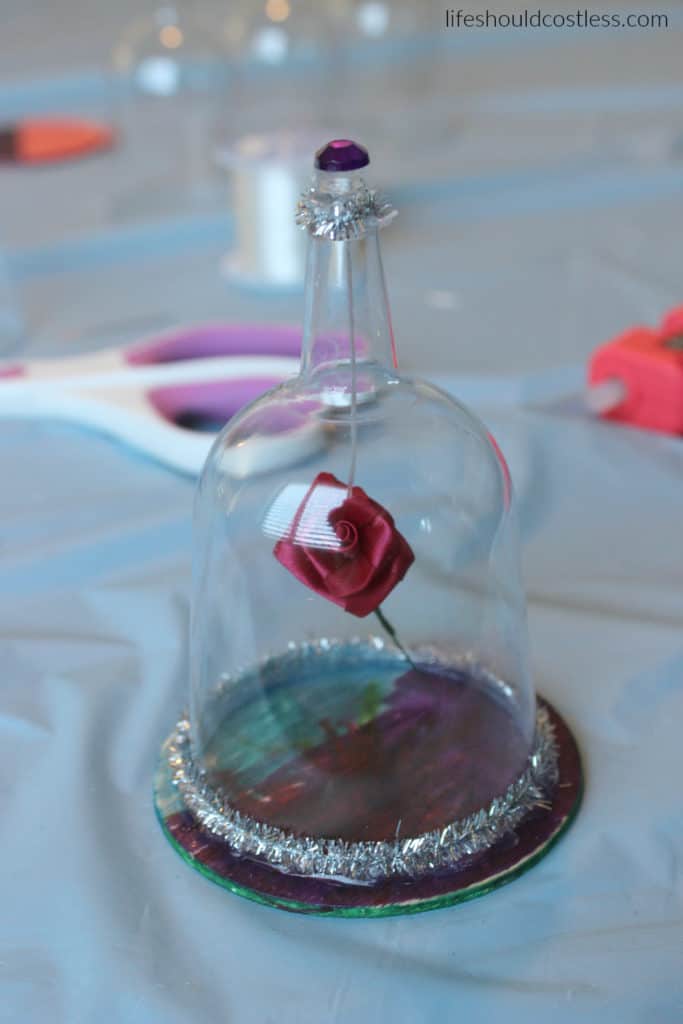
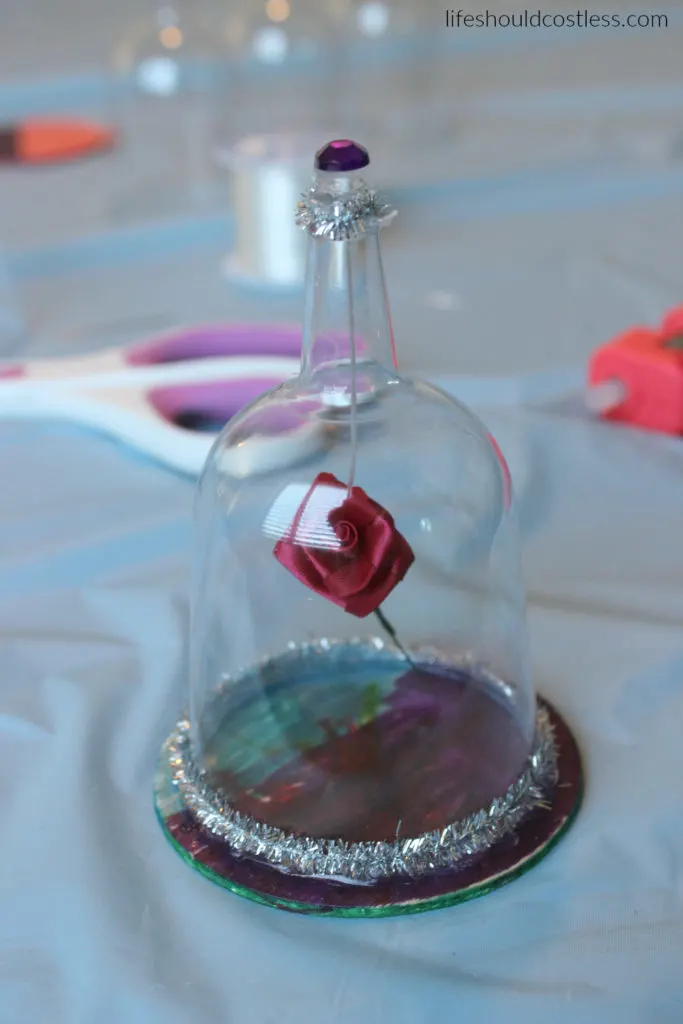
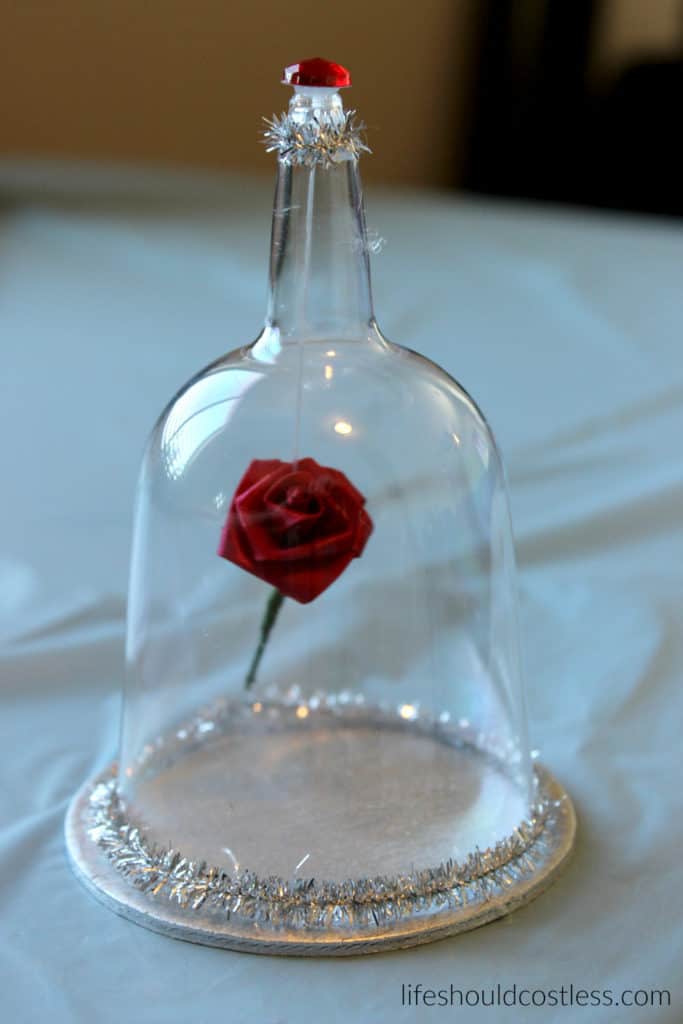
The glass case to go over the floating rose was made using a plastic wine glass…which is did get at Dollar Tree.
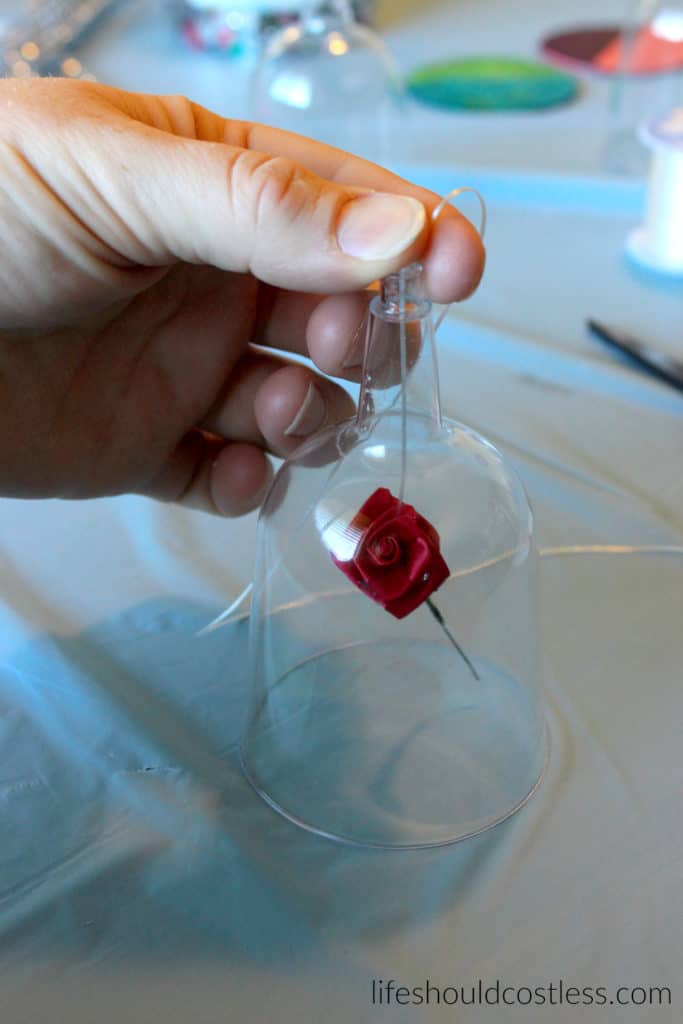
I drilled a hole in the “bottom” (I say that because it is used for the top of the craft) of the glass so that there is a place to feed the string through.
If you are going to be making these at a party or something it may be a good idea to pre-drill the holes. I found it easiest to drill through from inside the “glass”…it gives you much better control.

Next, you’ll need a ribbon rose pick (add to your Amazon cart here), clear thread or fishing line, a needle, and some crappy scissors… don’t use your nice scissors since you will be cutting through metal and will ruin them with this project.

Take a piece of clear string (I used a thicker, not quite so clear string so that you all could see it better in the pictures for the tutorial but I recommend fishing line for it to look the best and most “invisible” so the rose looks like it’s actually floating) and feed it through the hole.
The string will need to be between 12 and 18 inches long.


I wanted to show you what the package of ribbon rose picks looks like so you know what to expect. I mentioned that you can get them at Joann’s in the bridal section, or here on Amazon.
Using the bottom part of the string that has been fed through the wine glass, I threaded the needle and then pierced through the top part of the rose.
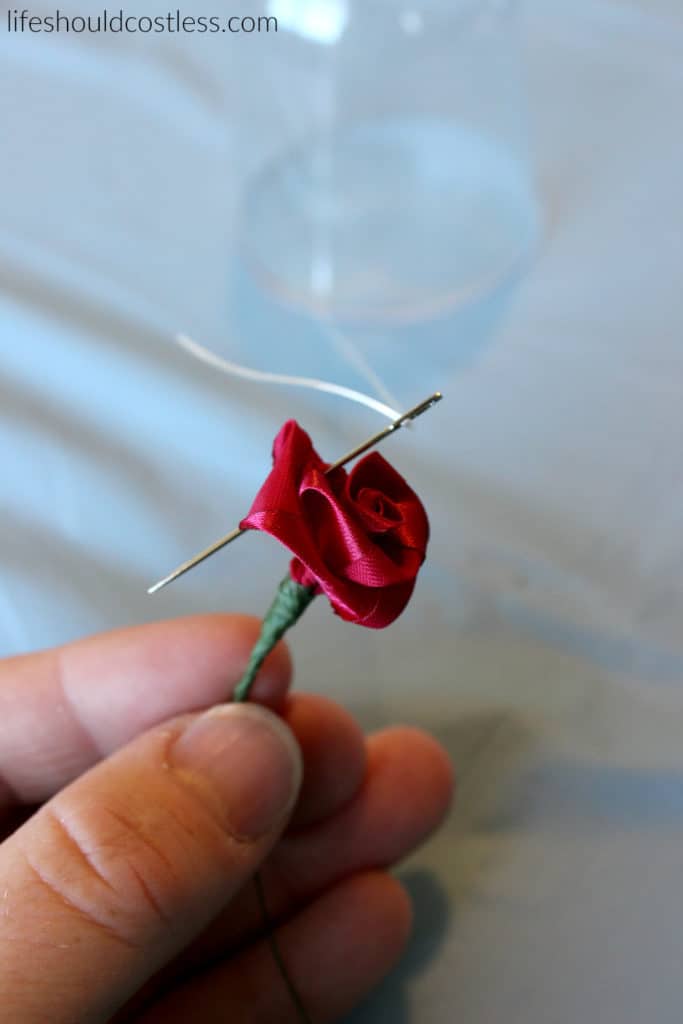

Then pulled it through making sure not to pull the string all the way out of the top of the wine glass.
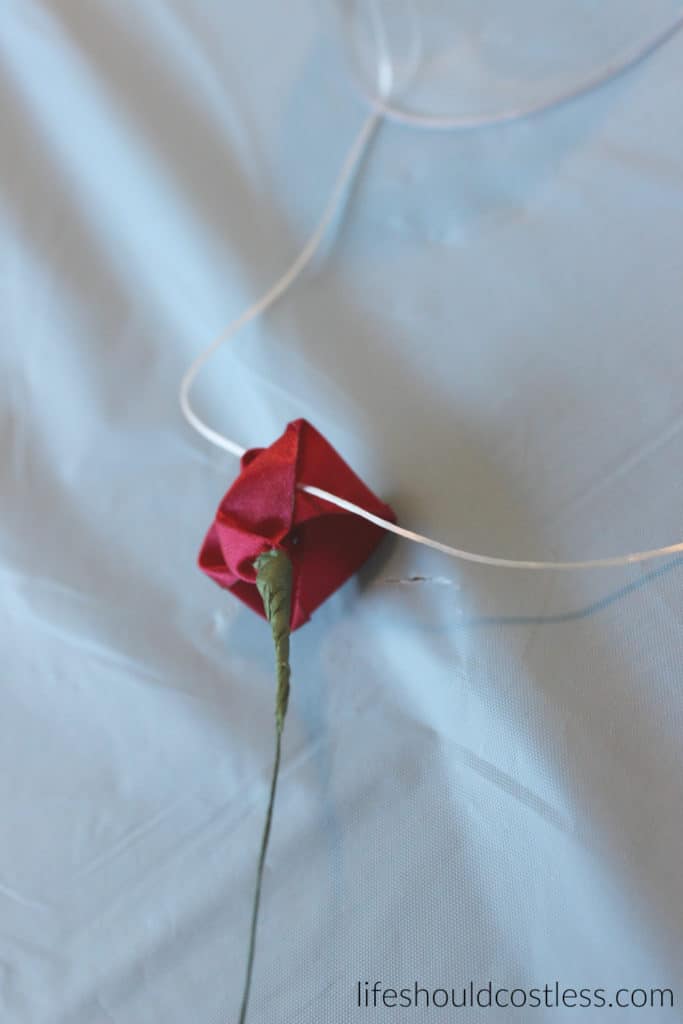
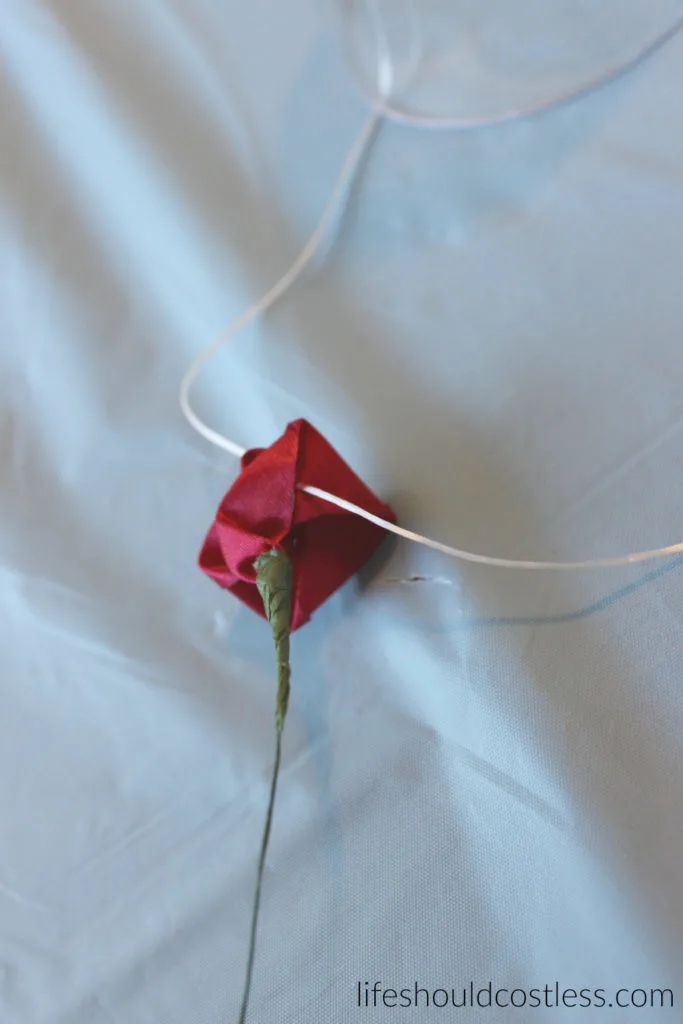
Next you tie a big knot with the string on the back of the rose…you can hide your knot within the petals of the rose if you’d like.

Then trim the excess string next to the knot.

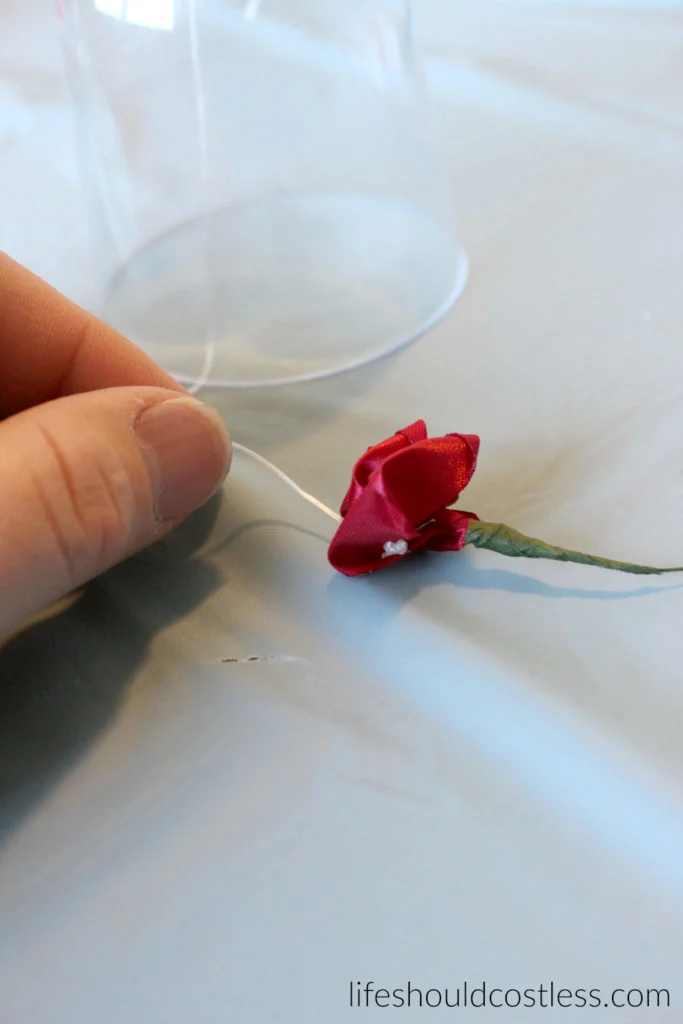
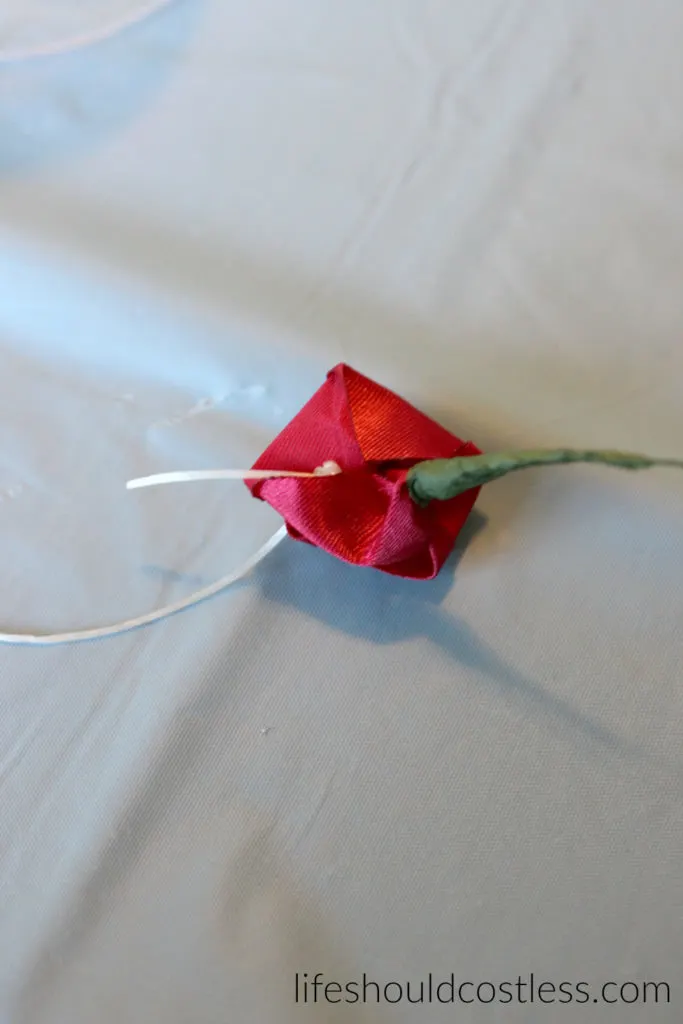
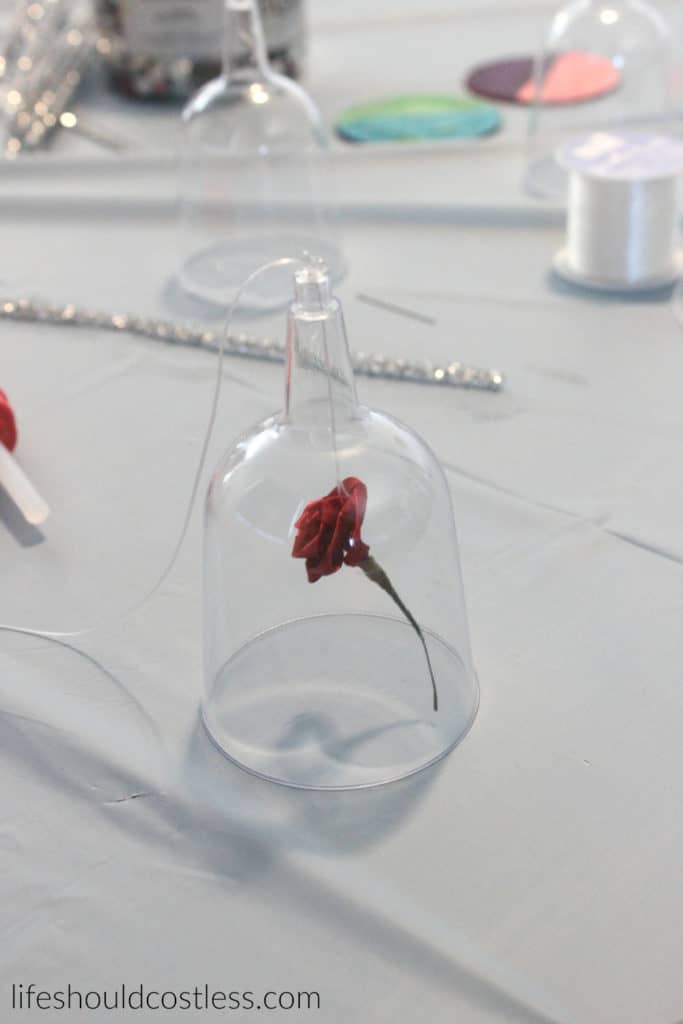
Now you tug on the top part of the string to decide where you want the rose to float. This also tells you how long you need to cut the tip of the rose to make sure that it is “floating”.


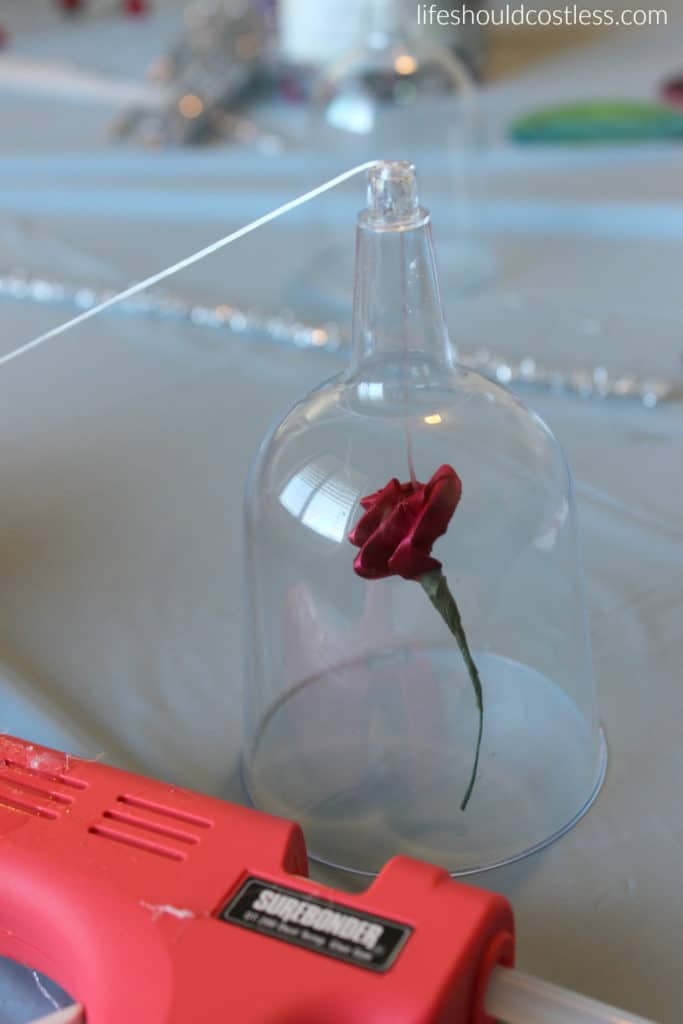

Once it is where you want it, hold the string in place and glue it there.

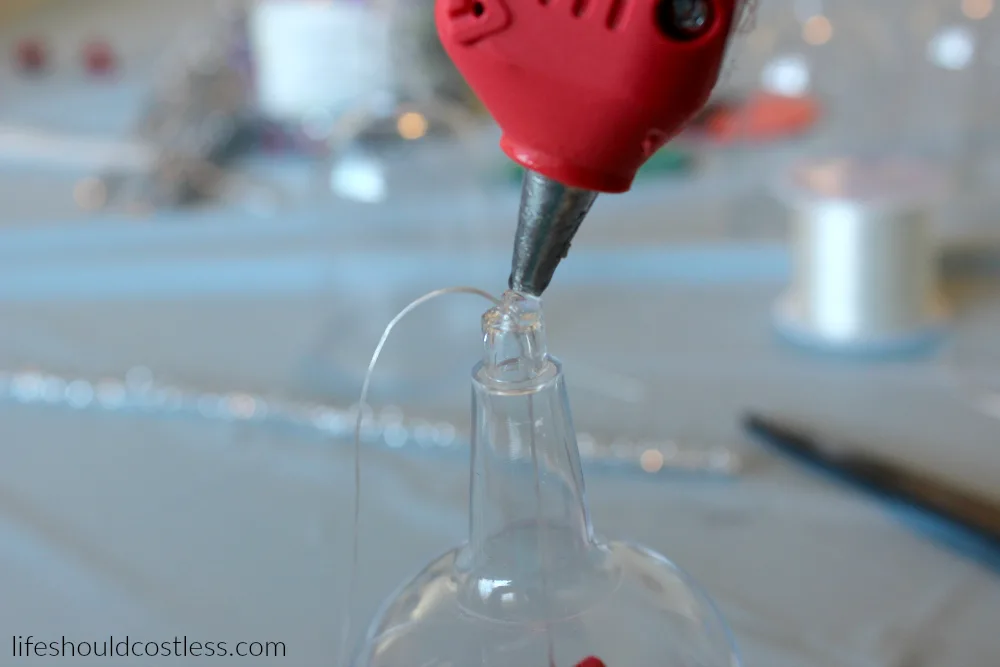
Let the glue cool/harden/cure. Then trim the excess string from the top.
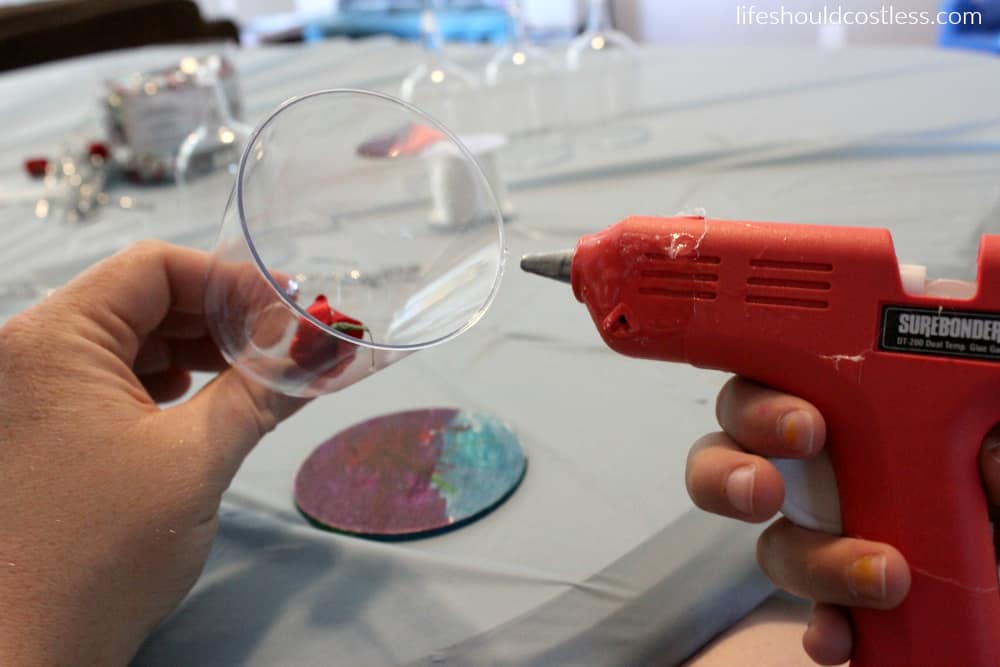
Now it’s time to glue the “glass” to the base. I made a thin ring with hot glue, on the plastic, and then centered it on to the base.
Make sure to work quickly since the glue sets fast.

It doesn’t look so great with all that glue blobbed on there, so what did we do…add even more glue ;).

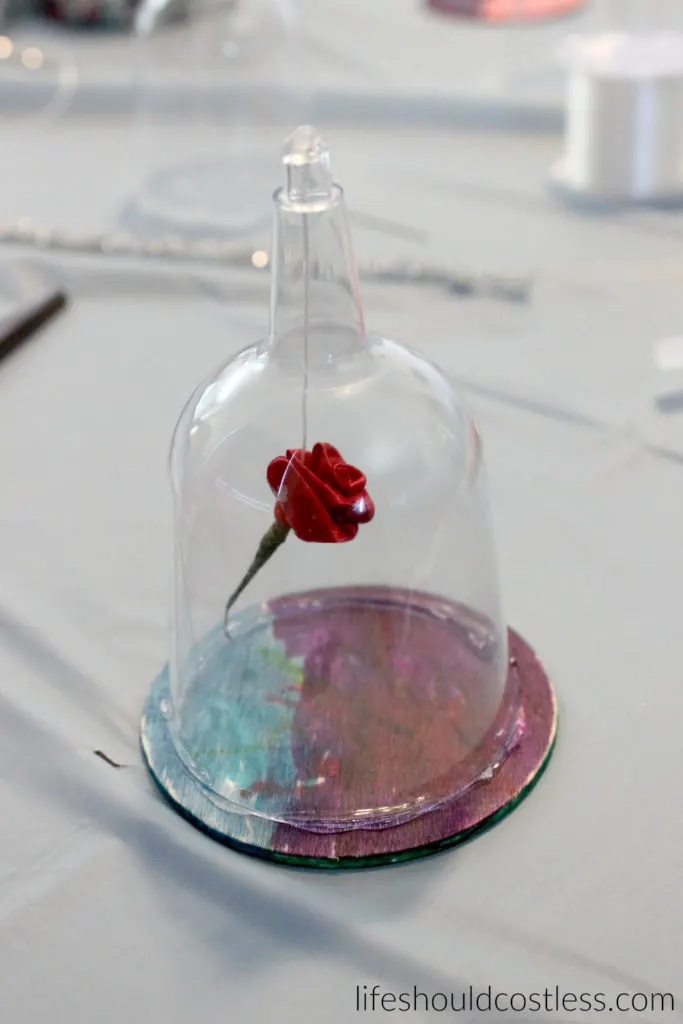
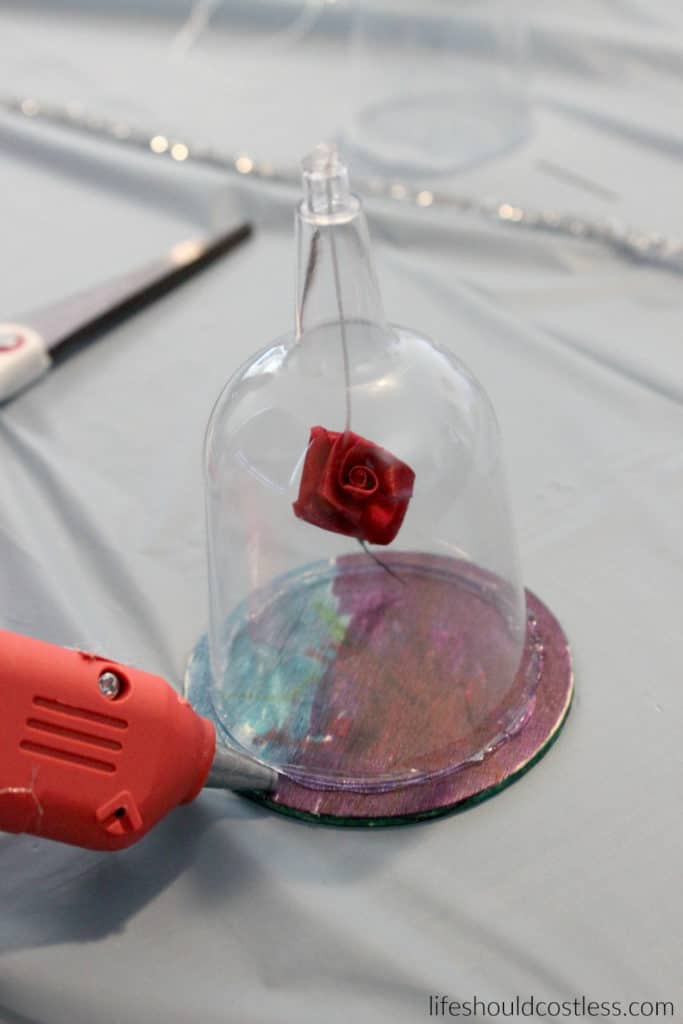

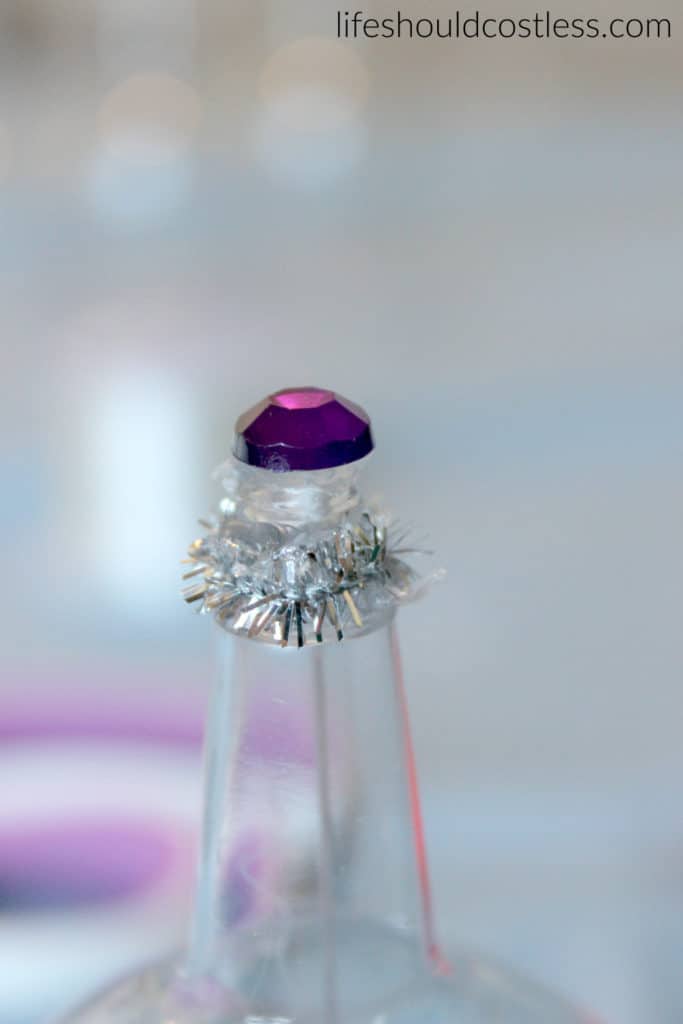
Of course it was to glue on the pipe cleaner to pretty it up a bit.
We finished the project off by adding a little bit more pipe cleaner and putting a little jewel on the top.

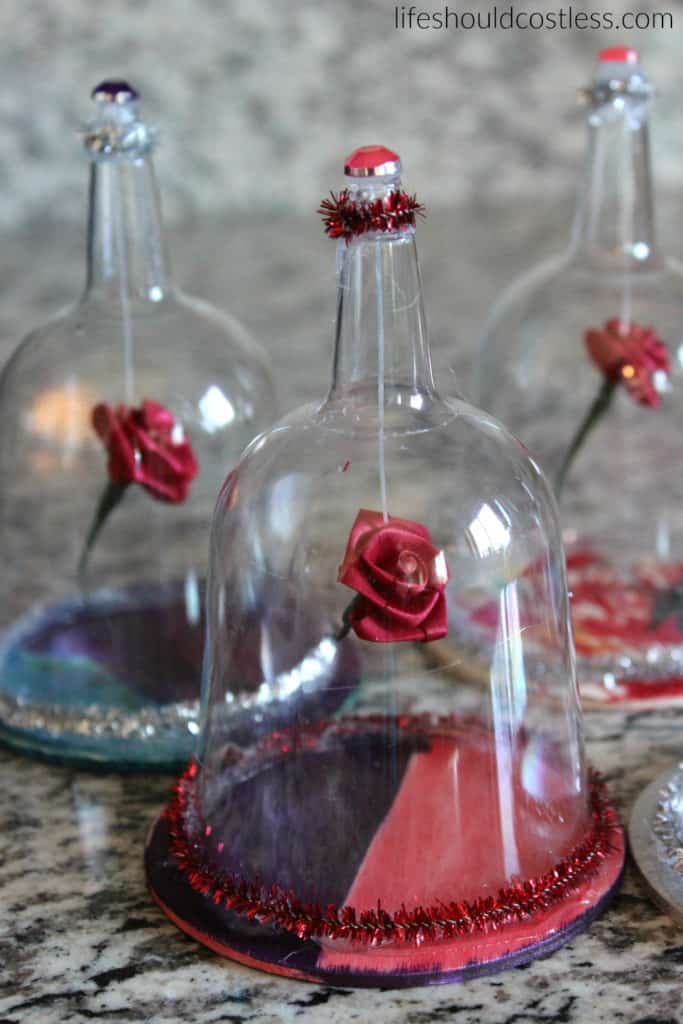
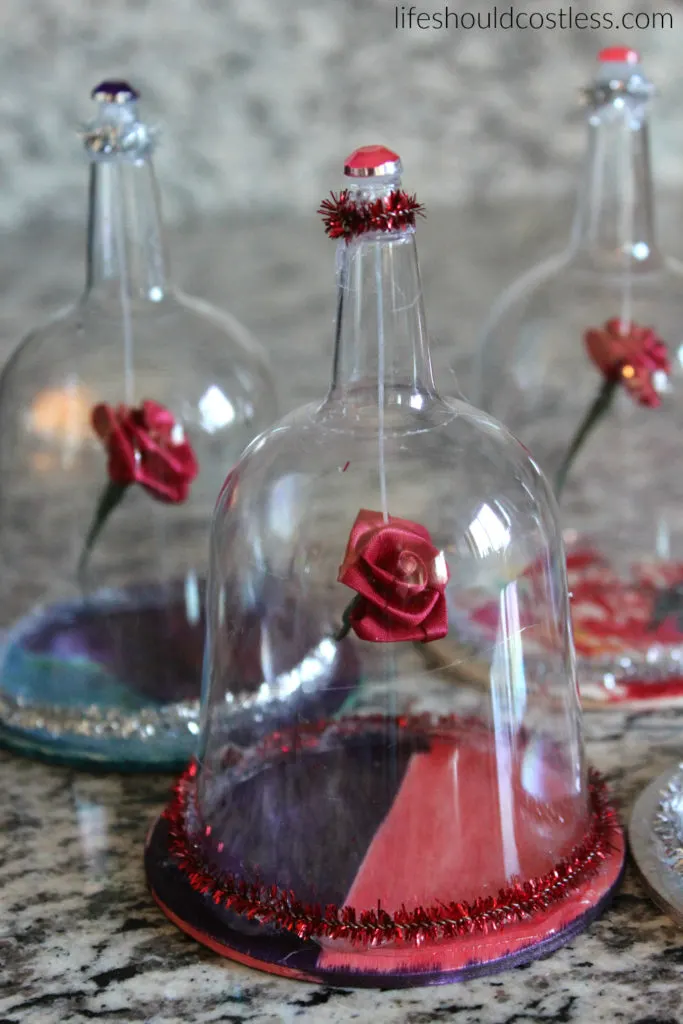
I think that they turned out pretty cute, what do you think?
I was pumped that they turned out pretty much as well as I had hoped….we had made our very own…
Enchanted Rose from Beauty and the Beast
Though from what reading I have done, people seem to calls these different things such as a “rose in jar” or the “rose vase from Beauty and the Beast”… but whatever you want to call it… it’s a pretty fun rose craft idea…at least I think so.

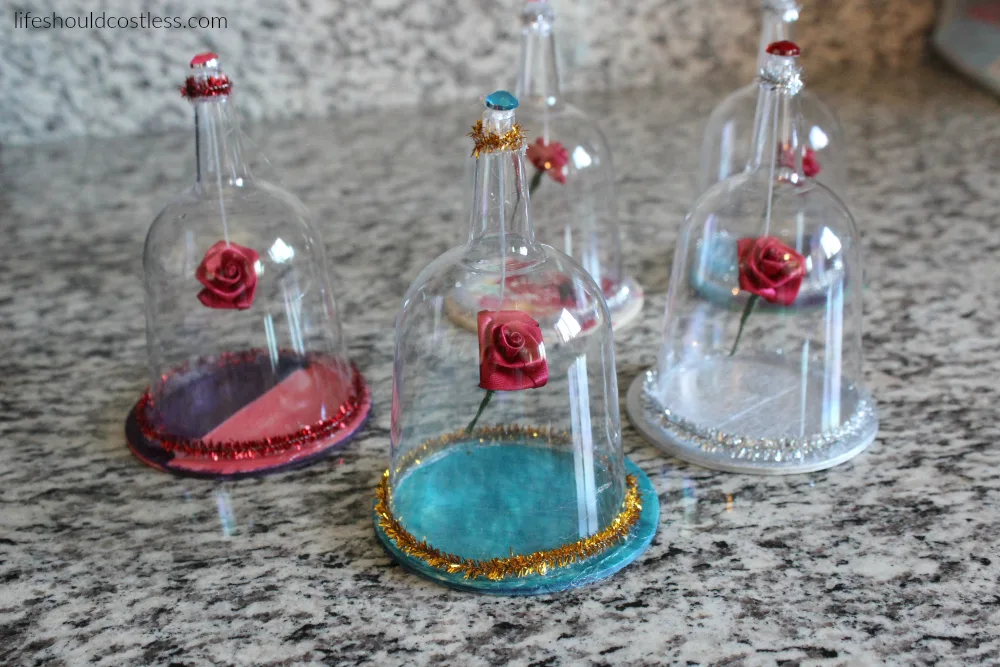

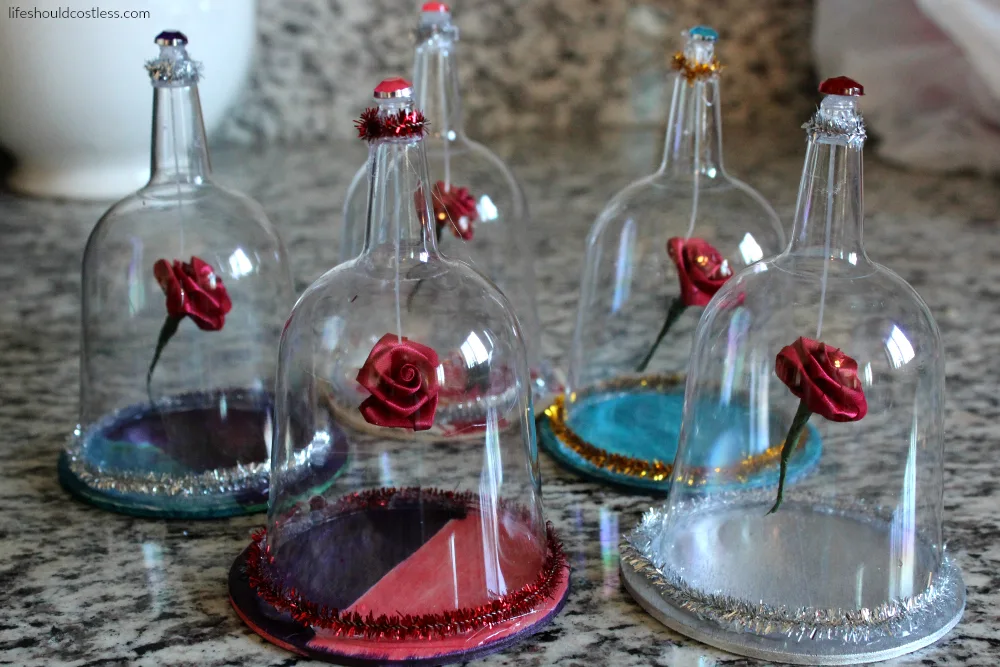
I cheated when I made my own and used some silver spray paint for the base… coloring with a sharpie on wood didn’t appeal to me so I used some paint that I had on hand…
The kids have loved them so much and put them in their room for a princess themed decoration.
Within a week of making them the only issue that we had is a single arose falling after the kids had been throwing one of them around…the others are still just “floating” all day long. So basically, it will last as long as your kids let it be…the little stinkers.
Once the kids had been given instruction it took about 15-20 minutes to complete.
It’s definitely a fun project if you’re looking for Beauty And The Beast Arts And Crafts ideas.
At least I think so…and I may be a little biased…ha ha.
Thanks so much for stopping by my blog! If you liked what you saw, please make sure to share it with your friends/family/ co-workers on any of the social medias…or you could even send them the direct link via email. Whichever way you choose to share it, I super appreciate the support!~Sarah
How To Follow & Support This Site
- If you would like to subscribe to my email list, go here.
- Make sure to follow along via social media, by going here.
- If you would like to learn how to really show your support to this site (at no cost to you), go here.
- If you would like to make a direct donation to the site, go here.
P.S. don’t forget to check out my entire crafts section…there are lots of other fun things to do for the kiddo’s.
Here are some direct links to several of my other crafty-ish posts that you’re also going to like:


*Reposts: Please note that this idea/post was originally posted to this website on 04/12/2017, but it was in great need of a refresh so it now is more user friendly/shareable, and now has a video tutorial.