In this article, we give you a complete look at what it takes refinishing a bathtub and tile shower surround in your bathroom. Tips, tricks, what to realistically expect, also a product review for the Rustoleum Tub and Tile Refinishing Kit, in how to make your bathtub and tile look new again.
I am a fairly cheap person in general… I try not to spend money unless it is absolutely necessary for my survival, or my happiness…& this particular project was absolutely necessary for my happiness while I am renting a very run-down little old house.
I am super grateful that I was able to still find a place to rent that is within my budget (the housing market where I live is insane right now), but I just had to do something about the bathroom situation to even feel like I could have company over without being embarrassed.
This bathtub, and the tile surround, was so outdated, cracking, and just plain not kept up that I literally almost threw up the first time I scrubbed it out to take a bath…
Because even with all of my prep and cleaning there were still a few chunks of whatever that dropped into the tub with me.
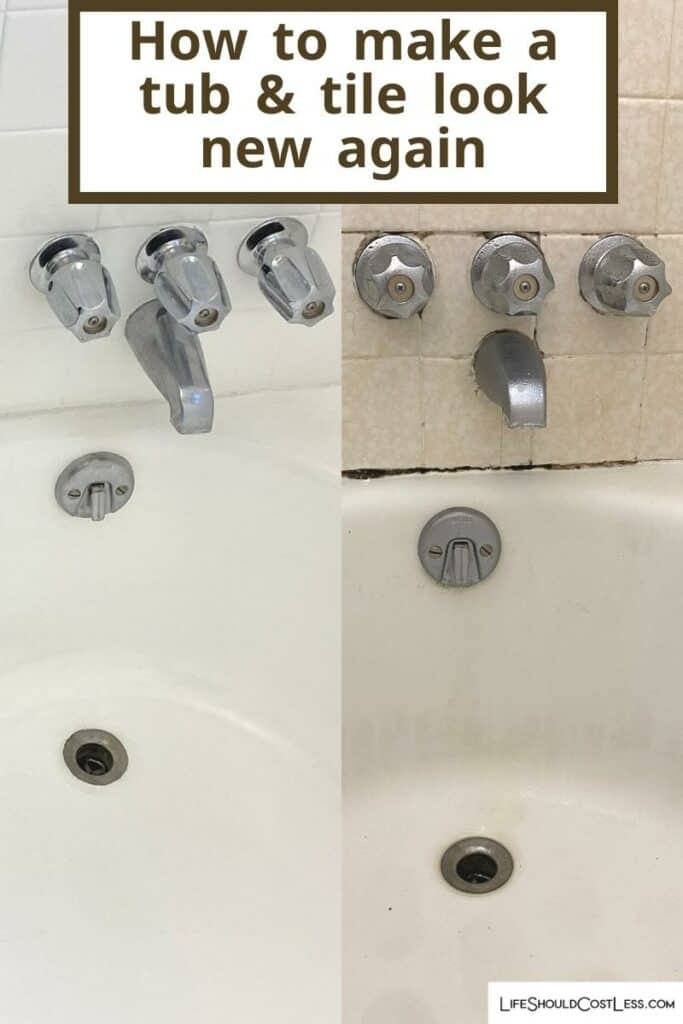
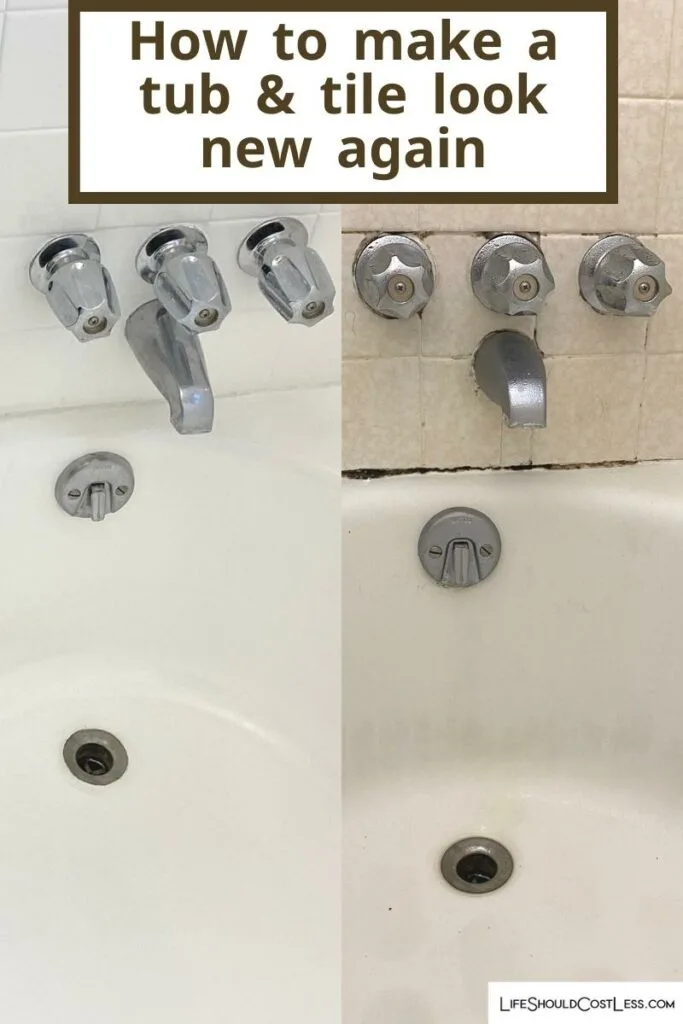
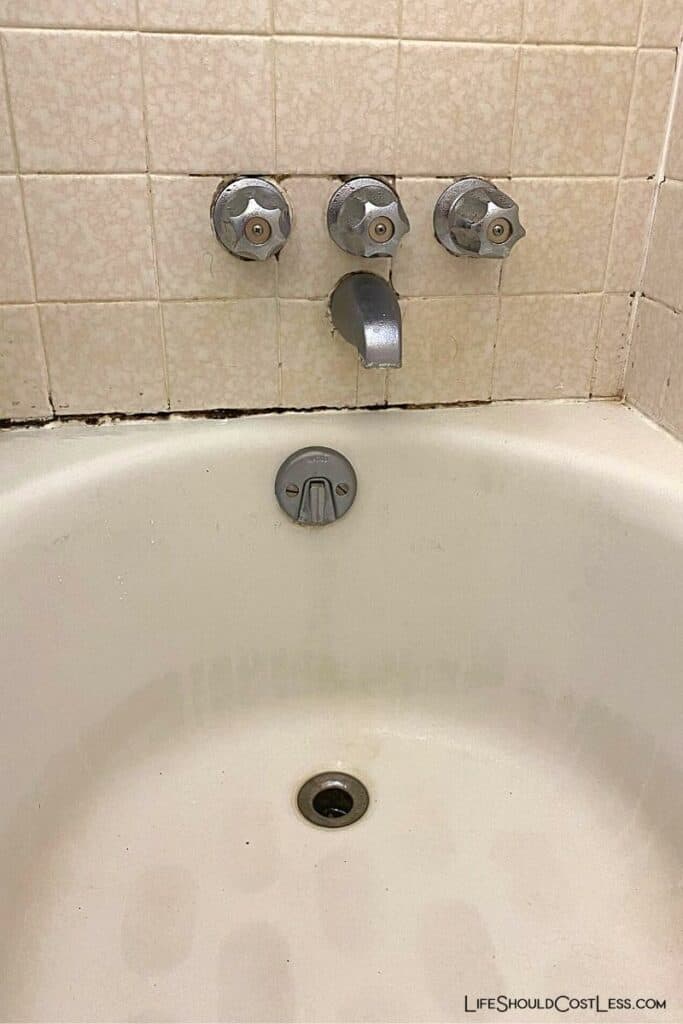
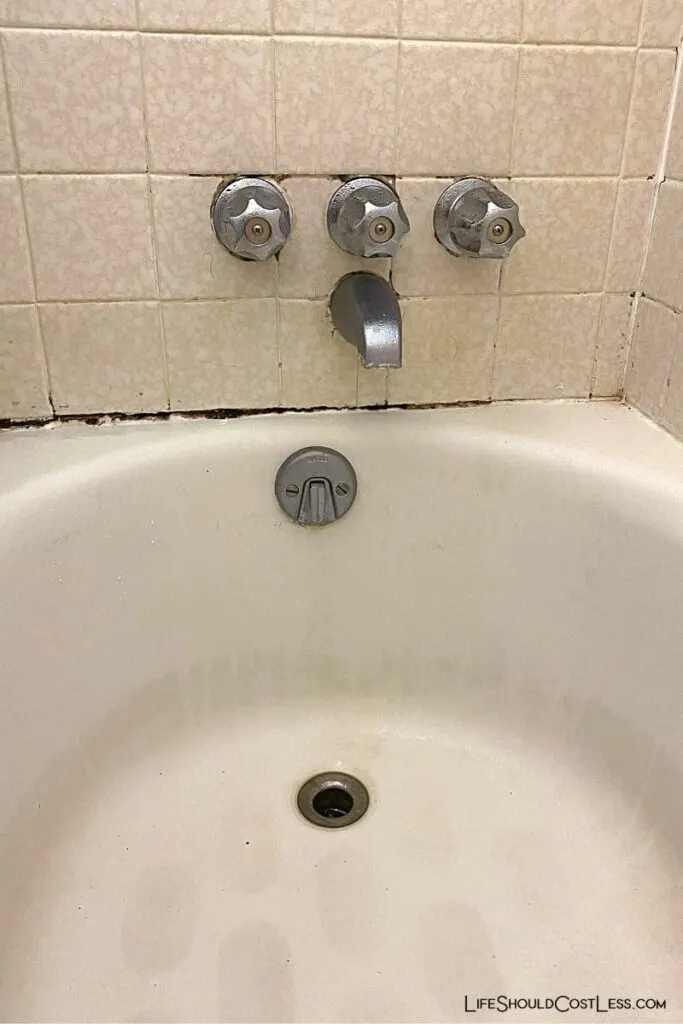
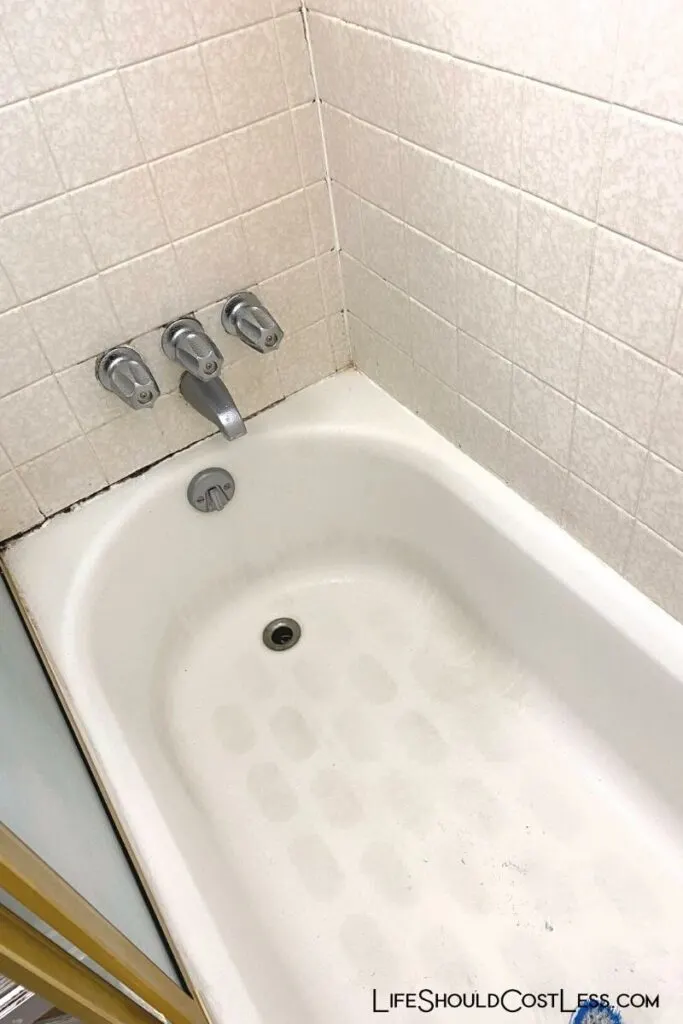
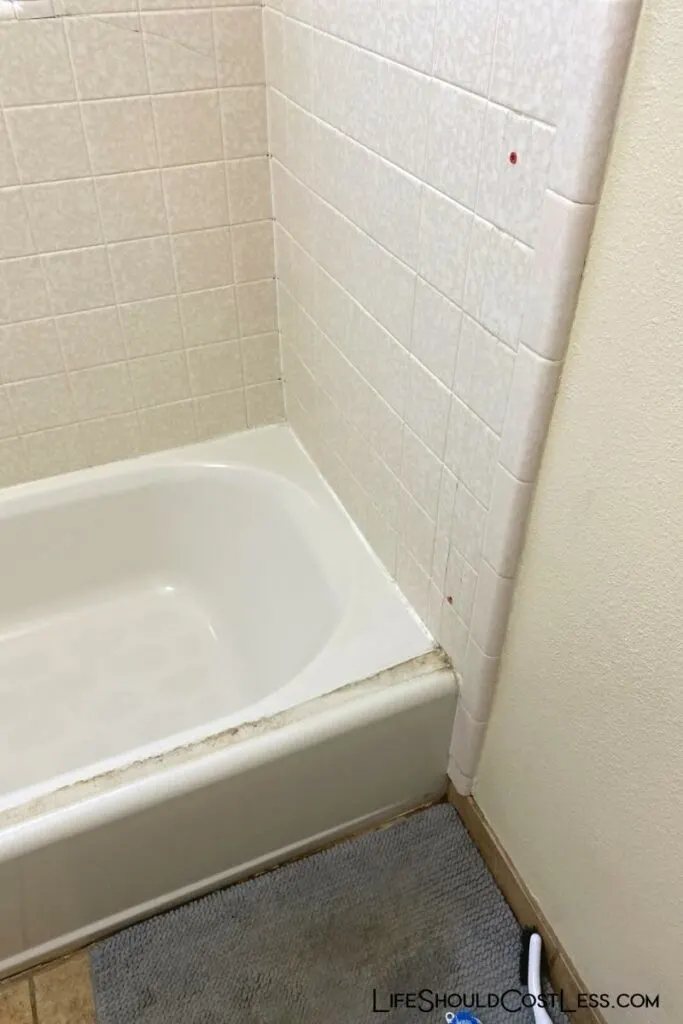
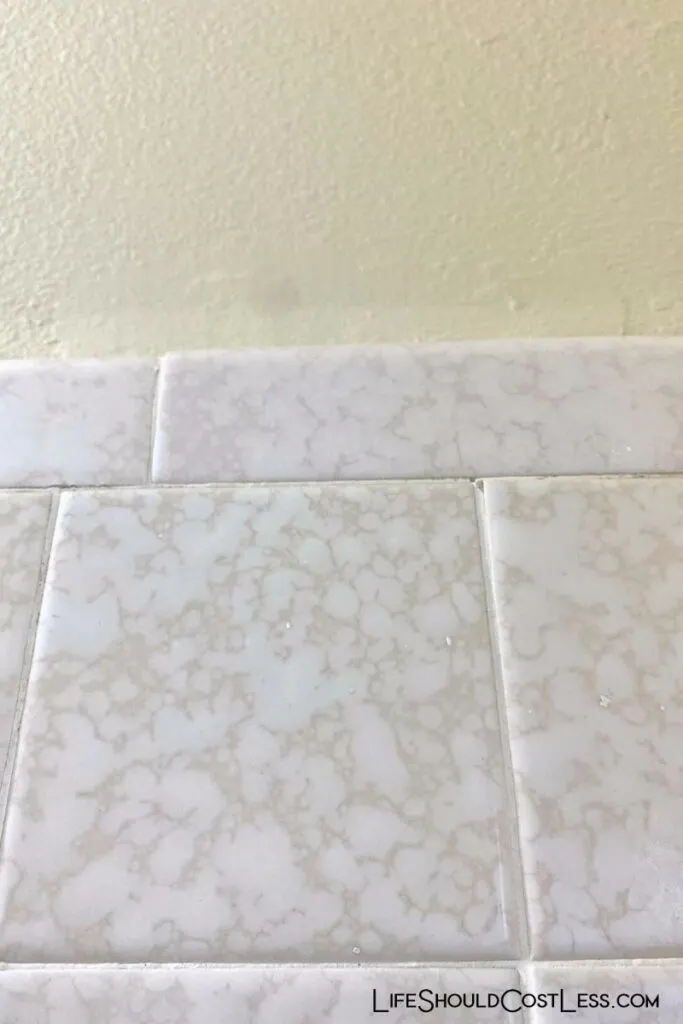
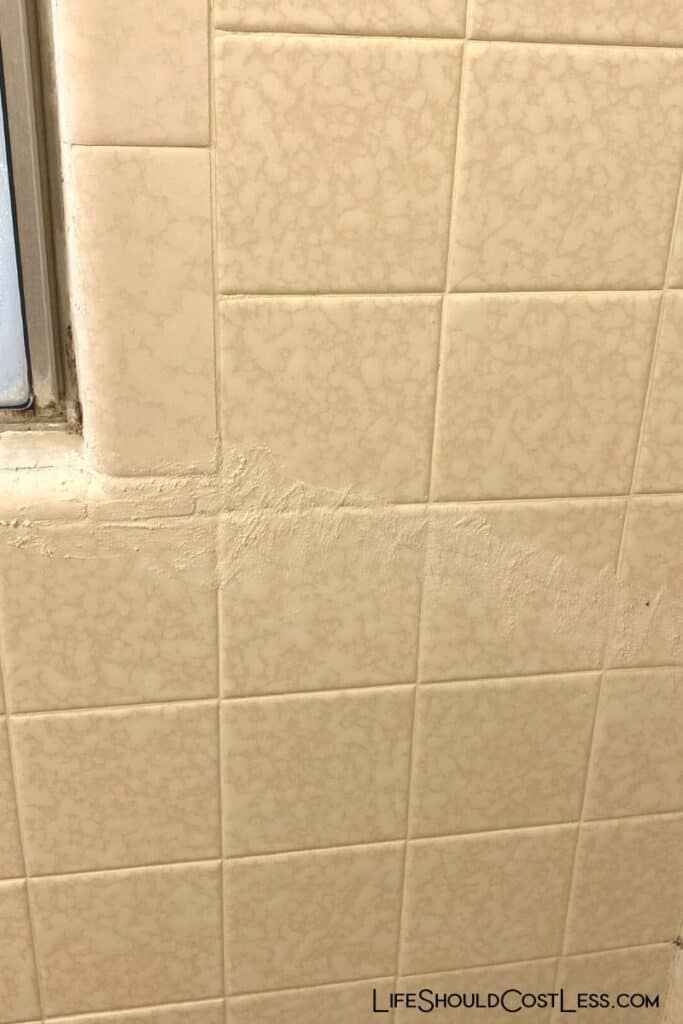
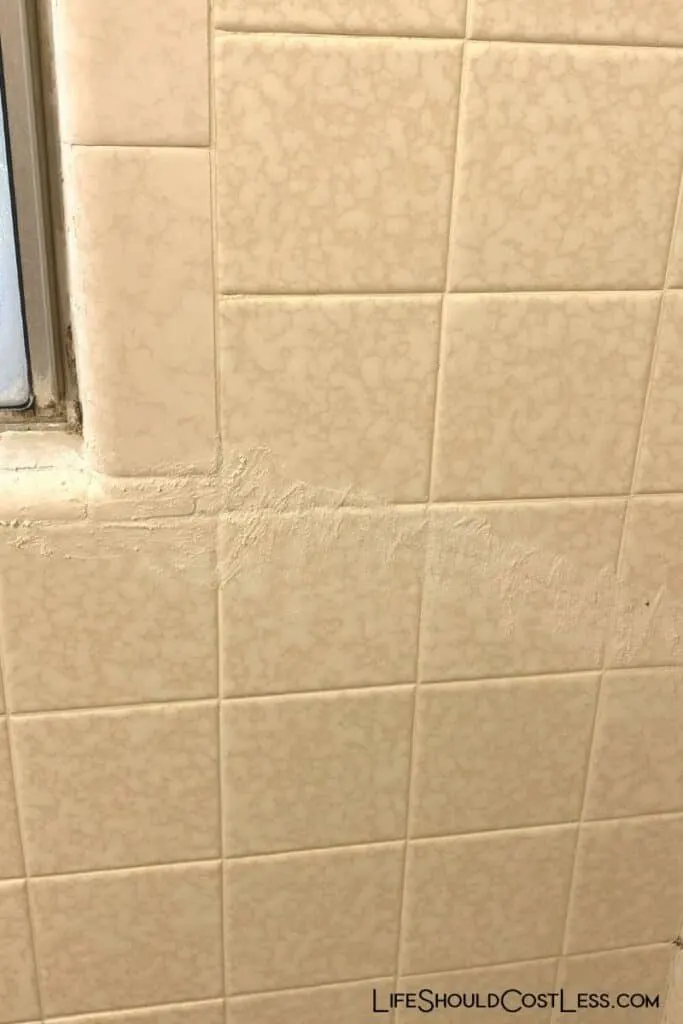
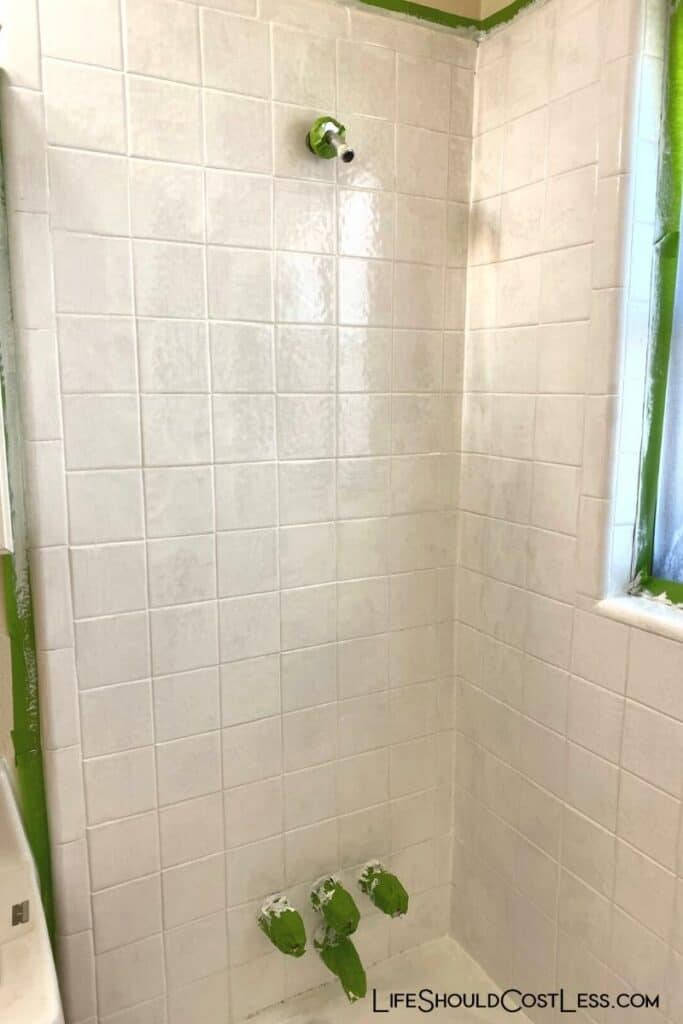
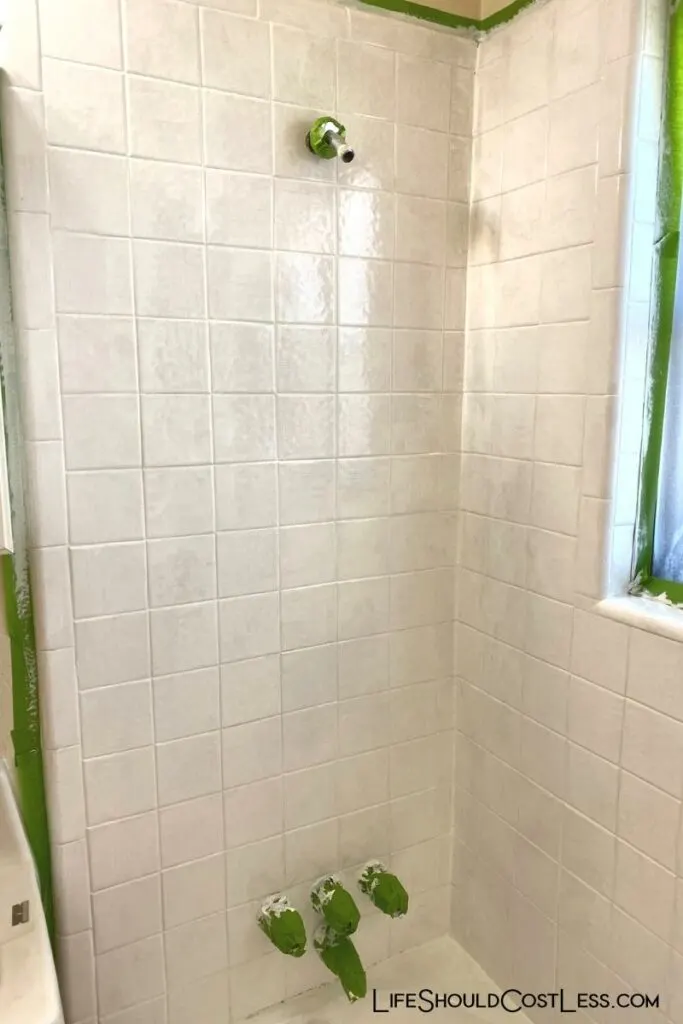
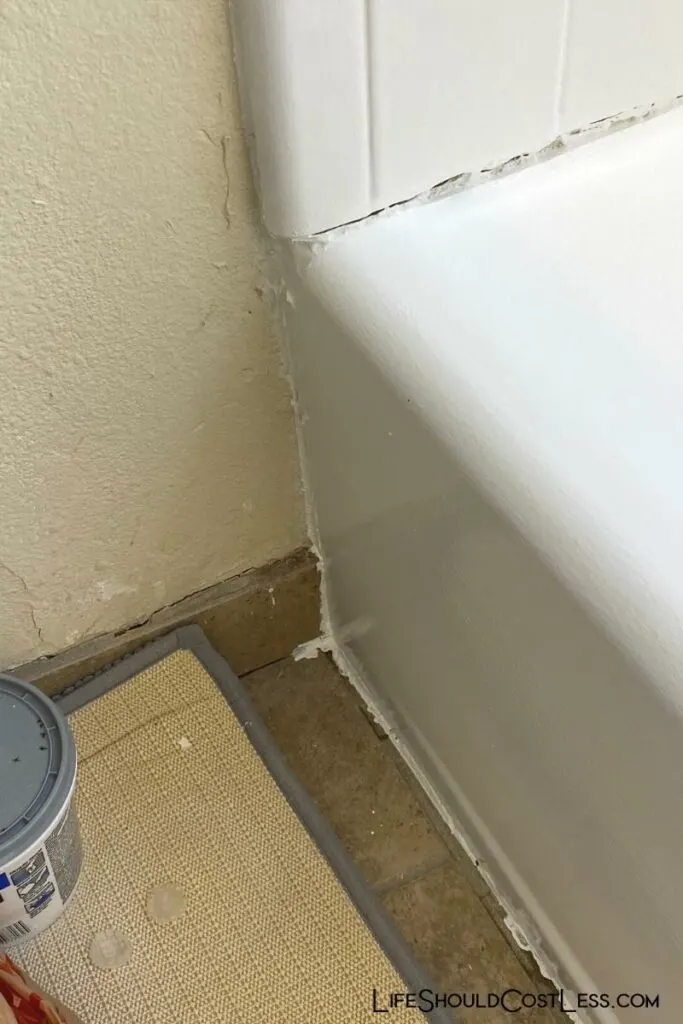
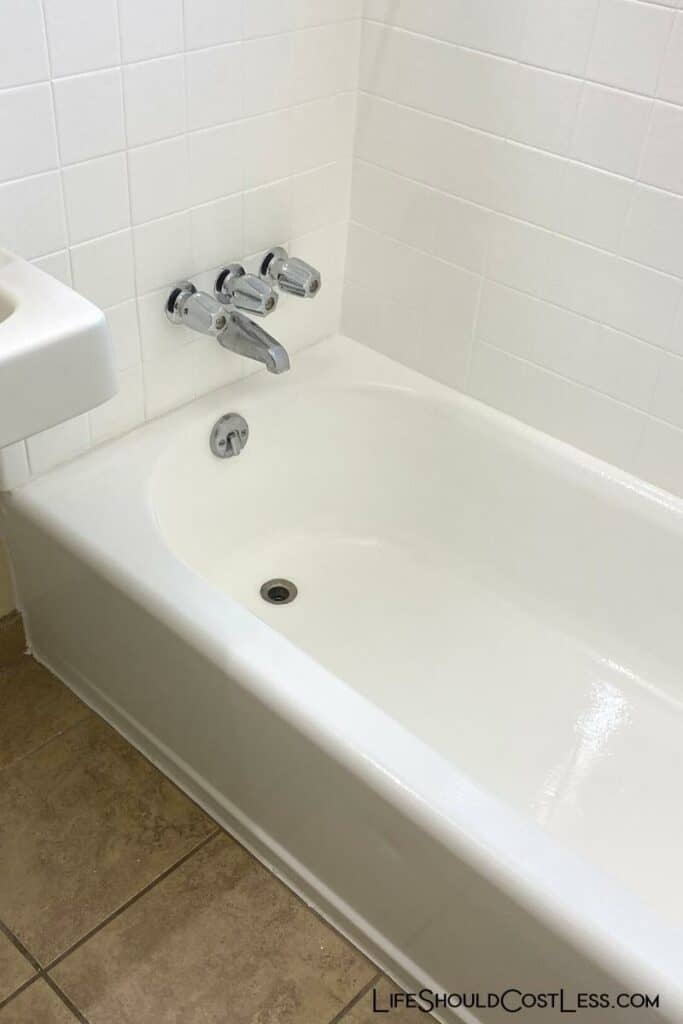
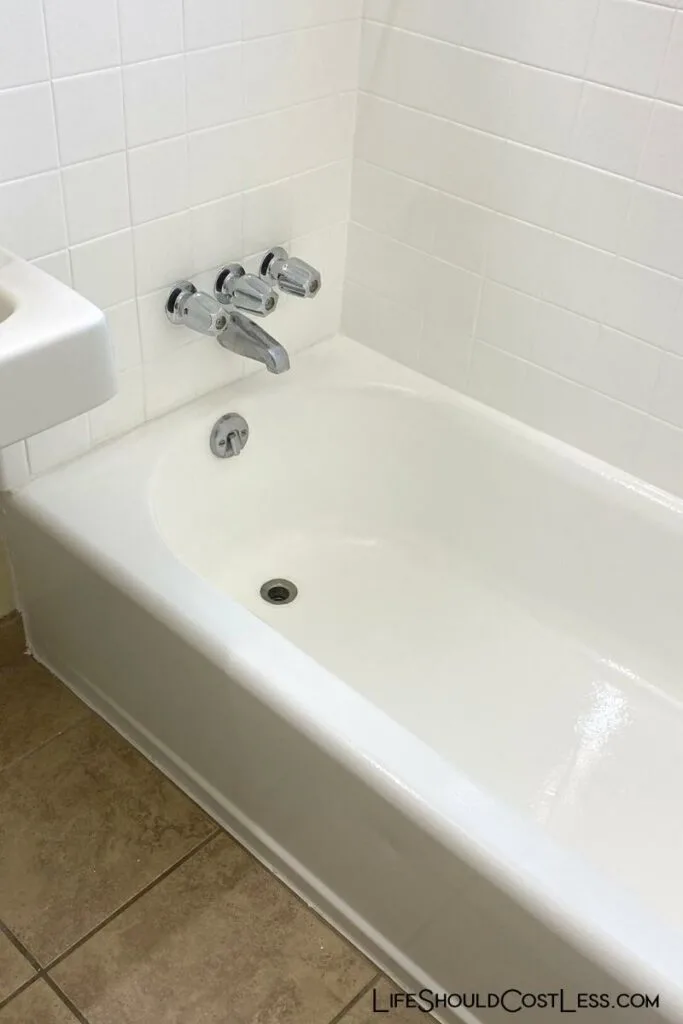
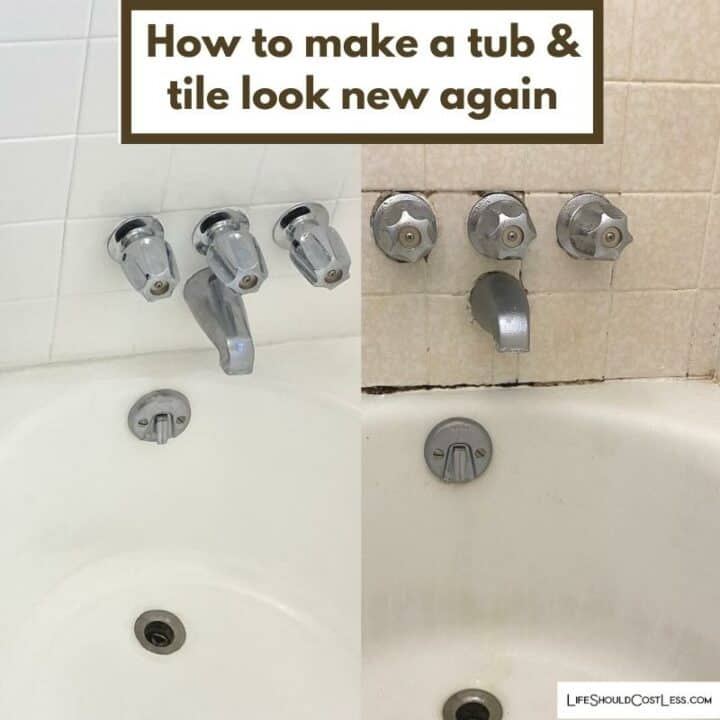
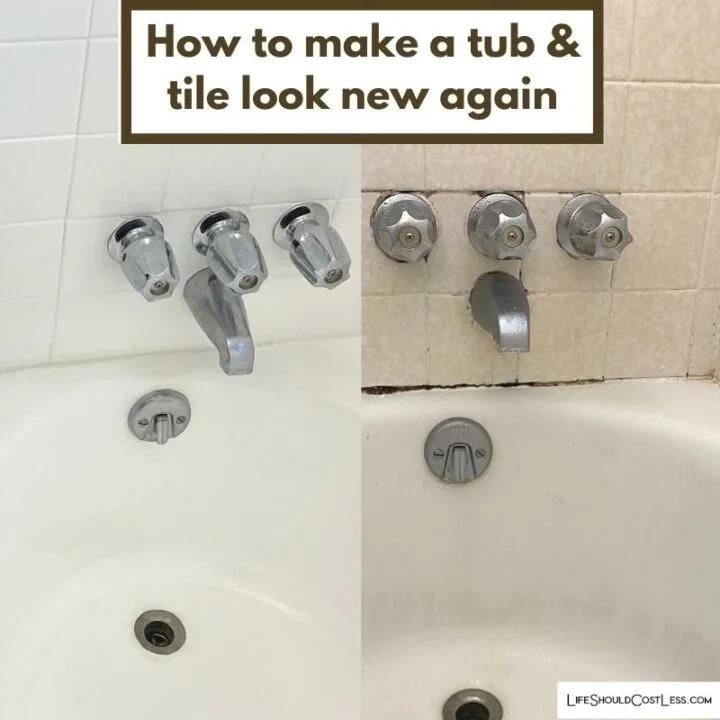
Here are a few before pics so that you can see why it was bothering me so badly…and keep in mind, this is how bad it looked after I had deep cleaned it multiple times…
This was just plain how bad it looked at its very best…complete with a permanent brown ring around the whole tub.


How to refinish tub & tile:
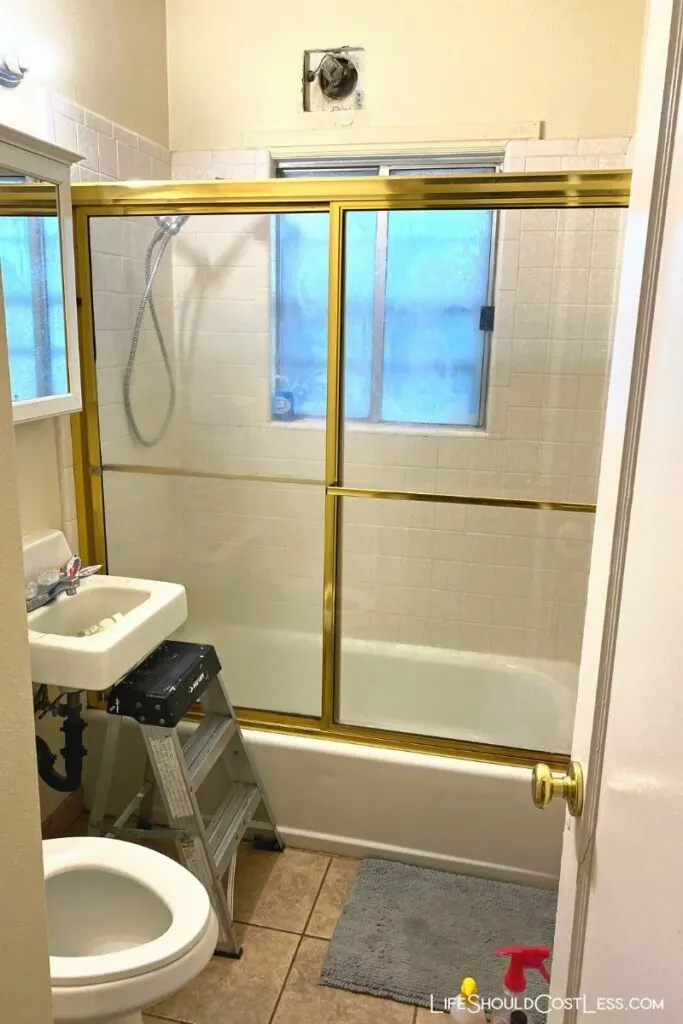
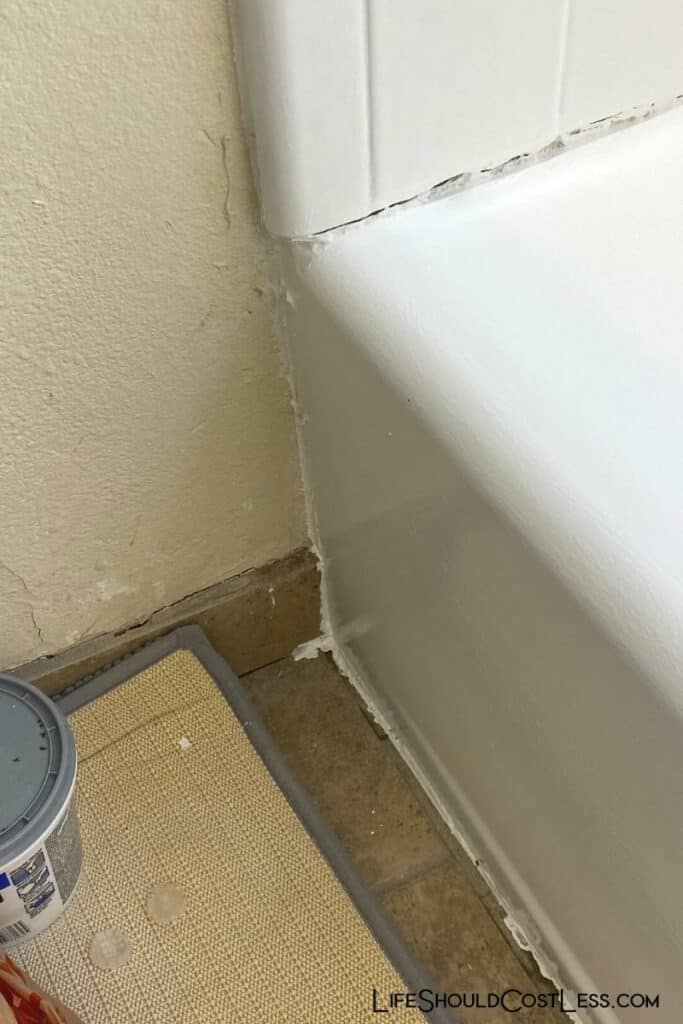
I had noticed before I refinished this tub that this bathroom was always just kinda damp and smelled, and it only took about a week for there to be enough mold build-up on the ceiling and walls above the shower that I would have to scrub it off because it too got embarrassingly bad…
So these next pictures of what things looked like when I took out a few screws and removed the shower door should not have been as surprising to me as it was.

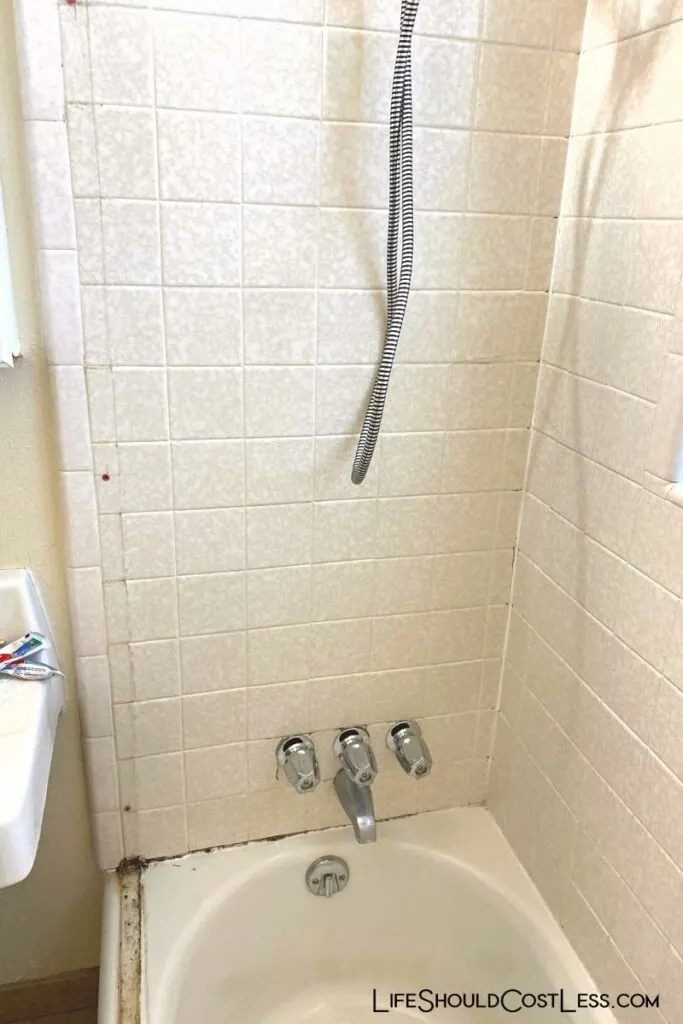


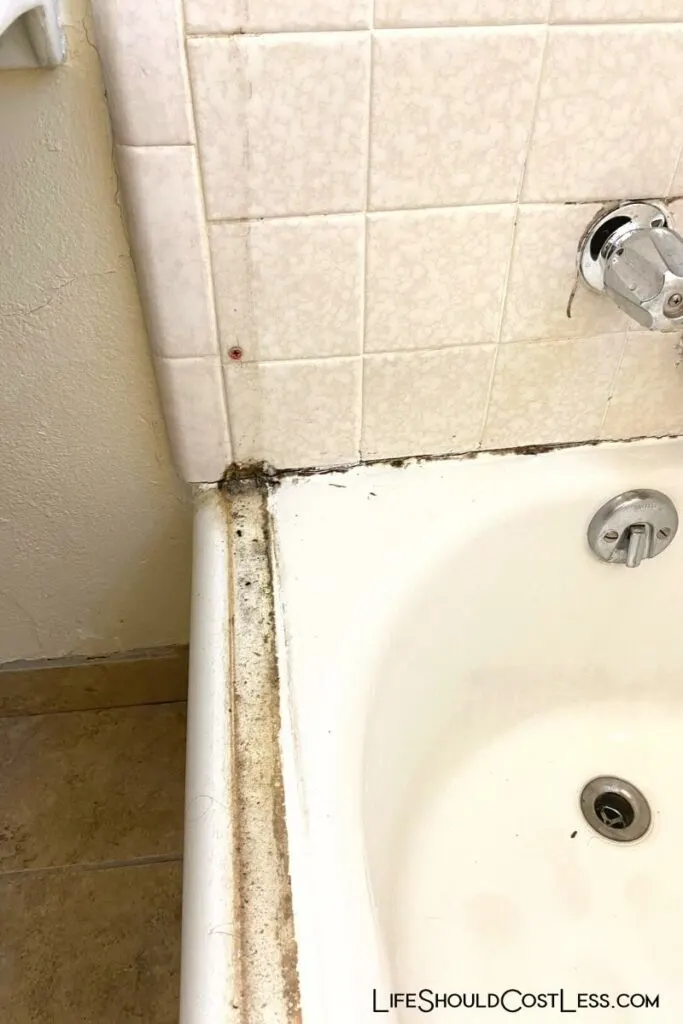
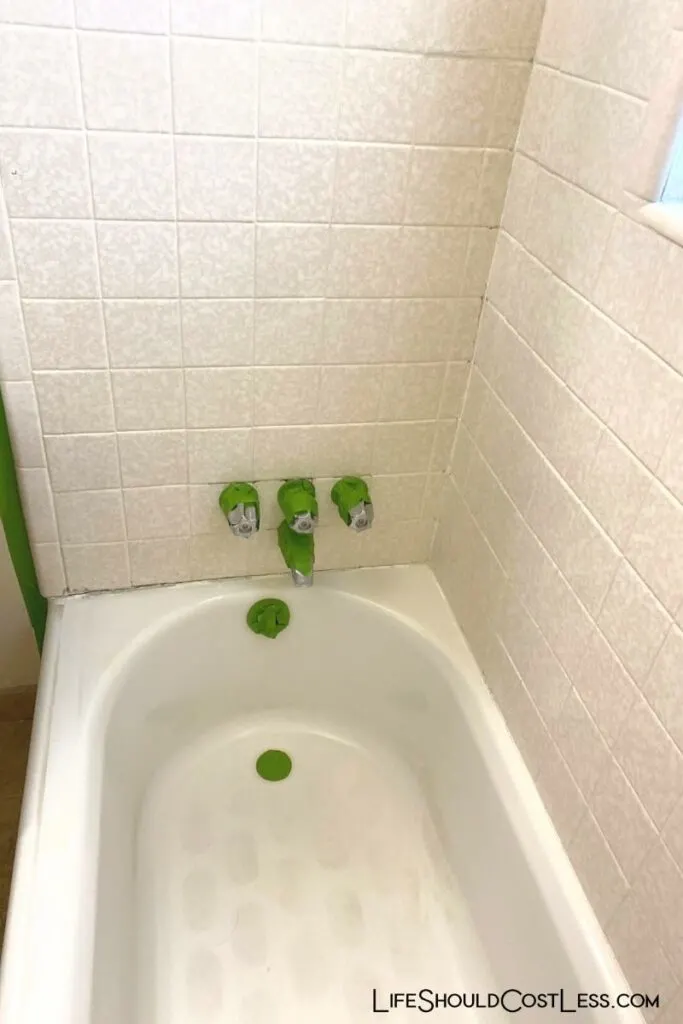
Once I had removed the shower door, it was time to rip out all of the old nasty, moldy, caulk.
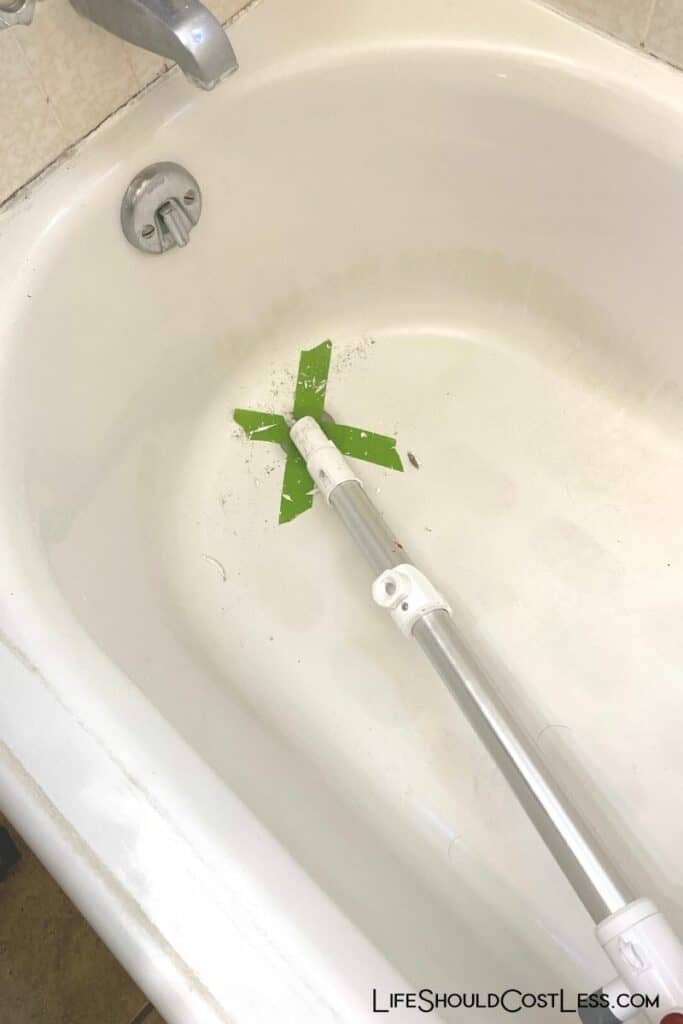
I knew it was going to be messy and didn’t want anything falling into and plugging the drain so I taped over it first.
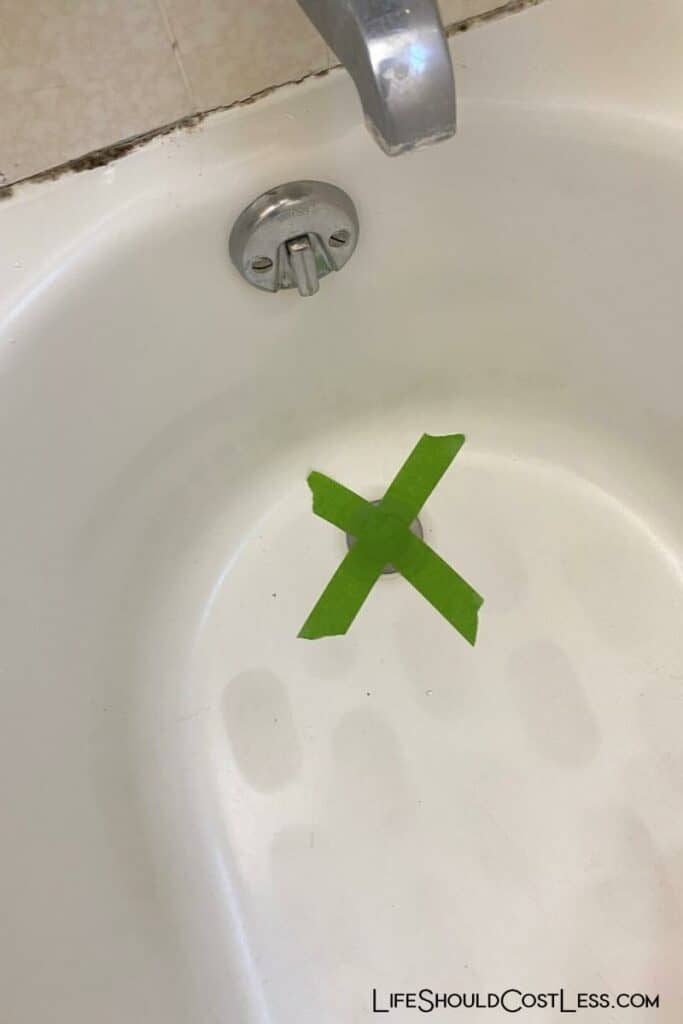

Then using the sharp side of my caulk-tool, I ripped out all the caulk that I could.
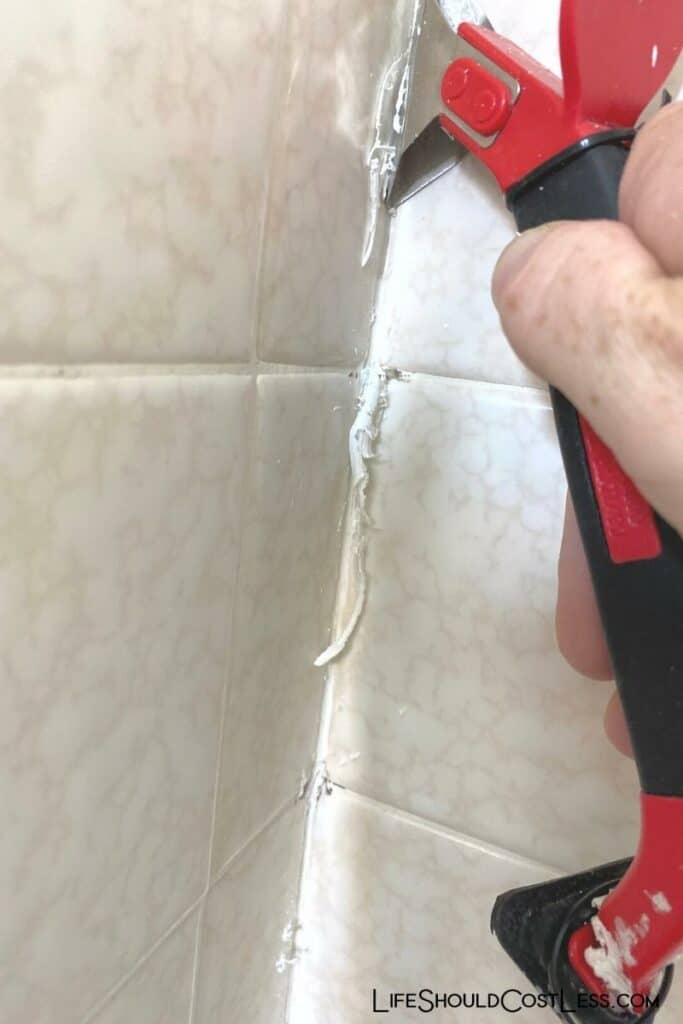


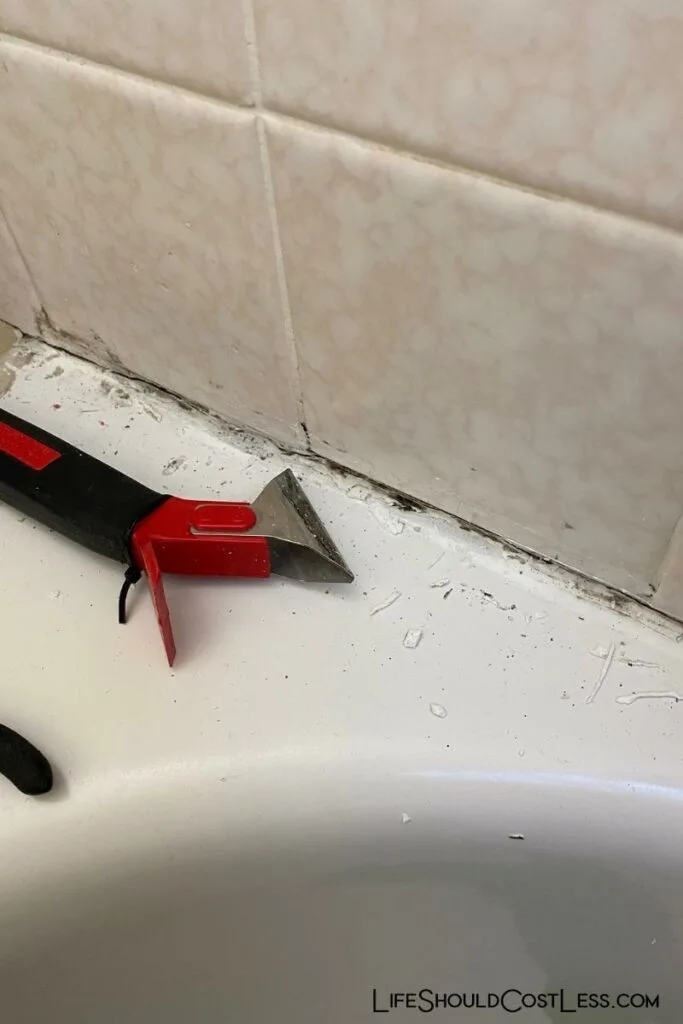
I was right about knowing it would make a mess…so the next step was to vacuum it all out of the tub.

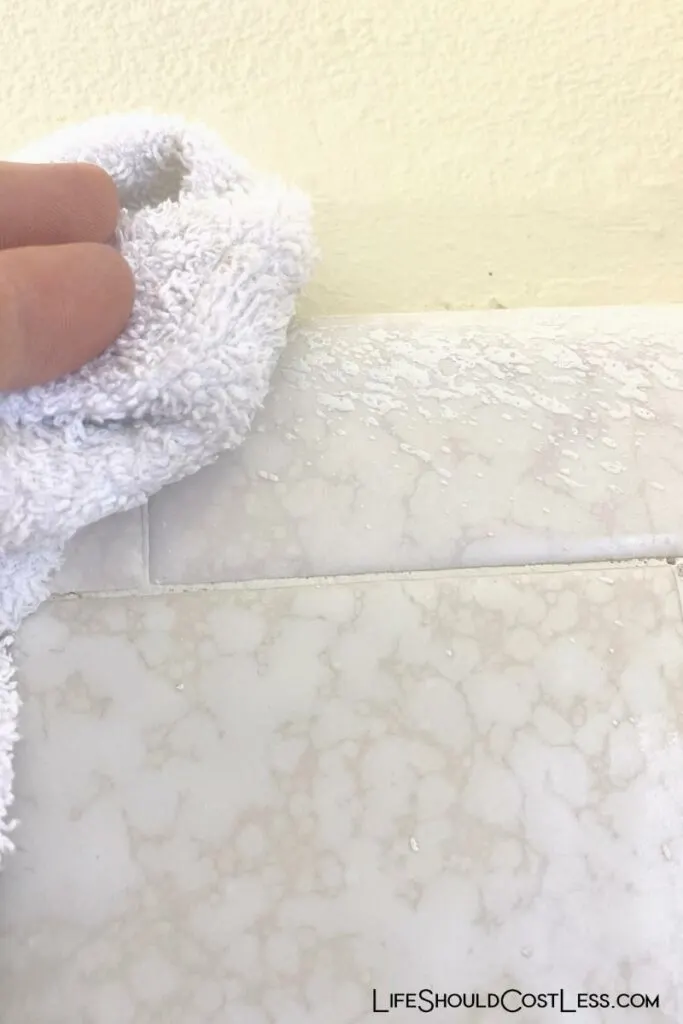
Next, it was time to clean and prep the tile and the tub. To clean it, I went a bit on the overboard side… I first scrubbed everything down with my vinegar spray bottle (it is one part white vinegar to two parts water).
I basically just spritzed everything and let it soak and then scrubbed it down with a scrub brush and wiped it off with a clean rag (vinegar removes mineral deposits).
After that I then scrubbed it down with Original Dawn Dish Soap, also using a scrub brush and water… and rinsed that all down the drain.
I used the Dawn because it is really good at getting rid of any greasy residues that may have been hanging out on the surfaces still.
Next, I decided that there were still some weird spots that looked like there had been something with an adhesive on it, so next I scrubbed everything down with some 91% rubbing alcohol.
I was thrilled that it actually even removed a bunch of old texture from the tile that someone had haphazardly sprayed on the top of the tile when they had textured the walls in the bathroom (I removed the tape over the drain before cleaning).

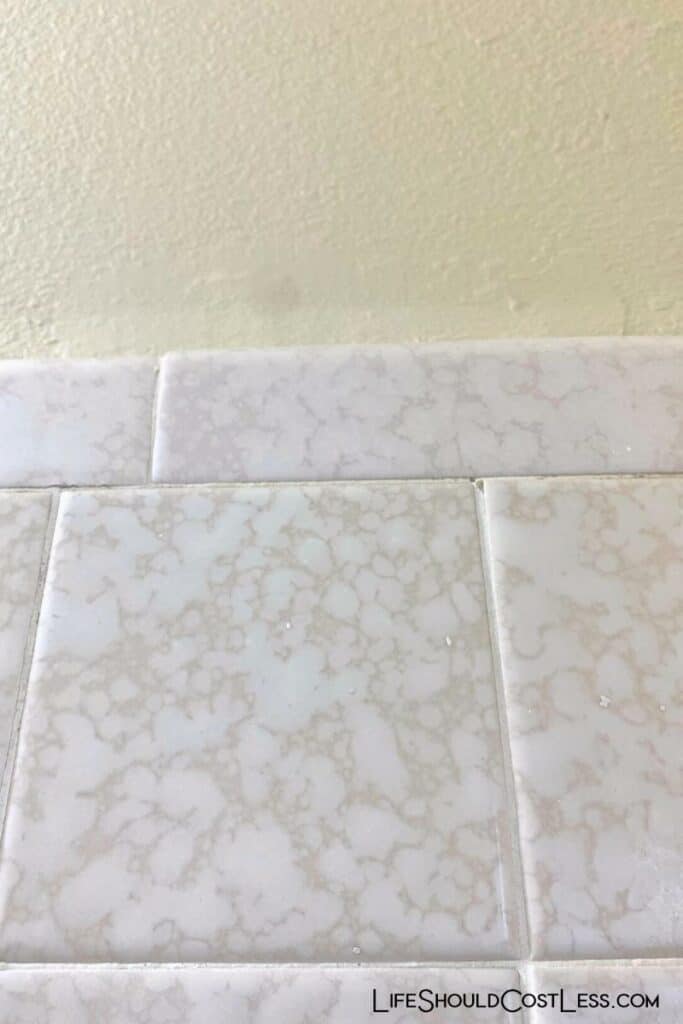
The rubbing alcohol did such a good job with the cleaning, I finally understand why many hotels have their cleaning crew clean out the tub with it.
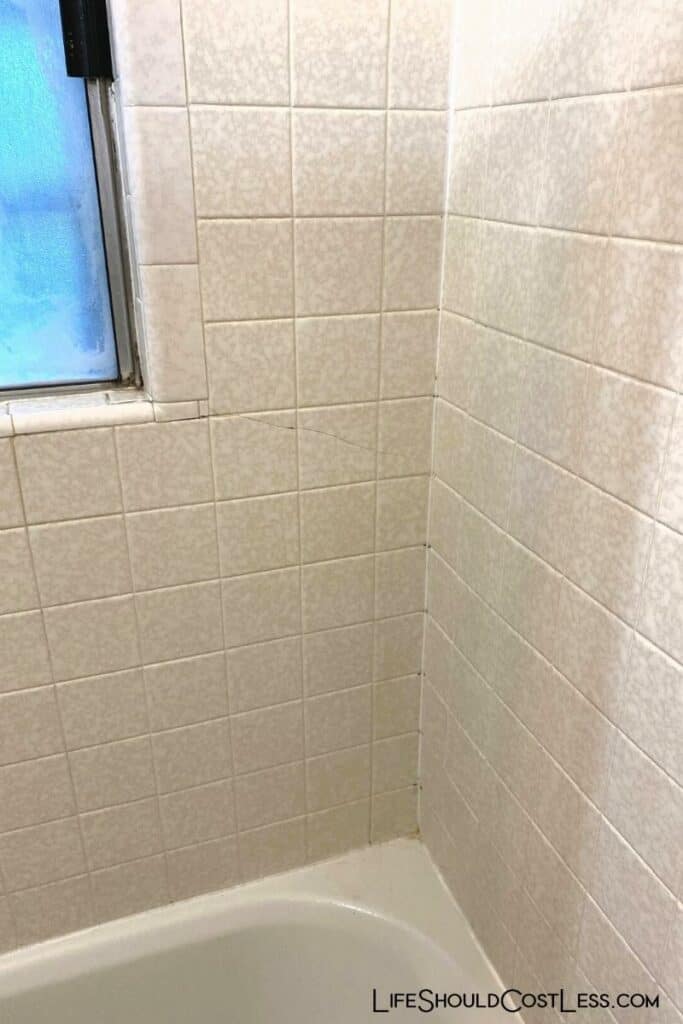
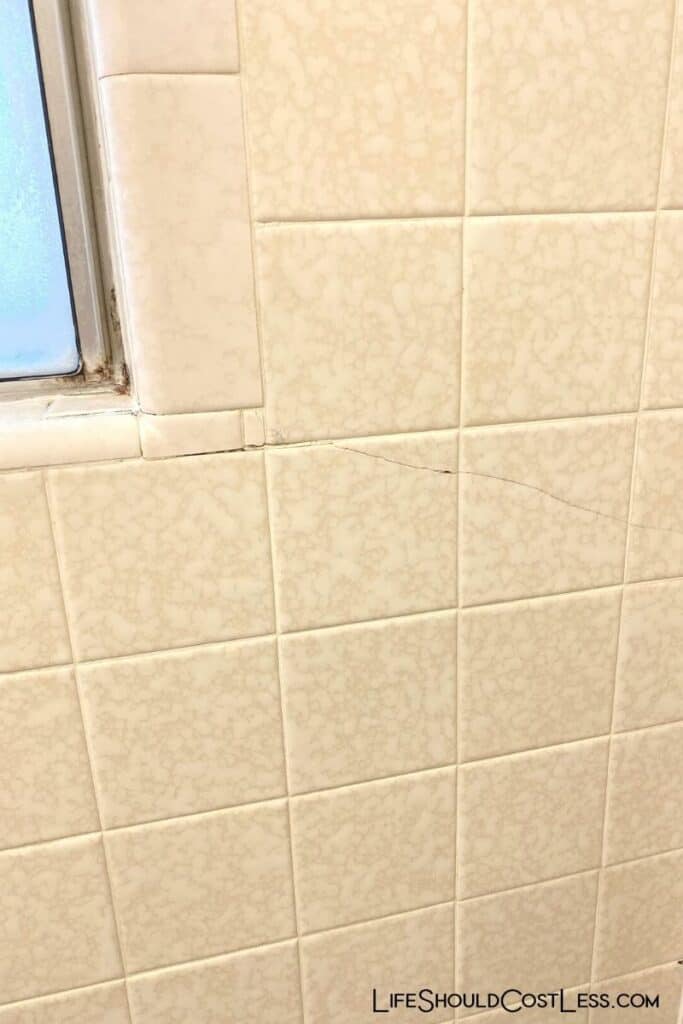
After cleaning, I decided that I needed to fill in any cracks that there were in the tile, as well as the holes from where the shower door had been anchored to the wall…and boy were there a lot of cracks and holes.
I suppose it should be expected when this shower is clearly older than I am and it’s a rental property, so who knows how many people have used it over the years.

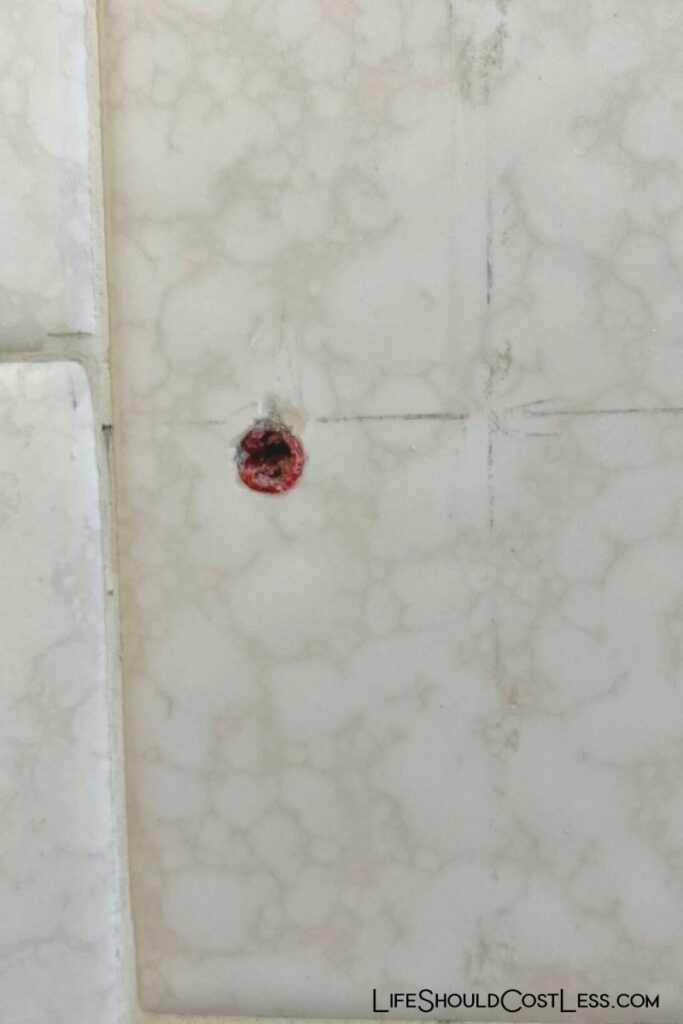
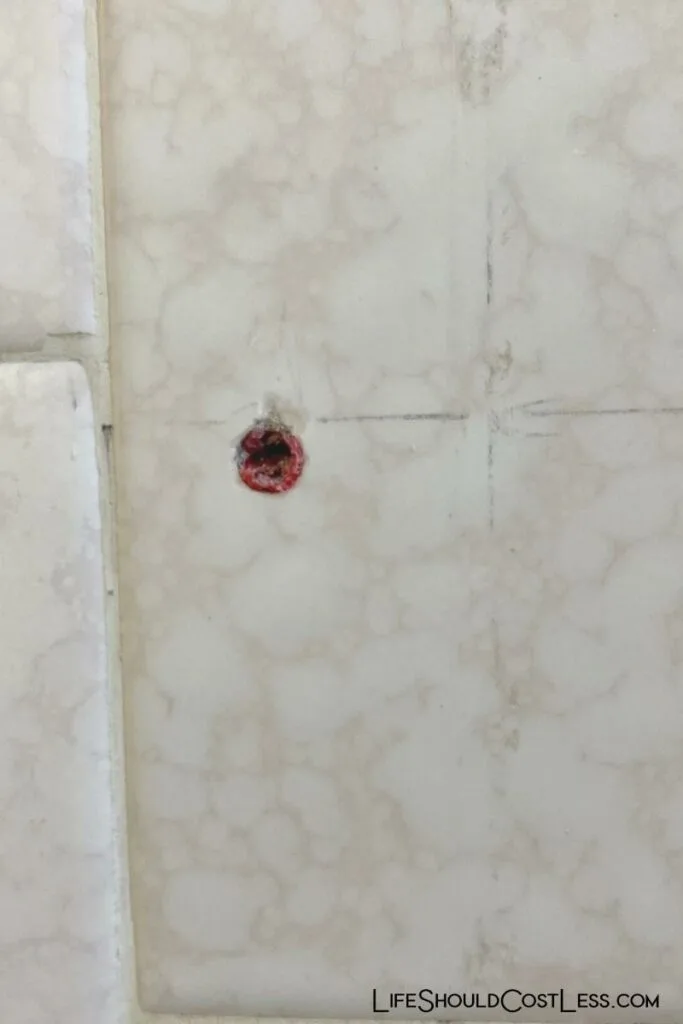
I decided that the only thing I felt comfortable filling the holes and cracks with is grout…for most projects I like to just fill holes with paintable caulk…but I didn’t dare risk it with this project, not knowing whether or not if the Rustoleum Tub & Tile Epoxy would stick to caulk..
So I filled it in, let it dry, sanded it down, and then repeated the process because I wasn’t happy with how well the cracks filled the first time… yes, I let it dry another day before sanding it down the second time.
I will say that if you decide to also fill your cracks with grout and you decide to use an orbital sander to sand it down…make sure that you are wearing long protective clothes and protective glasses/gloves because grout is grainy and it kinda hurts when it flies at you at high speeds.
Normally I would have just used a sanding block, but I wasn’t quite strong enough to sand the grout down by hand.
*Also, before you sand anything down, keep in mind that some older homes have lead paint, so please take any precautions necessary to protect yourself.*
Had this been for my own home and I had to live with the results for the next 20 years…I actually would have taken the sanding one step further and used a Dremel to match the existing grout lines in the tile a bit better…but I did as good of a job as I was willing to for this project.
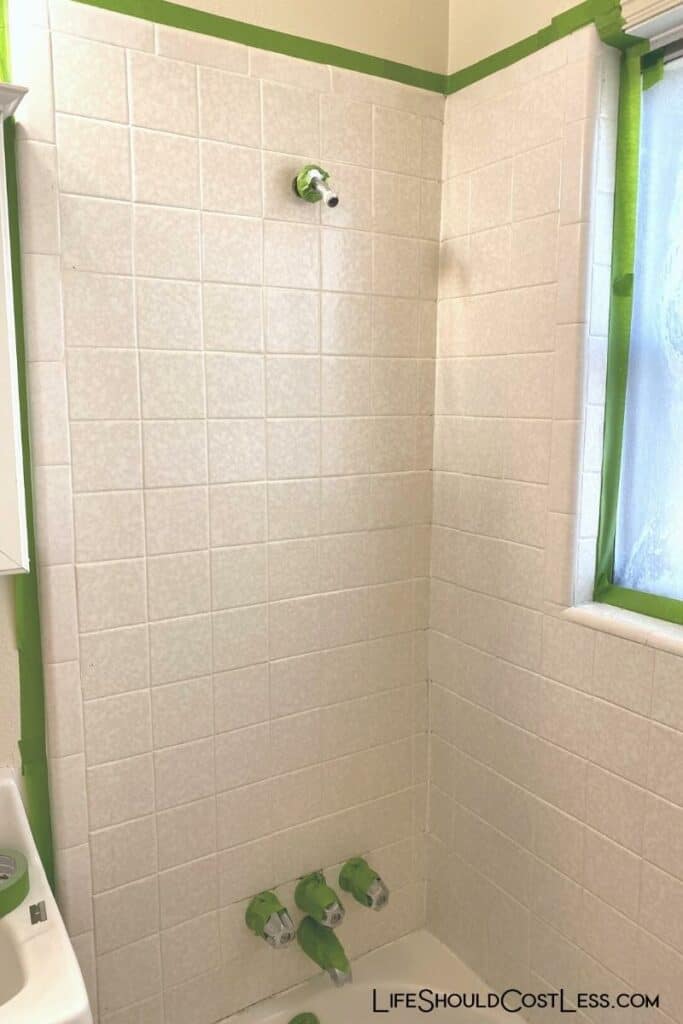
Once I finished sanding down the repairs, I went ahead and sanded the entire tile surround as well as the entire bath tub… this is a step you definitely shouldn’t scrimp on as it will directly affect how well the epoxy paint is going to adhere to your surfaces… the directions said to use tack cloth to clean off all of the areas that you sanded.
I wasn’t happy with how well the tack cloth did…so I took it one step further and scrubbed everything down again with the rubbing alcohol and let it dry…it dries really fast so within minutes of finishing that I was able to tape off.
Which is the very last of the prep work I had to do before I could start painting.


Now it was finally time to get out the Rustoleum Tub And Tile Refinishing “Kit”…keep in mind that I sarcastically call it a “kit” here because it absolutely does not come with anything that you’re going to need to finish this project, I think the product should have a less misleading name.
Which is why I think it’s helpful that I’m sharing all of the steps, so you can see what you have on hand, and realistically know what you’re going to need.

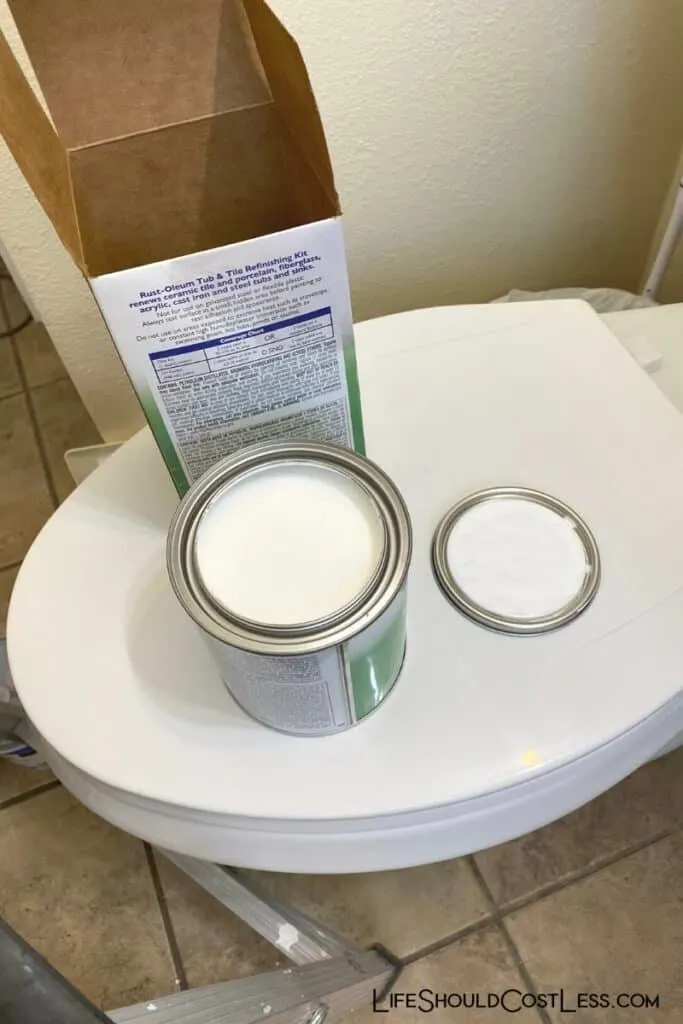
Anyway, end of my rant there… the “kit” comes with two little containers that you are supposed to mix together.
Luckily, you can just dump the smaller one into the bigger one and you don’t have to get another container to mix them.
Please keep in mind that once you mix it, you are on a timer to finish that coat…you can’t just come back to it… epoxy is finicky that way…and it does say on the product that you can recoat within an hour.
I honestly don’t think that you should recoat that quickly…it needs more time than that to just sit and cure…I gave my shower/tub a day or two to cure between coats.
I recommend mixing the two containers together for a couple of minutes,and then letting it sit for about five minutes before you try to start painting with it.
The texture of the epoxy, once it has sat for a few minutes after being mixed…is kinda similar to what a soupy finger nail polish would be.
I decided that there were just too many cracks and holes that I had repaired to use a roller on my shower, so I used a two inch nicer quality paint brush.
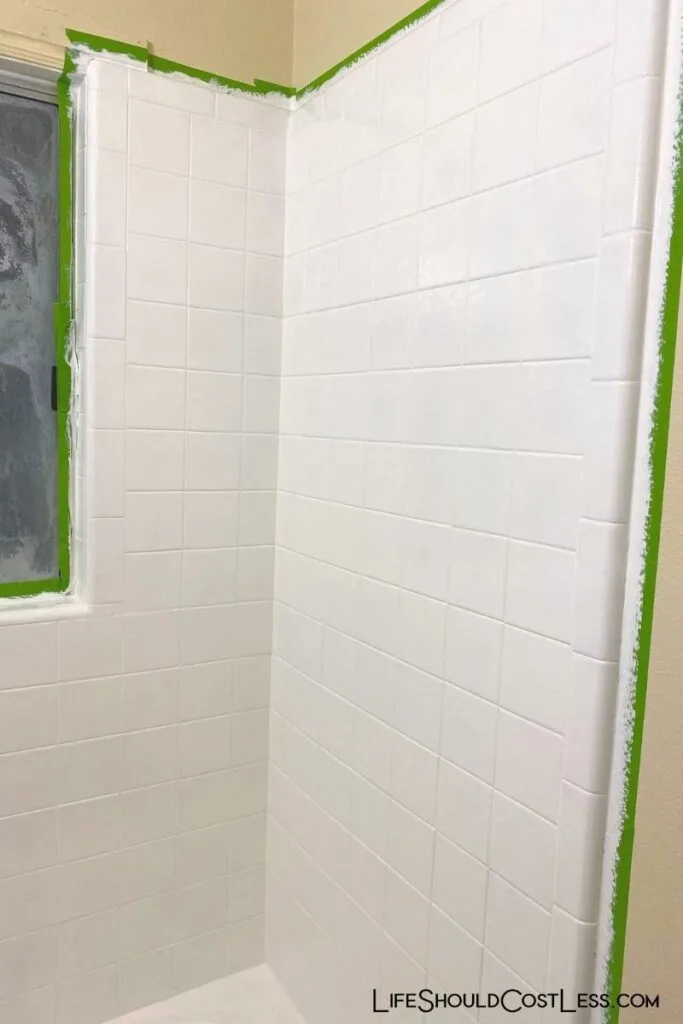
For the first coat, I started top to bottom, left to right with the tile surround…and then I did the tub afterwards… the first, thin, coat looked like crap as first coats are supposed to…but it was still an improvement over the way the bathroom had looked before.


I waited a day or two and the used a damp rag to dust everything (to make sure there was no dust that would cause problems with paint sticking) and let it dry before doing the second coat.
On the second coat I went from right to left, top to bottom on the tile surround, followed by the tub again…I figured that I would get better coverage if I came at it from a different angle.
Then another day or two later I did the third and final coat.


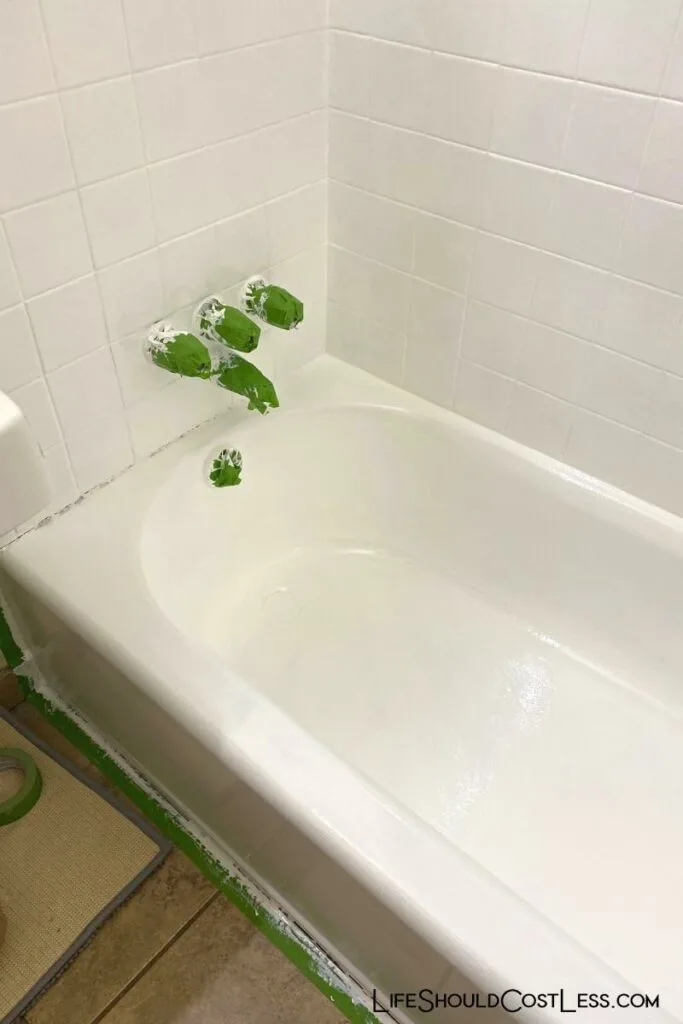
While I was giving it time to cure, before use, I did the finish work…so, in order to get the tape off in a straight line (especially around the plumbing fixtures) I used an Xacto type razor knife.
I was not a fan of how bad the epoxy paint had bled onto the tile under the tape…it says on the kit to use rubbing alcohol to clean up any mess that got on tile and such…but rubbing alcohol was not strong enough to do the job.
I was able to get it off pretty easily with straight acetone though.
The next thing that I did was put another line of tape down, in an attempt to get a clean line when caulking (I put fresh tape around all of the plumbing hardware too before caulking).
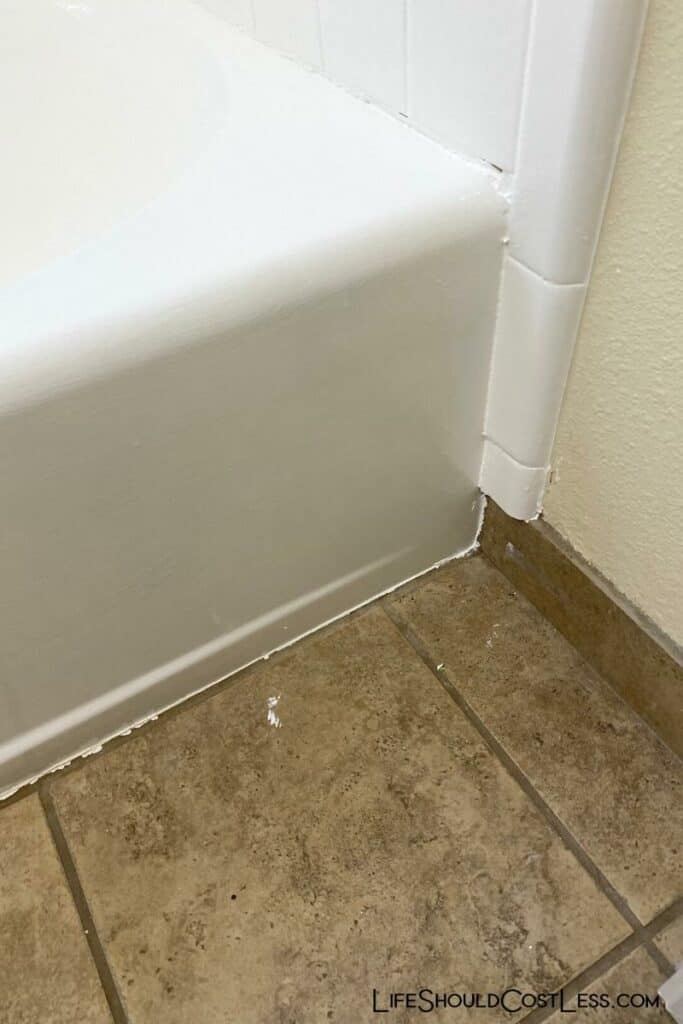
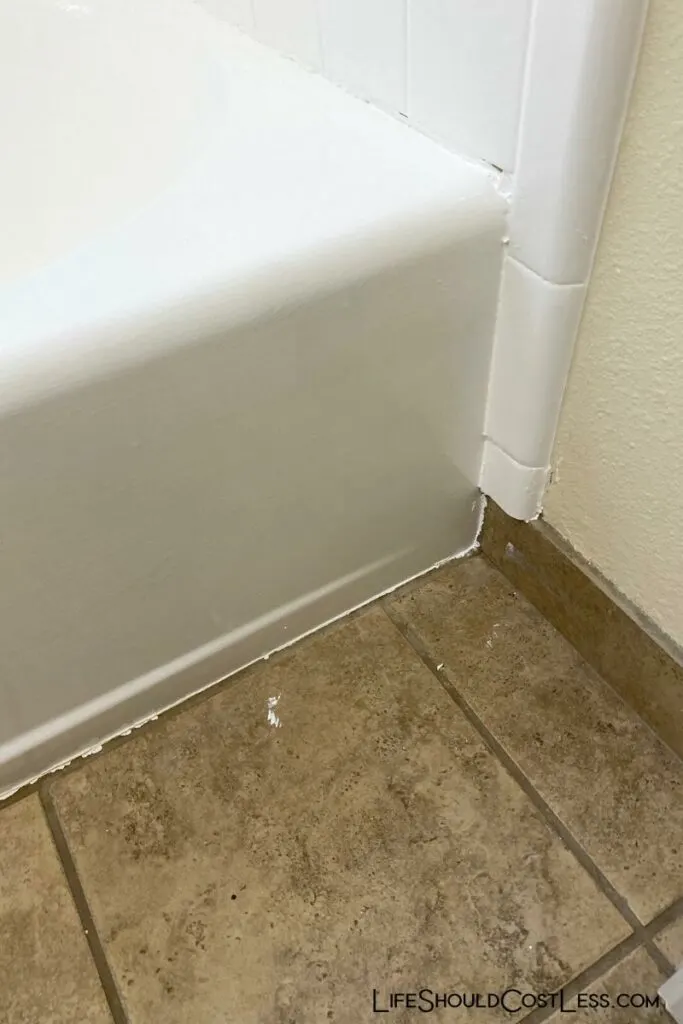
First I did a coat of clear caulk to seal the tape, let it dry, and then followed it with a white caulk(don’t skip this step, especially inside the tub around the drain and such…creating a seal will give you better long-term results so that no water gets under the epoxy).
I was very happy with the result of a nice crisp caulk line and everything just looked so much better.
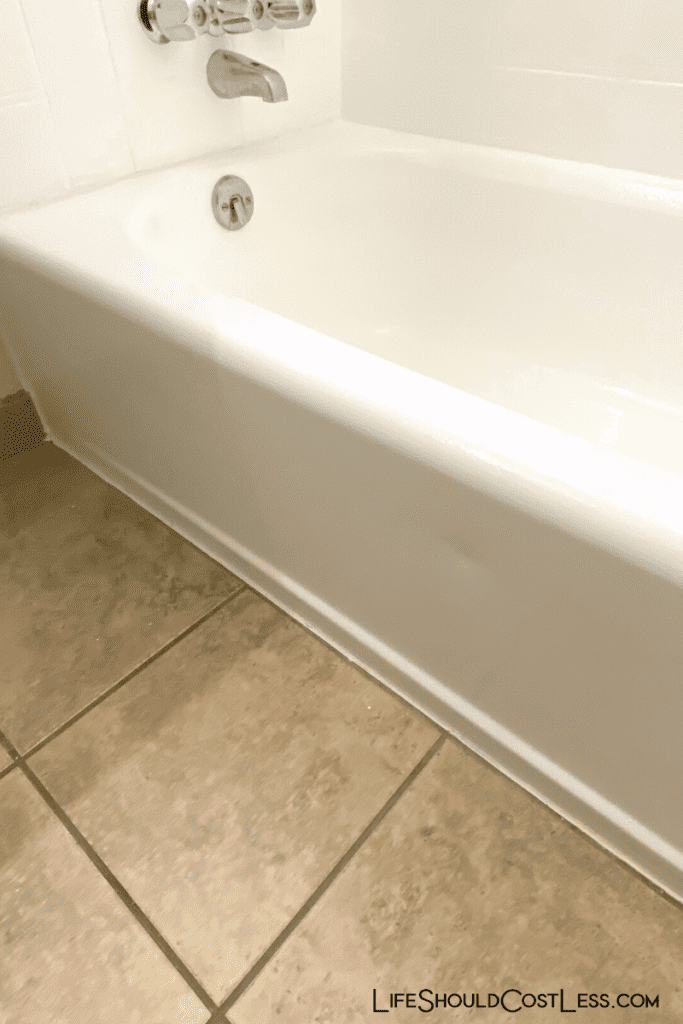

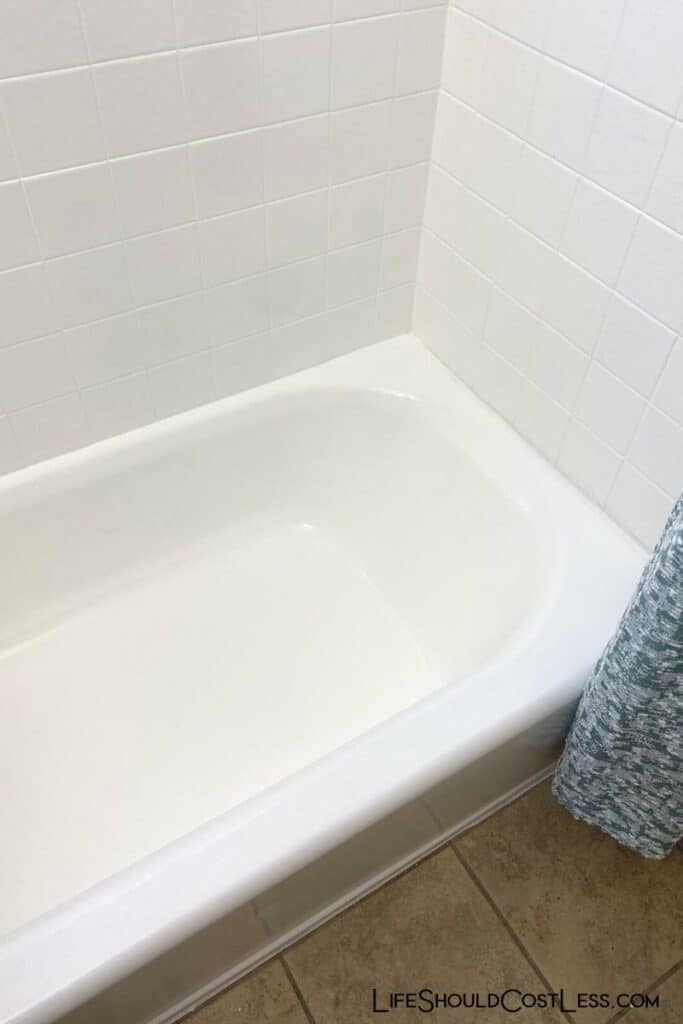
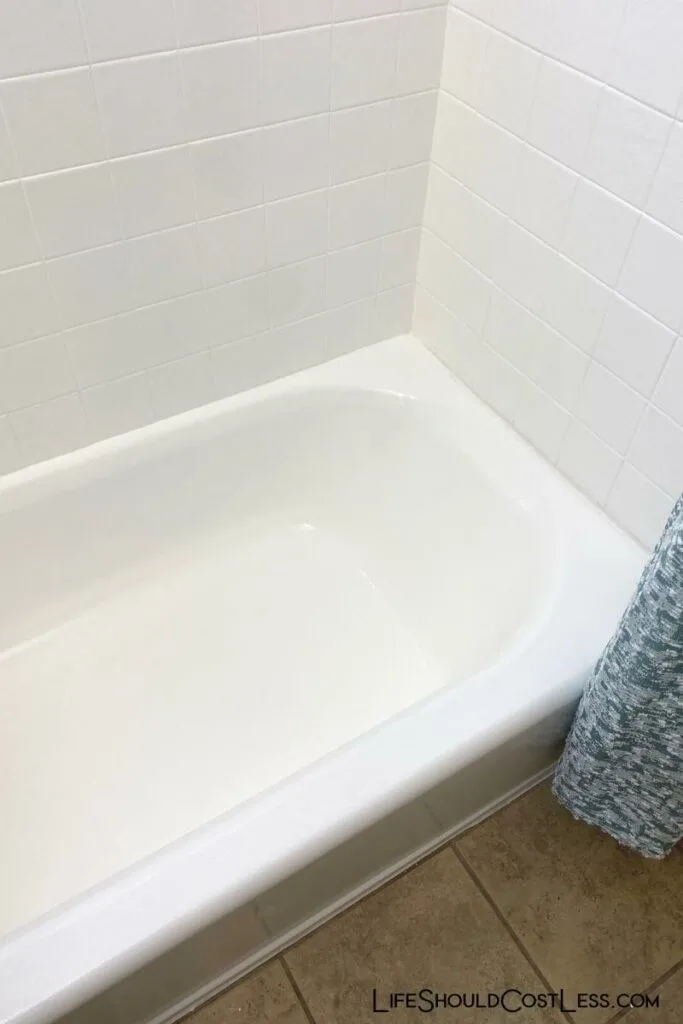
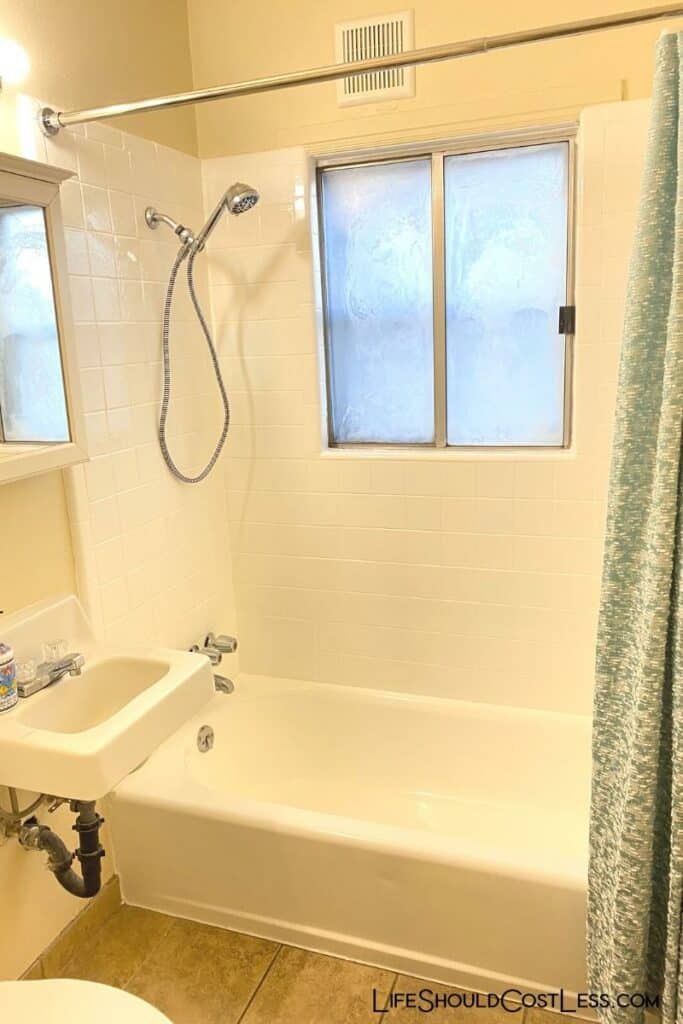
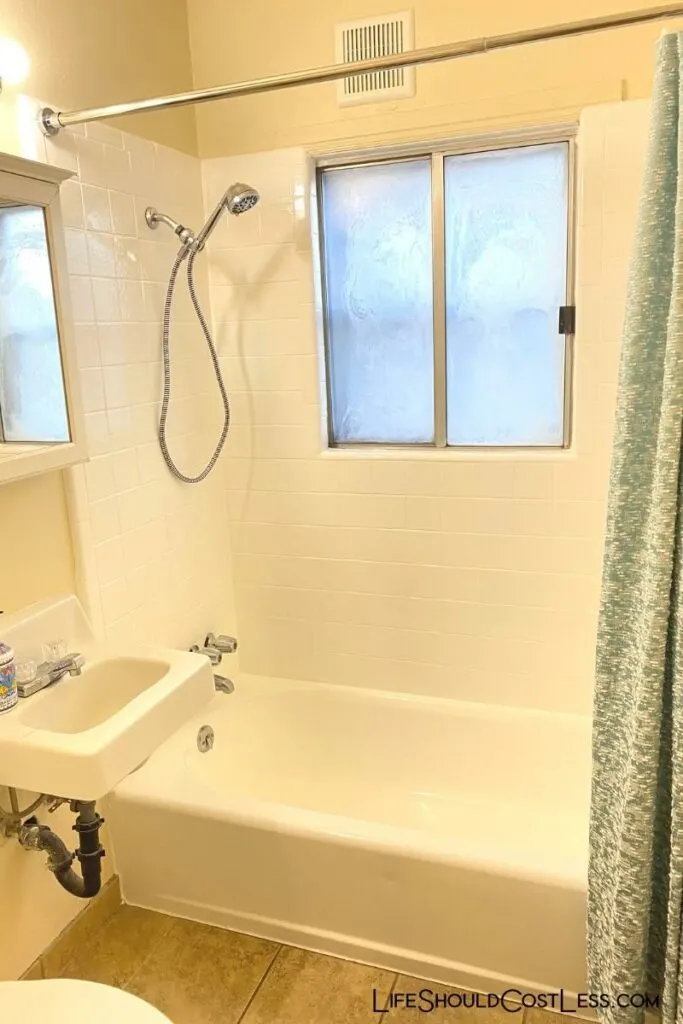
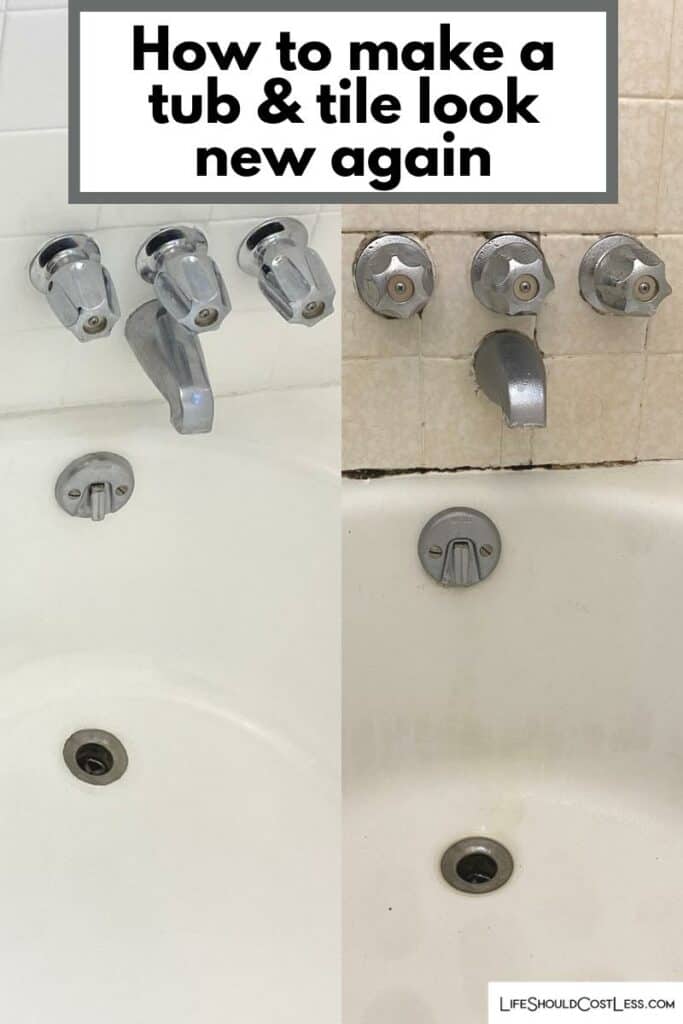
Here is what my tub and tile looked like after I was done…talk about a night and day difference!
The best part is, that this tiny bathroom feels so much bigger not having that gross old shower door anymore, the room no longer stays damp or gets moldy after showers/baths.
I am just plain so much happier to feel like I’m living in less of a dump…to be frank, it was literally one of the grossest bathrooms I have ever had to use so now I have so much less anxiety when using it.
How long does it take to refinish a tub and tile surround?
Some of you are really not going to ike my opinion on how long it takes to complete this project…but I’m also a firm believer that if you’re going to do something you gotta do it the right way, all the way to the end of the finish work.
Or you should just hire out the job to someone that will because it will either be a major eye-sore, or it will cost you more in the long-run by having to pay a professional to re-do it later on.
Before I even started, I did some searching around the internet on how long it should take to let an acrylic epoxy (what this stuff is made out of) cure, and the best answer that I could find was 9-10 days minimum.
I factored in the fact that I was going to be exposing it to water (often very hot because I like my baths as hot as I can stand) on a regular basis, so I decided that I was going to let it cure one to two days between each coat.
Then I decided to err on the side of caution (because I still want it to look good long after I move away)…and I let my tub cure for a full 30 days after I finished with my final coat.
The actual prep and painting of each coat probably took me about 24 hours worth of effort.
I suggest, not skimping or rushing through your prep work either… so that it will actually stick really well to the tile and the tub.
So far, I have had great success with my steaming hot baths and it hasn’t chipped or bubbled in any way…I think giving it a good amount of time to just sit and cure was the only reason that my results have been as good as they are.
So, if you want great results too, I definitely recommend being patient and allowing a minimum of 10-12 days to cure once you are done with your painting and re-caulking.
How many Rustoleum Tub & Tile Refinishing kits does it take to refinish a tub?
How many kits did it take to refinish my bathtub and the tile around it?
Trying to figure out how many kits I was going to need to buy was my biggest question as I was getting ready to refinish my tub.
Going by the guidelines that were listed in the product description I decided that I was going to try to overshoot my needs, and so I ordered three kits…which I thought would be at least one too many as I was just going to be painting white over off-white/cream tile.
I really thought that I would have an extra kit just laying around when I was done… but, in order to get good enough results for me to be happy with it, it took all three kits to do my bathtub and tile.
Basically each kit was one coat, so that is a good rule of thumb on how much you’re going to need if you have a similar bathroom setup to mine.
So, if you are going to be refinishing a darker color of tile or a nastier tub than mine was… keep in mind that it may require three or more coats/kits to get your desired results.
Product review for Rustoleum tub and tile refinishing kit
All in all, I am pretty happy with the results… my bathroom is no longer so disgusting that I’m afraid, or rather embarrassed, to have company over and it was a cheap enough project that even this single mama, that has several kids, was able to stretch the budget and make it work.
The only things that I am not happy about with the results is that it seems to scuff fairly easily, like if you drop a bottle of shampoo or something it will leave a mark.
In which case I just get out a magic eraser and very carefully get it wet and gently scrub the scuffs off in a circular motion.
I feel like I have to be a little bit more gentle in the cleaning process so that I don’t damage the “paint job”… but I mean, that is a very small price to pay for having a no-longer-disgusting bathroom situation.
I also wanted to mention that Rustoleum has a mini-touch-up kit, which I am pretty excited about because it means that periodically I can touch things up to keep my results looking brand new…but I am a little bit OCD, so maybe I’m just a little special for being excited about that.
How much does it actually cost to refinish a bathtub?
Out the door, I’d say it cost me about $200 USD to refinish my tub and tile… but I also left the Rustoleum Tub & Tile Refinishing Kits in my Amazon shopping cart until the price dropped significantly, and then I jumped on them…doing that alone saved me a good $30-$40.
I also saved some money on my nice paint brushes by finding some cheap, but good branded, ones at my local Re-Store (it took one paint brush per coat because it dries hard and fairly fast and I wasn’t willing to work with chemicals to clean them out).
I did have a few of the tools/cleaning supplies needed on hand so it didn’t quite cost me as much, out of pocket, as it will some people.
If you don’t have any of the tools and such, it may cost you closer to $300 if you have a similar situation to my tub and tile.
Is bathtub refinishing worth it?
After looking at my pics of the process and reading what I had to say about it being a little bit of a beast of a project, many of you are probably wondering if it is even worth the effort.
Frankly, I think that it all depends on your situation.
If you’re 100% sure you’re going to be gutting and replacing your bathroom within the next three to five years, I would probably recommend that you just save your money and just wait for the renovation then because it is a bit of a hassle.
However, if you’re like me and you just can’t function with a funky looking main bathroom… this project is definitely one to consider.
Would I do this project again? Absolutely, but it gives off a LOT of fumes, so I would wait until spring or fall to do it because it was a struggle to ventilate properly, and keep my home warm enough as I worked on this project during some cold months.
To do a really good job, and to get good, long-lasting results… this is a fairly time-consuming project (which is also more for an intermediate or above level DIYer), so keep that in mind.
If you’re not going to take the time to do it right, and just rush through it, this particular DIY project may not be a good fit for you or your situation.
Thanks so much for stopping by my blog and supporting my endeavors to make people’s lives a little easier/better/more affordable.
If you liked this post, or found it helpful in any way, please make sure to share it with your family, friends, and co-workers via social media.
Or you could even send them the direct link via email. Whichever way you choose to spread the love, I super appreciate it! ~Sarah
How To Follow & Support This Site
- If you would like to subscribe to my email list, go here.
- Make sure to follow along via social media, by going here.
- If you would like to learn how to really show your support to this site (at no cost to you), go here.
- If you would like to make a direct donation to the site, go here.
If you would like to check out my entire DIY section, go here.
Otherwise, here are five of my other DIY posts that you’re going to want to check out too:
For those of you that would like the option of another “pinnable” image to share on Pinterest, here you go. Thanks again so much for the support!:

*This article was originally posted this website on December 31, 2021 and has since been updated to remain current in the information provided.