Learn how you can build your very own DIY Bucket Air Conditioner (using a five gallon bucket) at home with this easy to follow, step by step, photo tutorial. Also as an added bonus, I have included some tips that will help you save some money and headache along the way. It will also make it easy so that you can make it your own so that it can easily fit in with the decor style in your home if you wish to.

DIY Bucket A/C, A Little About This Project
Hot summer months bring with them the high cost of keeping our homes nice and cool.
My poor kids live in attic bedrooms where there is no insulation in the eaves of the roof, so their bedrooms get extremely toasty-hot in there.
Having small children in those bedrooms, and being a single mom, I don’t really dare use a window Air Conditioning unit because I feel like it would make it just that much easier for someone to break into our home…
So when I heard about five gallon bucket air conditioners I knew that I had to give them a shot to try to safely cool the upstairs because the two vents up there just didn’t seem to be cutting it.
How does a bucket A/C work?
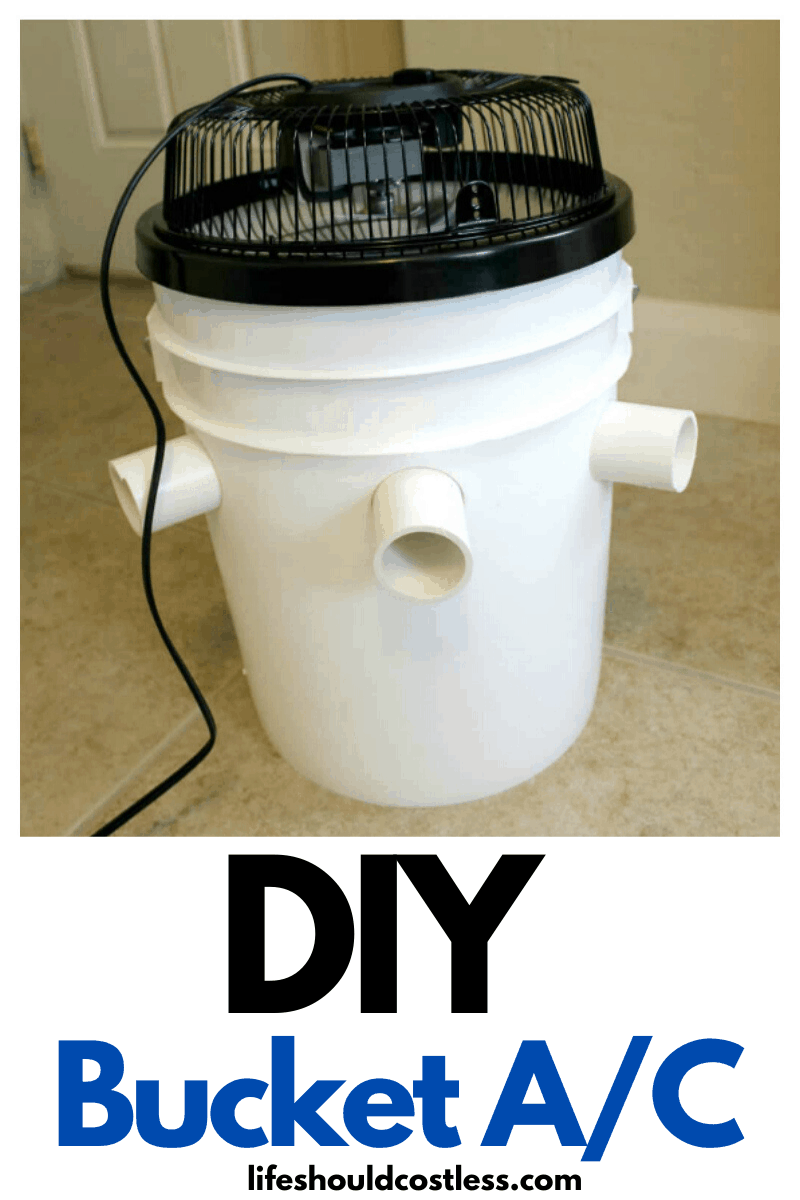
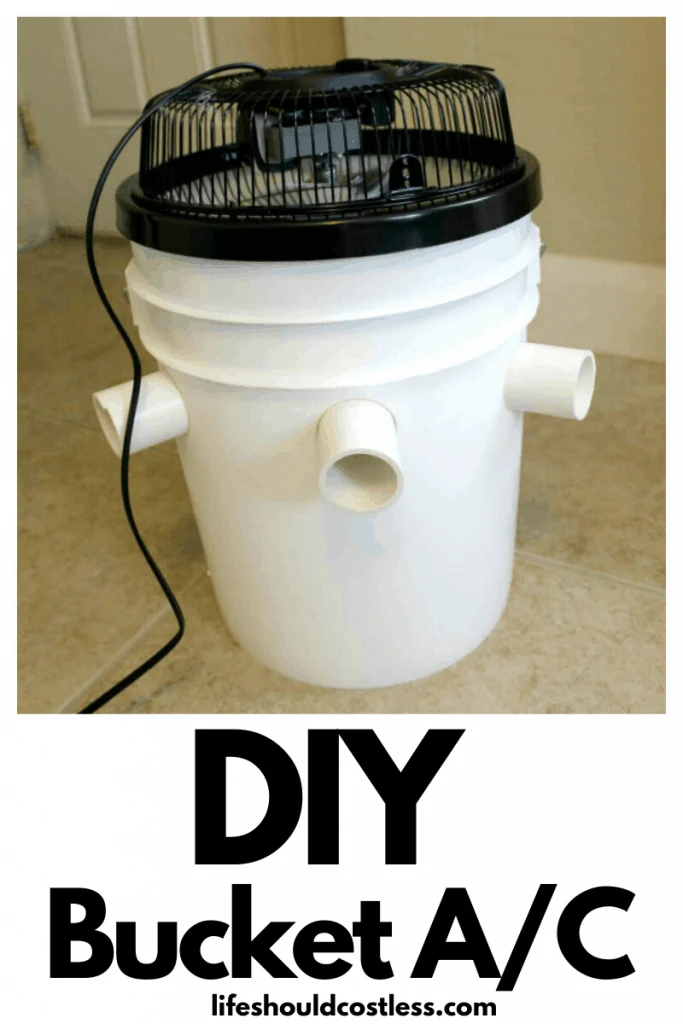
For those of you that may not be familiar with these particular types of A/C units, they work by drawing the air into the bucket with the fan, then the air then gets cooled by a frozen gallon jug of water.
Then that cooled air gets released/ pushed out by the fan through the pvc pipes into the room…it’s actually a pretty cool method.
Please keep in mind that there is more than one way to do things…I just did these in a way that both made sense to me, was within my budget, as well as made them look a little less ghetto (just a personal opinion) than many other units that I have seen.
How To Build A Homemade Air Conditioner In A Five Gallon Bucket
Let’s just jump right into the tutorial. It’s a long one, but I actually do things a little differently than what I have seen other people do when making these, plus I try to tell you where I got the things that I had trouble finding, which is win/win.
To start out, I got my five gallon buckets from The Home Depot. I knew that I was going to need a couple of different sized hole saw bits for my cordless drill and I really didn’t want to spend much money on them, so I popped into Harbor Freight to see if they had anything that would work.
Luckily, Harbor Freight had a hole saw set that did just the trick without totally breaking the bank (Amazon also has one for pretty cheap found here), especially considering that since I have never needed them for a project, who knows if I’ll even need them in the future.


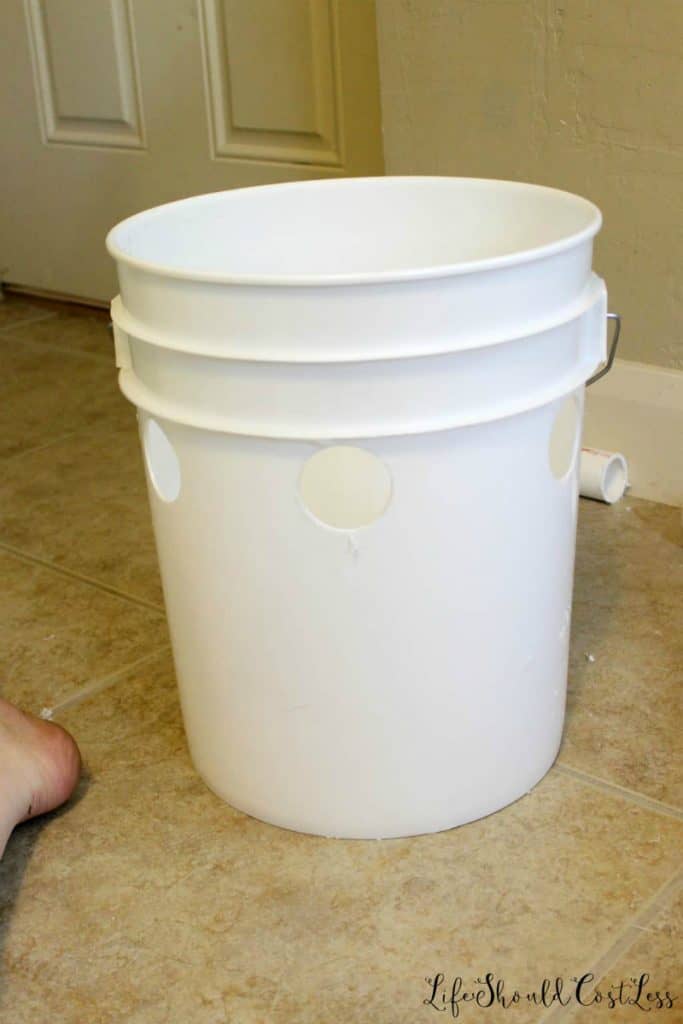
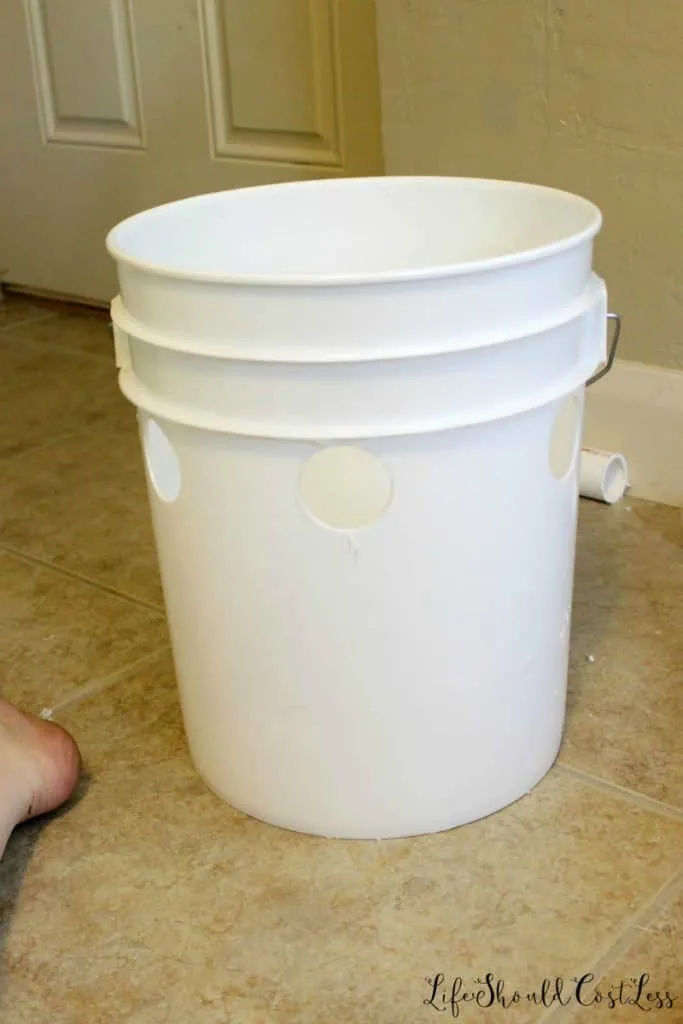
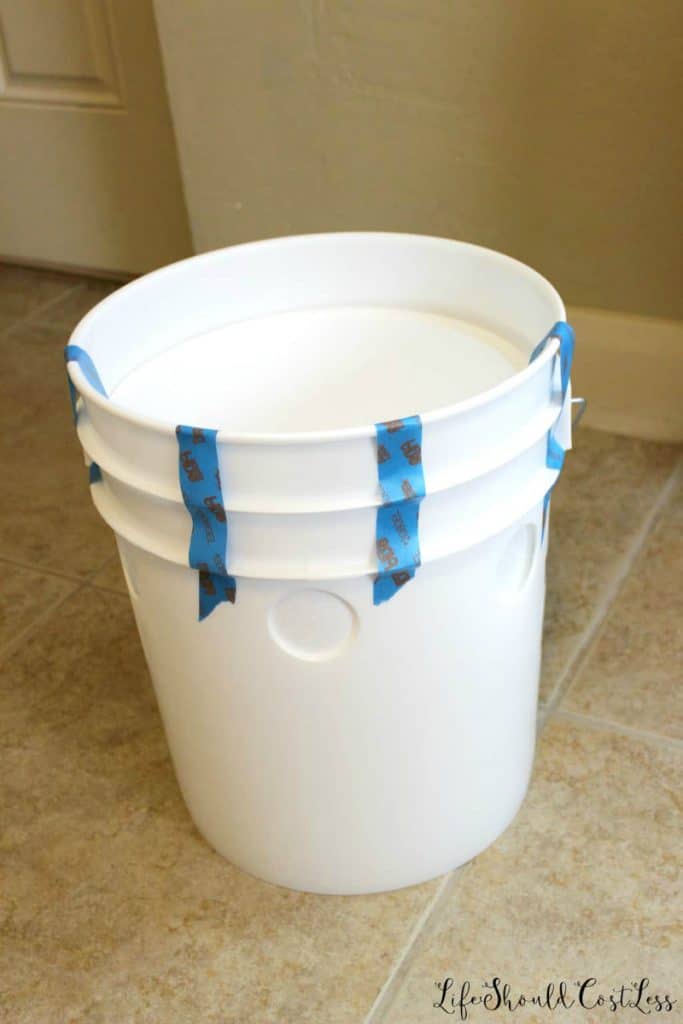
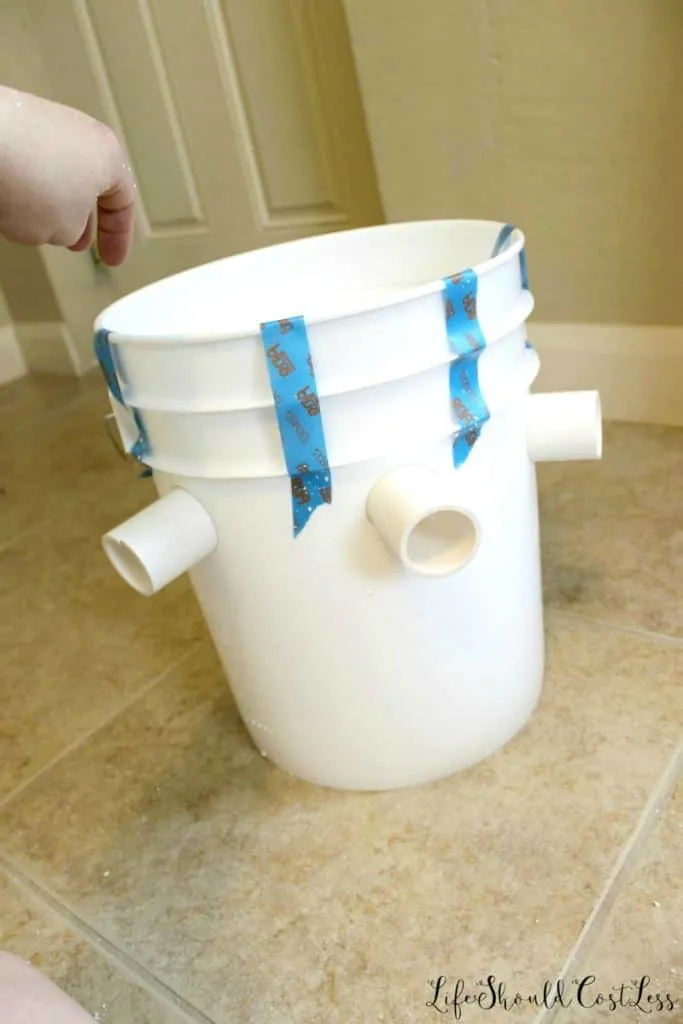
The first thing that I did was mark the buckets where I knew that I was going to want to drill the holes that would have the PVC pipe sticking out.
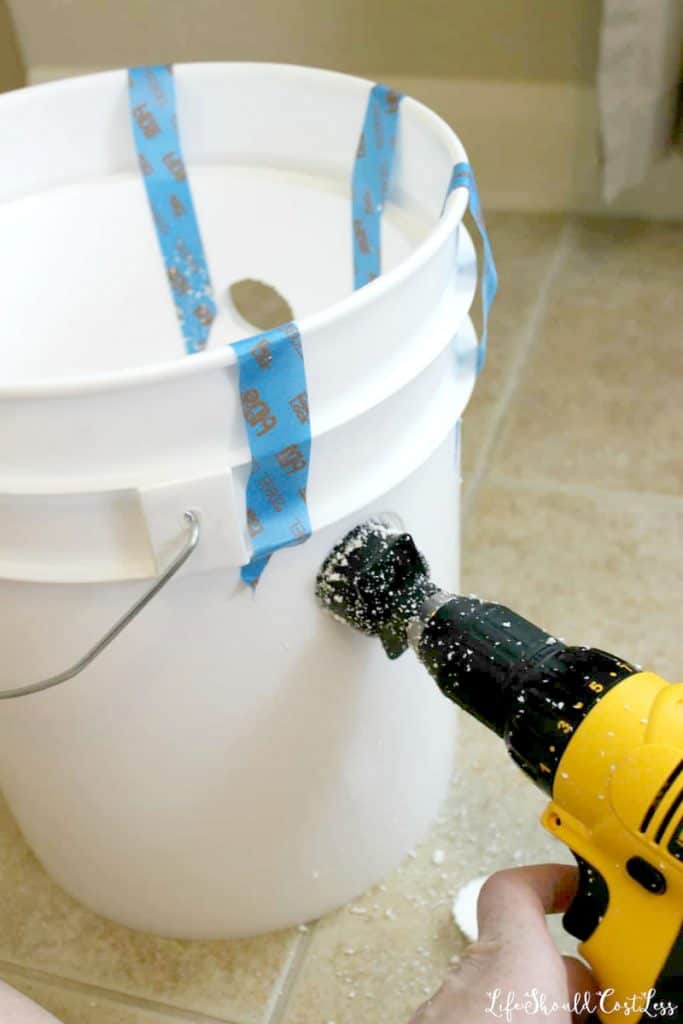
I used 1 & 1/2″ PVC for this project and so I used the 1 & 1/2″ hole saw bit to make the holes in the buckets…go figure.
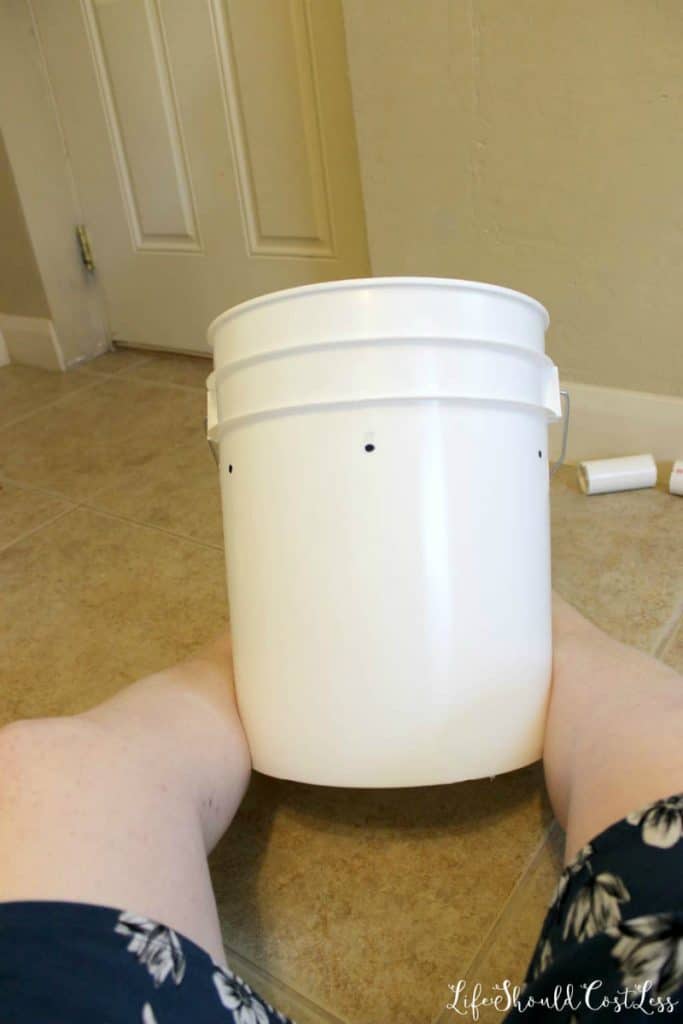


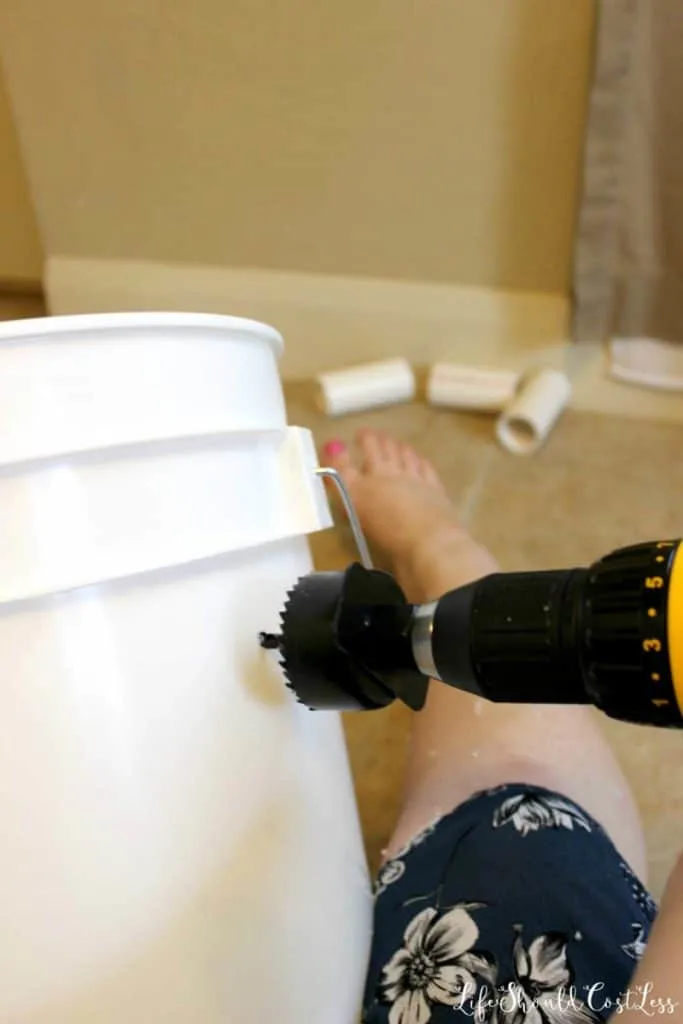

It was actually much easier to use the hole saw bit than I thought it would be…it’s just really really messy, so plan on a fair amount of cleanup afterwards.
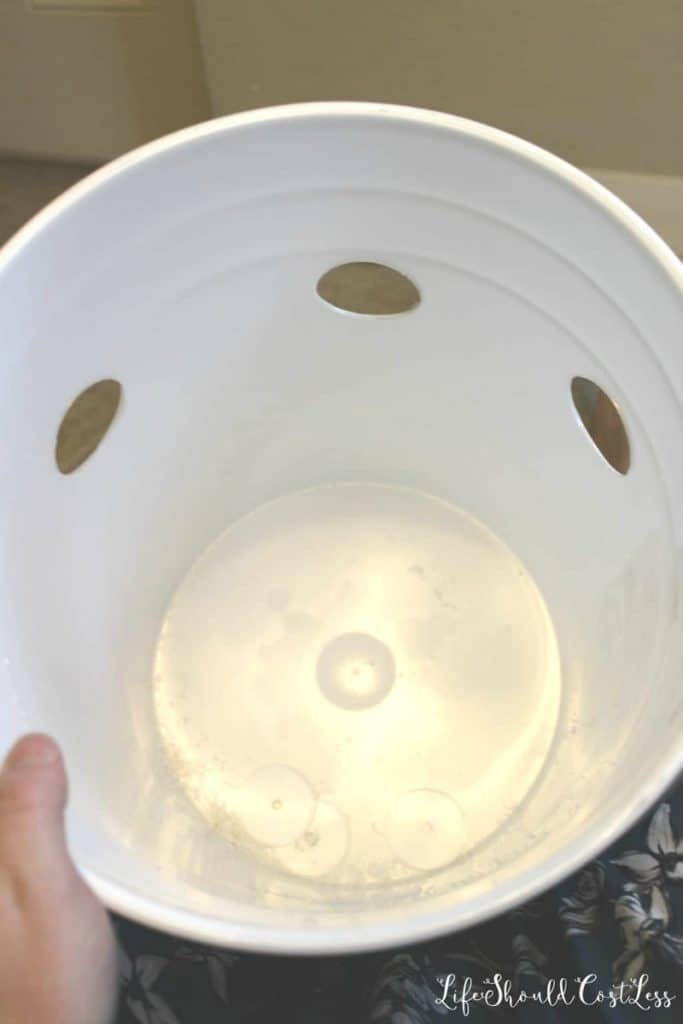
Just showing you what it looks like inside the bucket once the holes have been drilled.

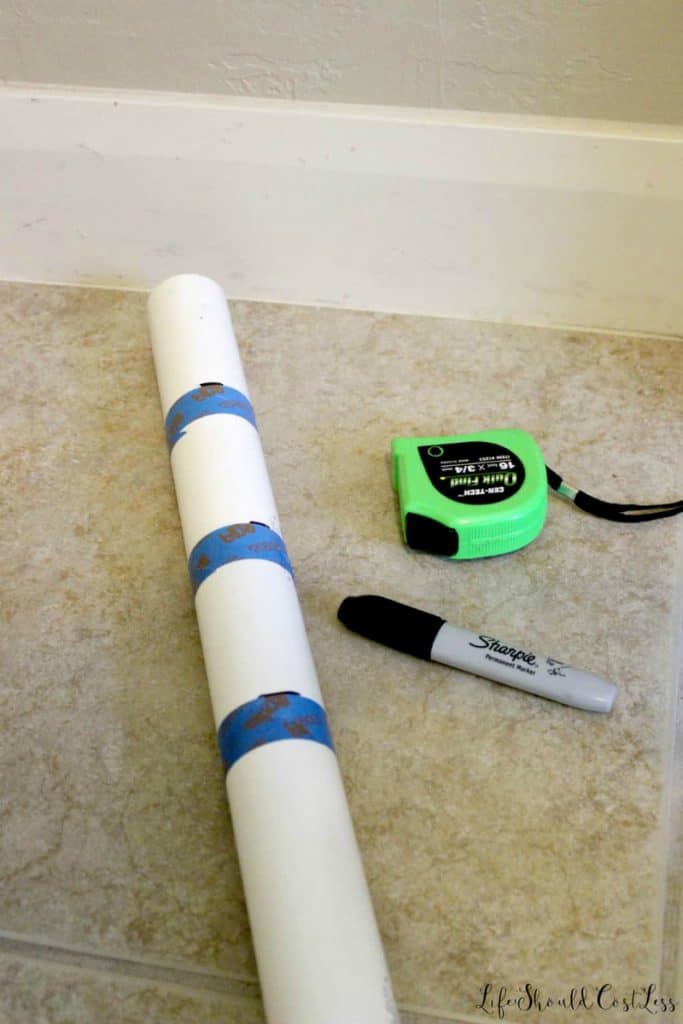
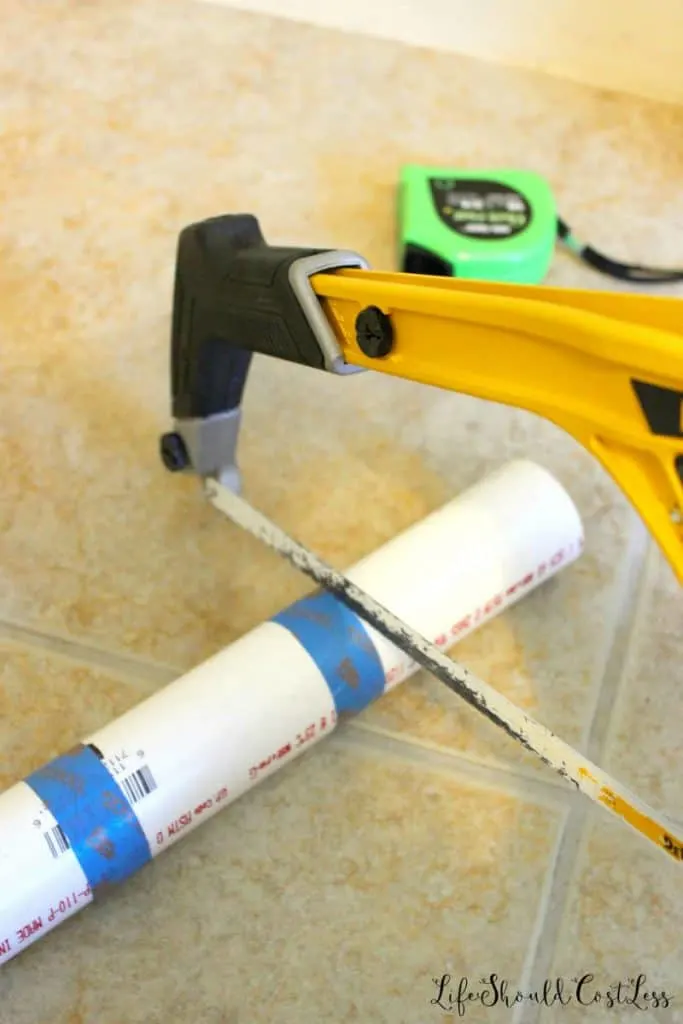
To cut the PVC to my desired length I marked four inches, taped off as a guide for cutting, and then used a hack saw to cut to length.


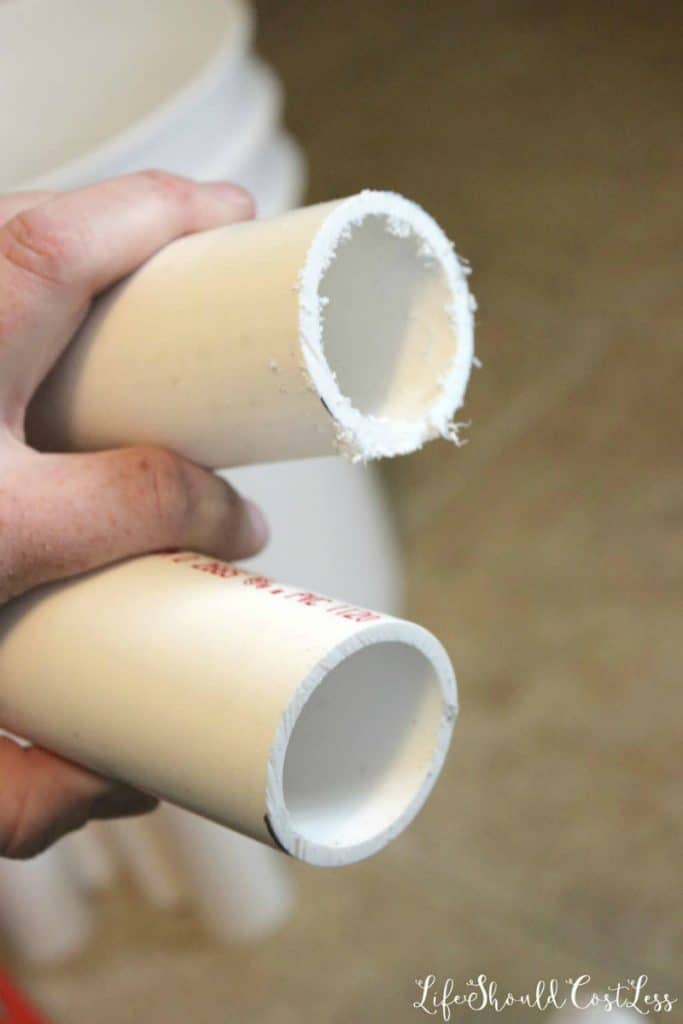
When I was done with the cutting I decided that the plastic on both the buckets and the pipes were looking pretty crazy because of the sawing so I used a sanding block and sanded them all down anywhere that there was plastic shavings hanging off.
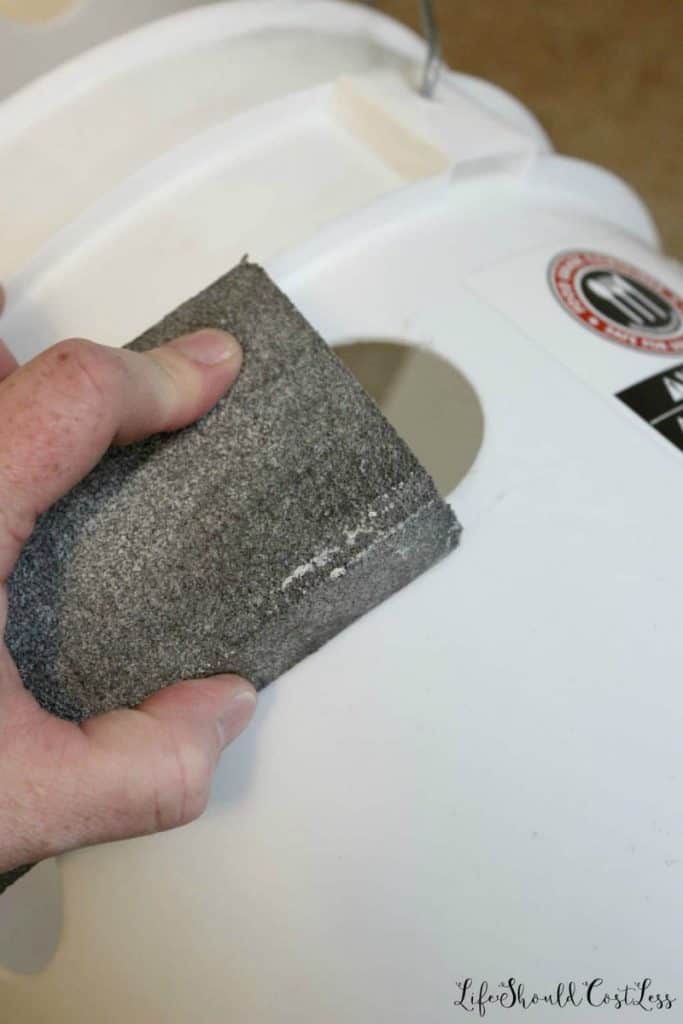
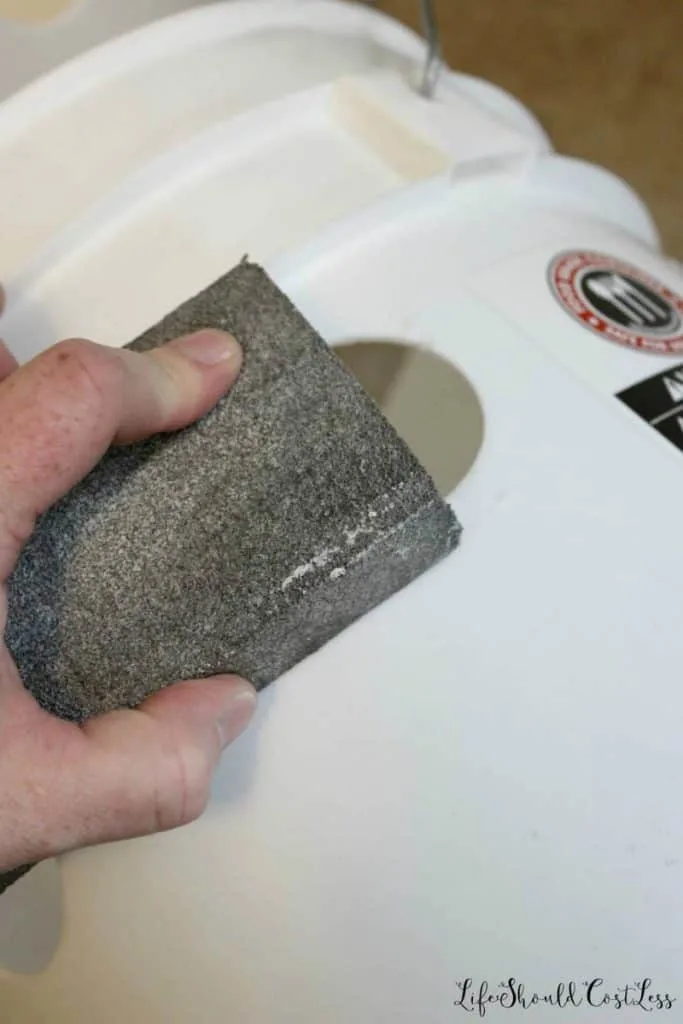
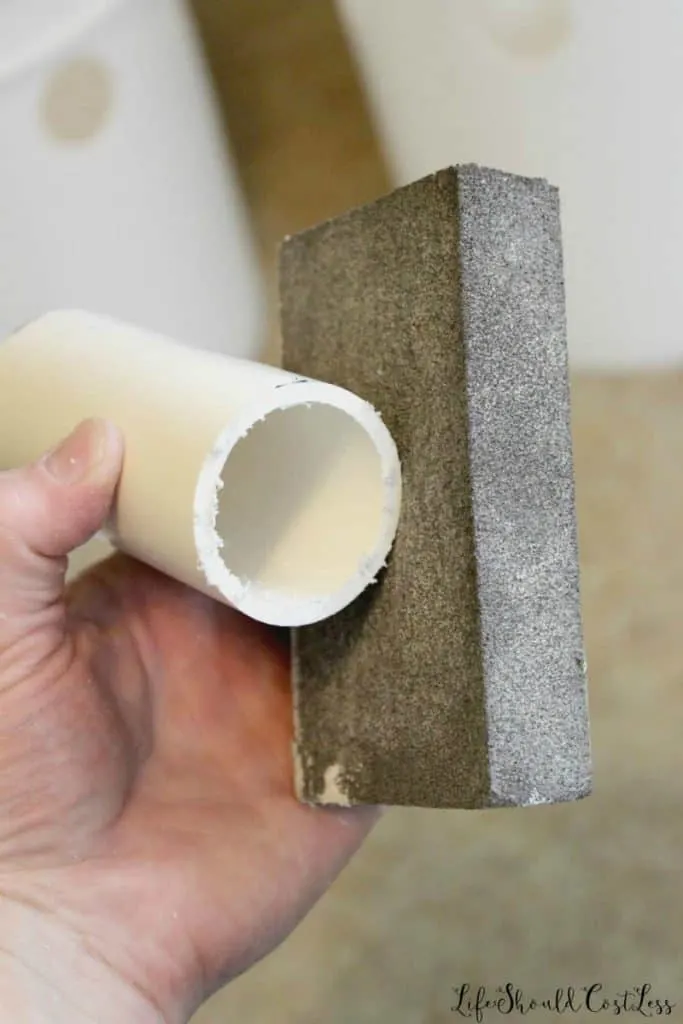
Sanding is a really important step to having a finished product that looks a little better, so don’t skip this step…
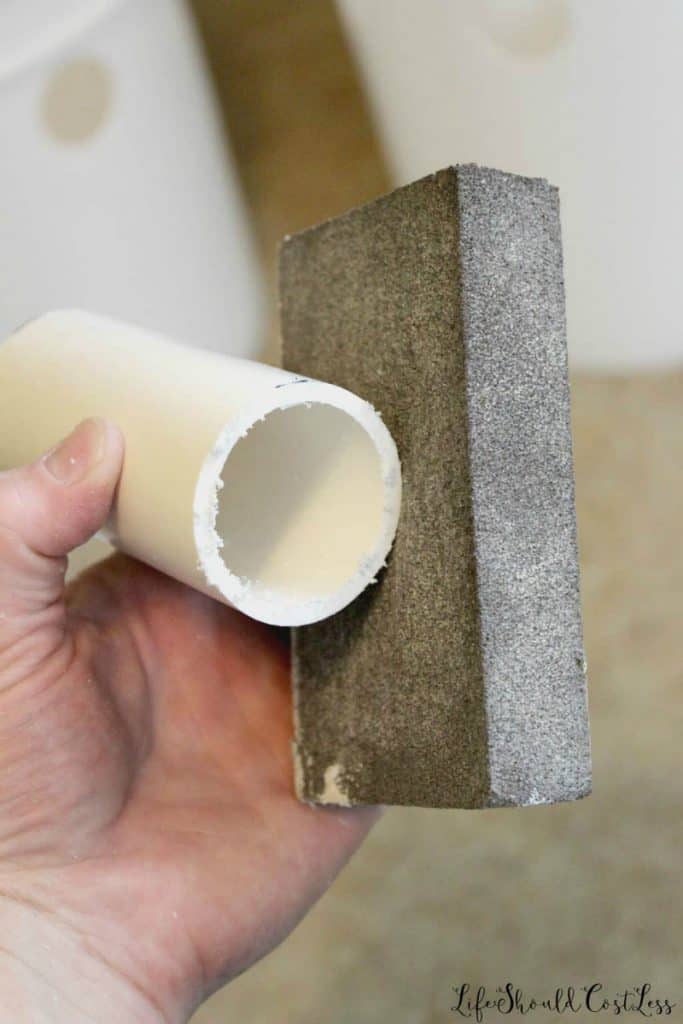
Next I show you guys a pipe without sanding vs one that has been sanded… you just gotta do it if you’re going to the trouble to make these, make them look at least semi-decent.

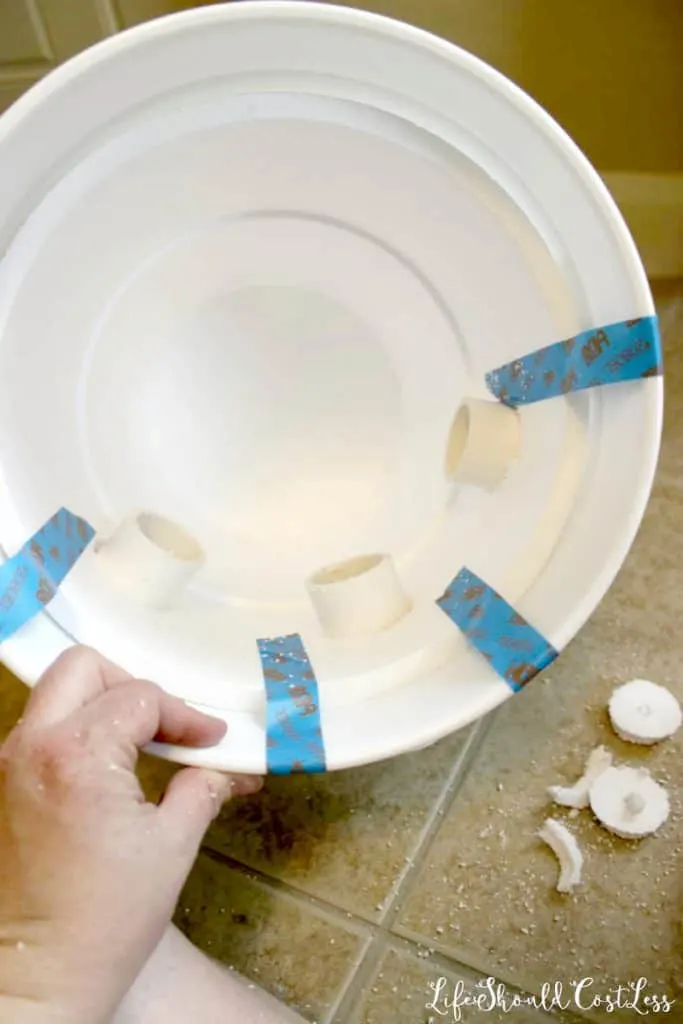
Next it was time to put the five gallon bucket styrofoam liner into the bucket.
This was actually the piece of the project that I had the hardest time finding and every single tutorial that I looked at did not give any direction as to where to find a liner for the five gallon buckets.
I was finally able to find them on Home Depot’s website.
There was an option of buying a three pack and I went ahead and did the site to store option and went and picked them up(I made three units).
It’s cheaper to make these in bulk, so if you have any friends or family that want to do them too, you’ll save the most money.

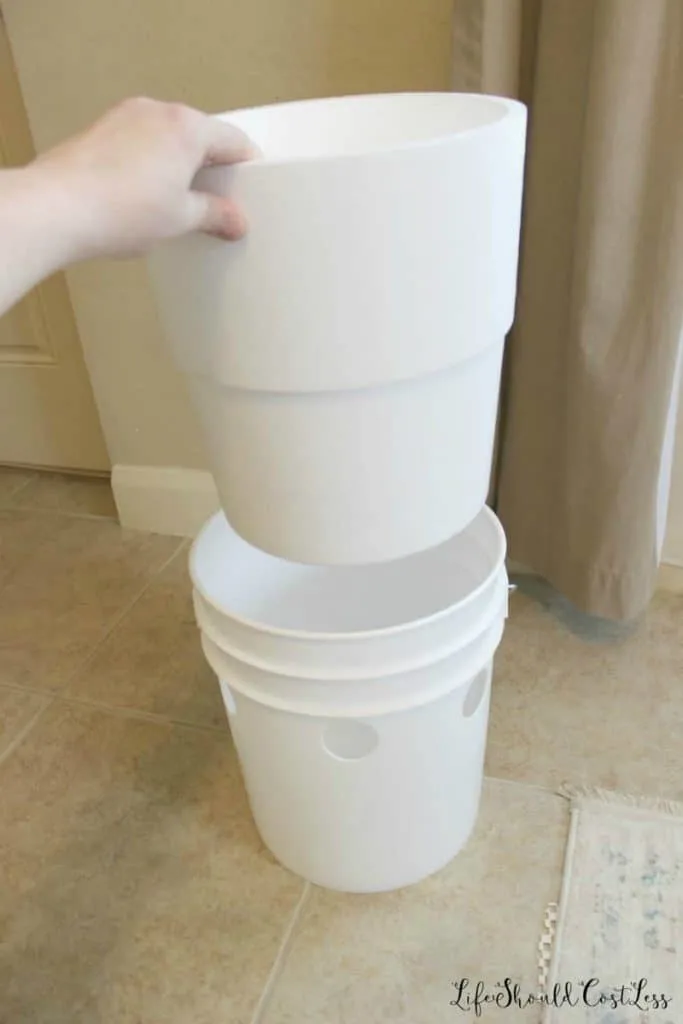
All you do is pop the styrofoam liner into the bucket.

I taped mine in place to avoid shifting while I was trying to drill through the foam, but if you’re lucky enough to have help on this project you could just have someone hold the liner in place on the side opposite from where you are working, of course.

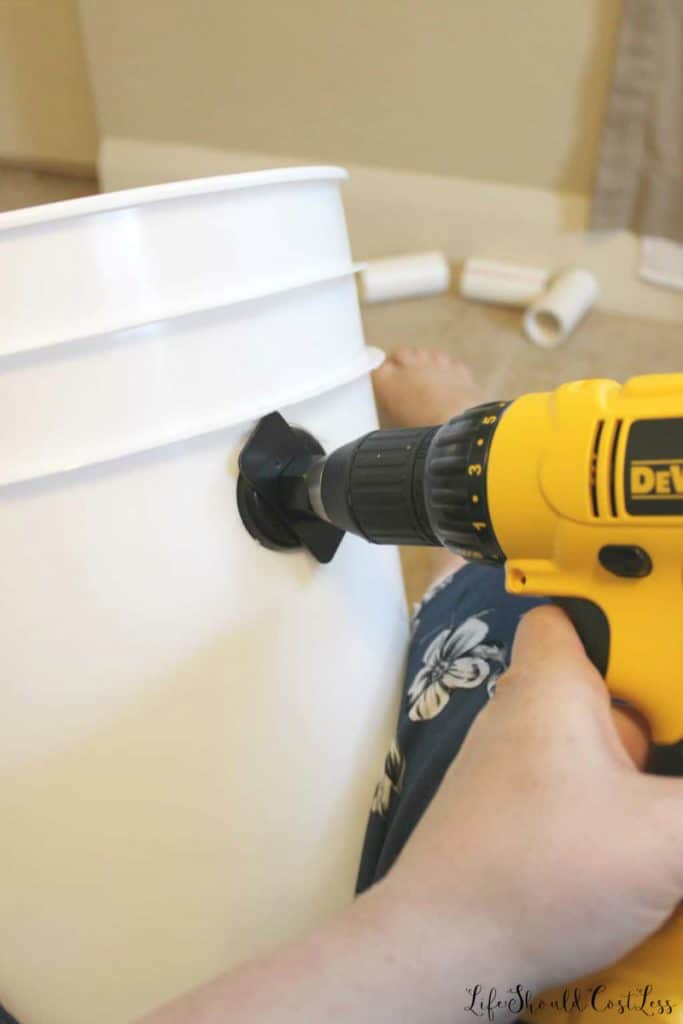
Then I used a hole saw bit that was slightly smaller than the 1 & 1 /2″ one that I had used to drill into the plastic.
You do this to give the PVC pipe a snug fit…otherwise the PVC pipes will slide right out and you will have to figure out how to get them to stay put…
I promise it’s just easier to use the slightly smaller hole saw bit. (If you do need to secure them in there I suggest maybe trying hot glue or white duct tape on the inside as a good option)

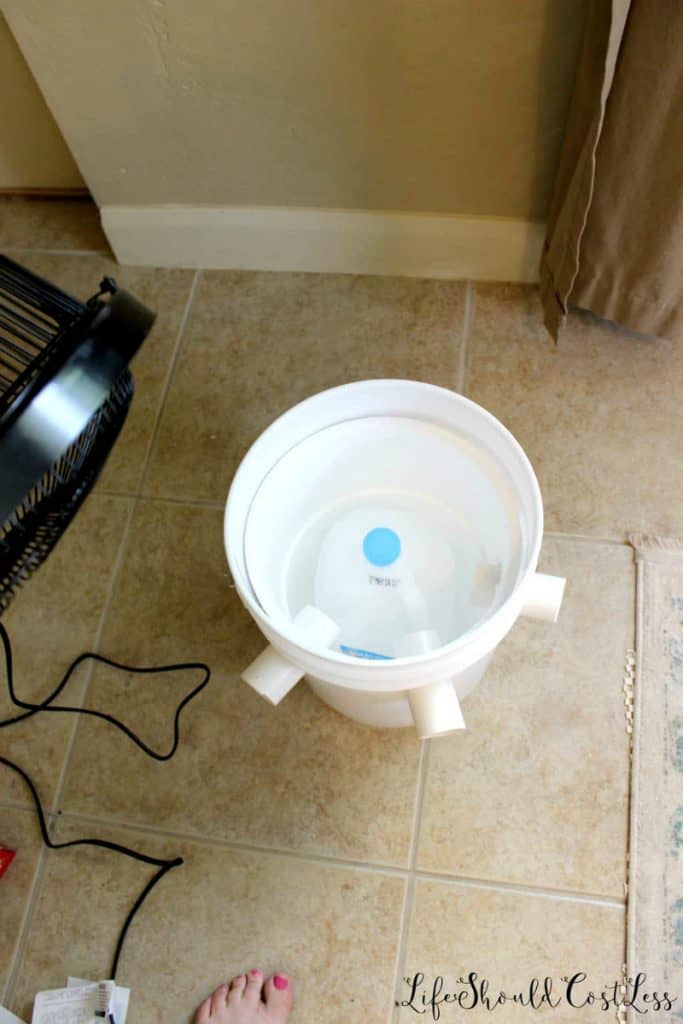
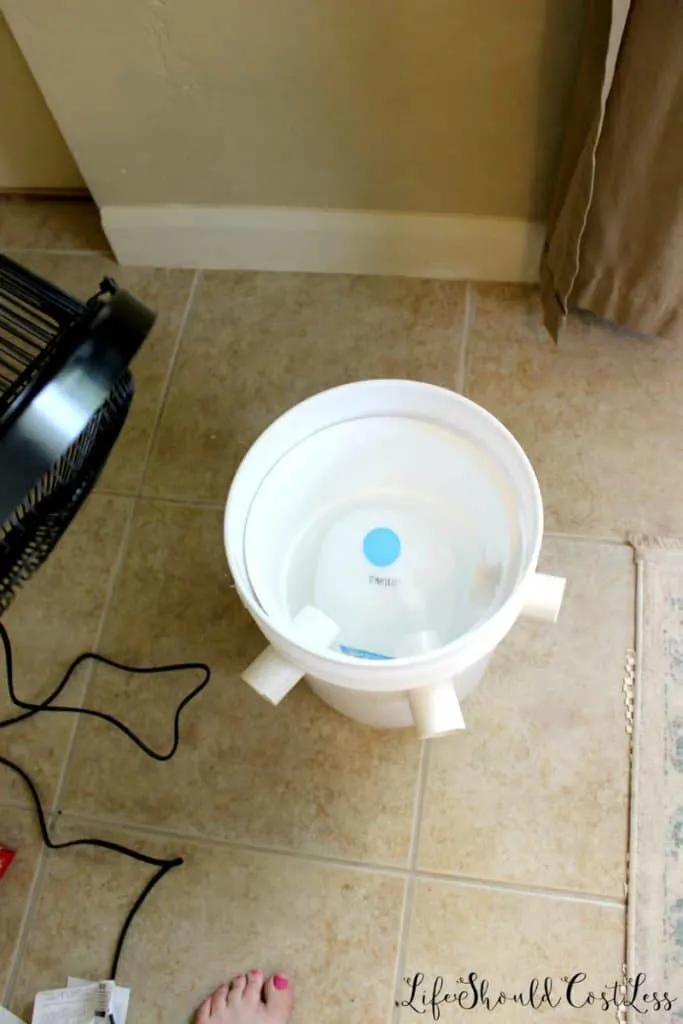
Here is what it looks like after the smaller holes have been drilled into the buckets, and then pushed through both the bucket and the liner.

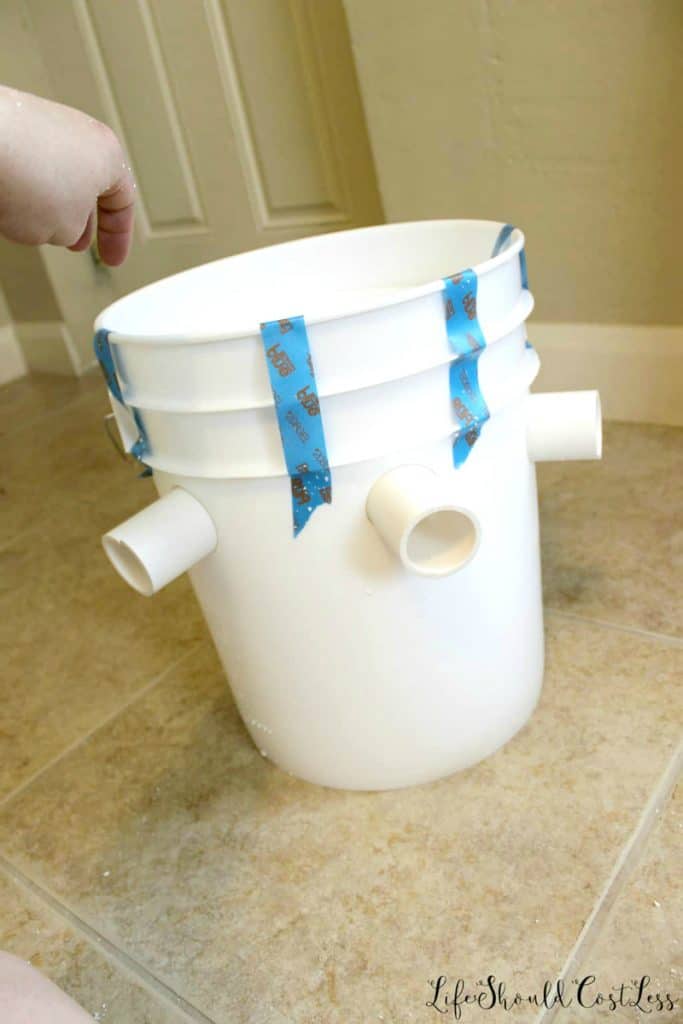
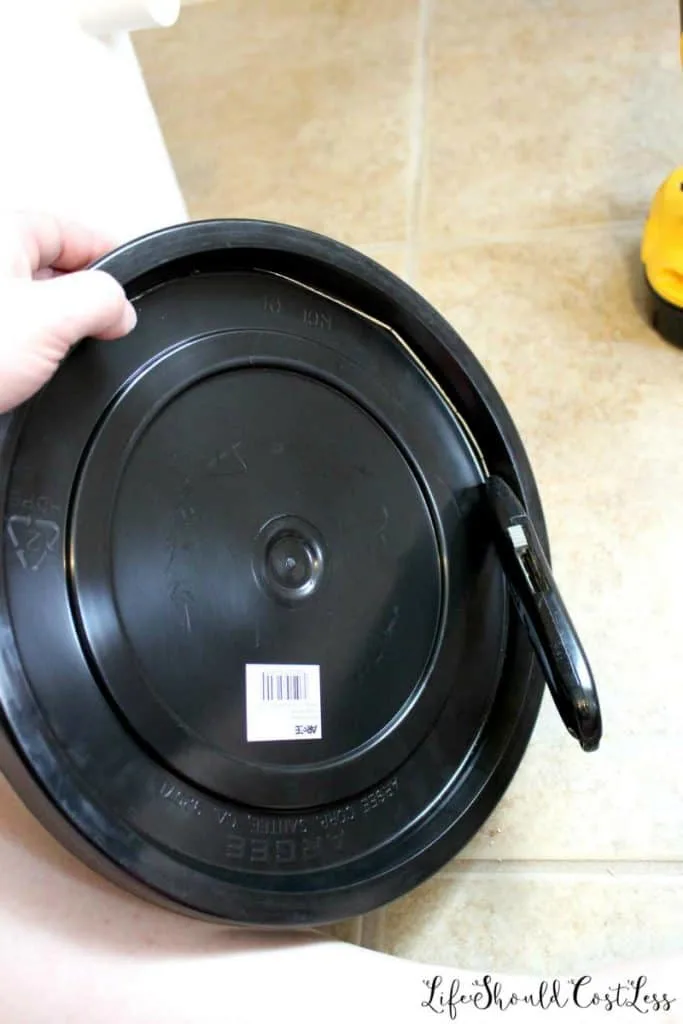
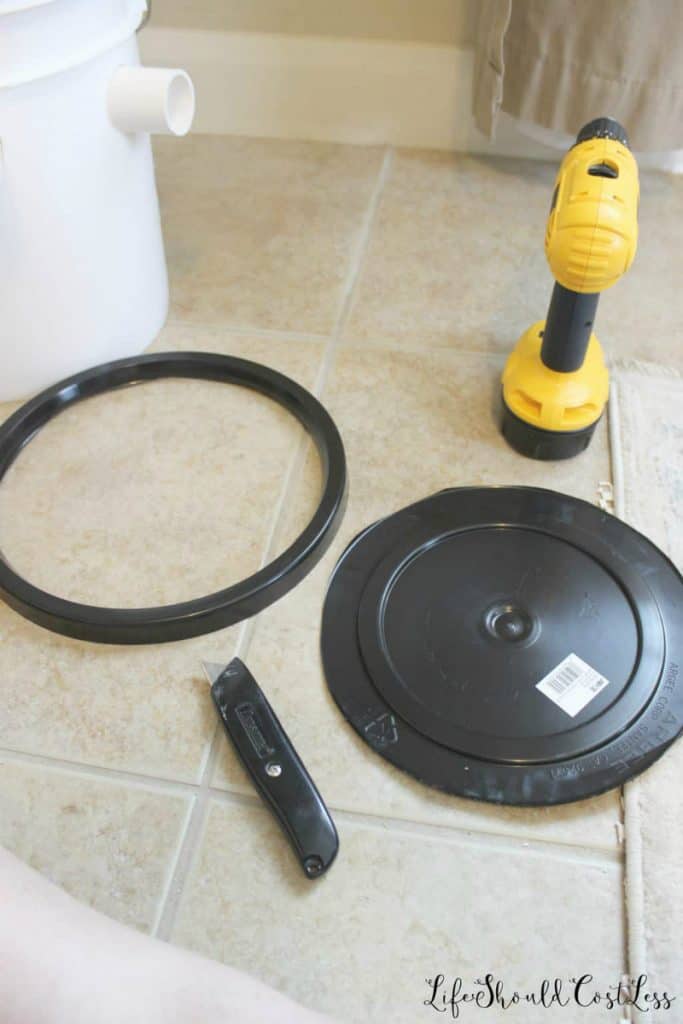
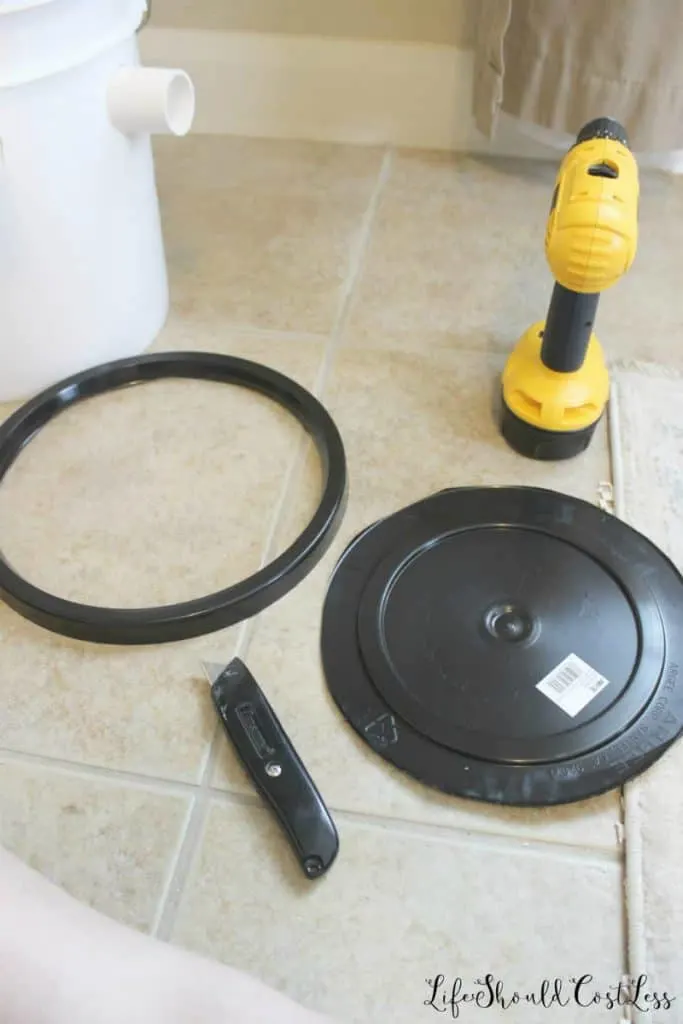
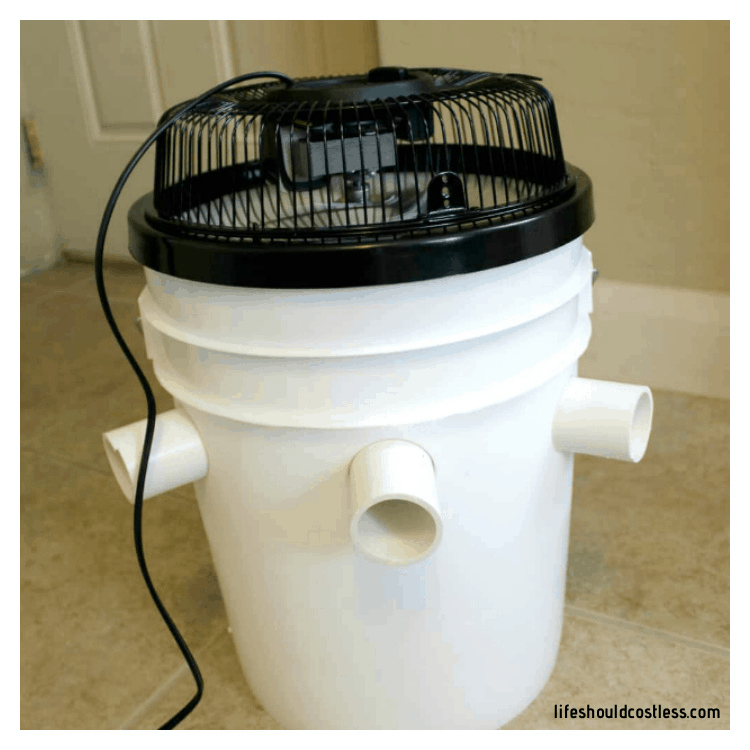
I removed the tape after that and then started in on the lid. This part was fairly easy too, I just had to be careful not to cut myself…and you definitely need to be careful too.


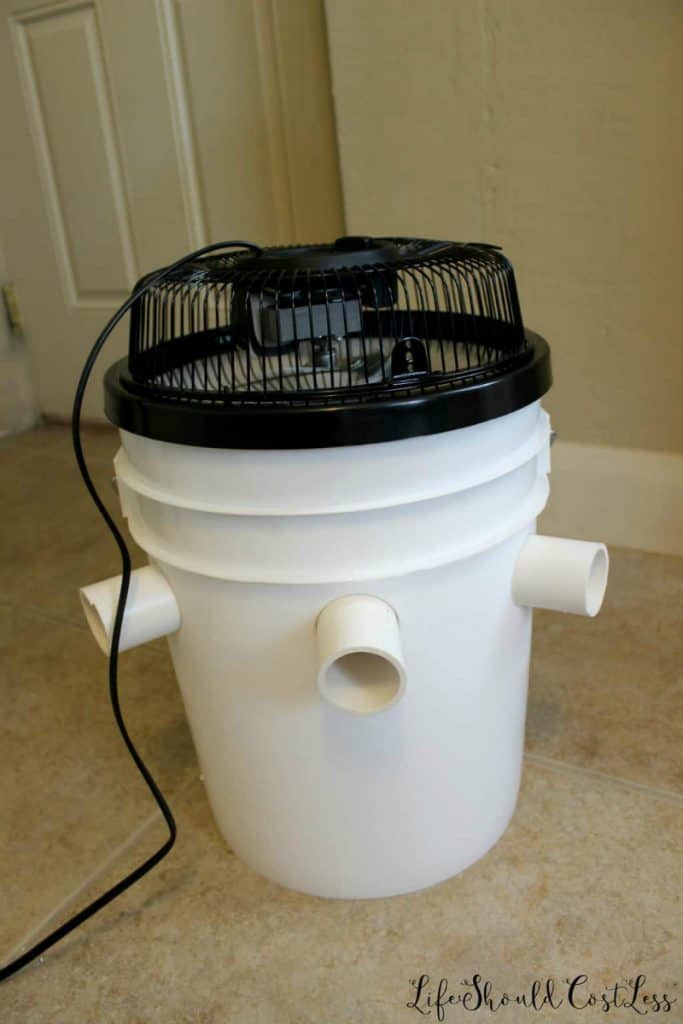
I cut out a big chunk of the lid with a utility knife…it was actually cutting off everything except the part of the lid that attaches to the bucket.
This provides a place to set a fan on top to allow air flow.

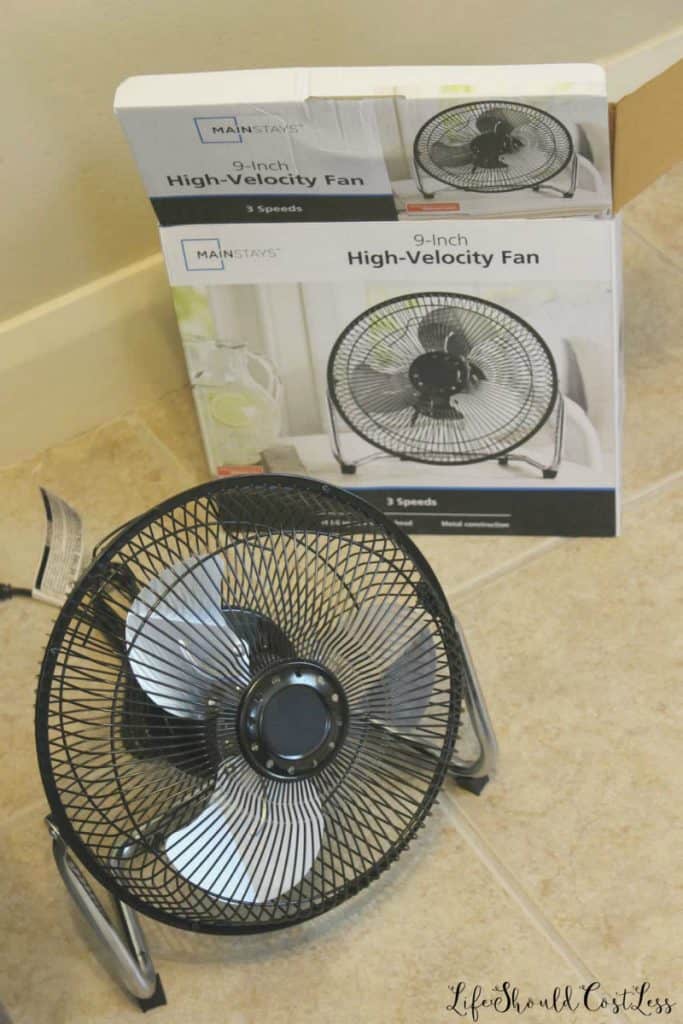
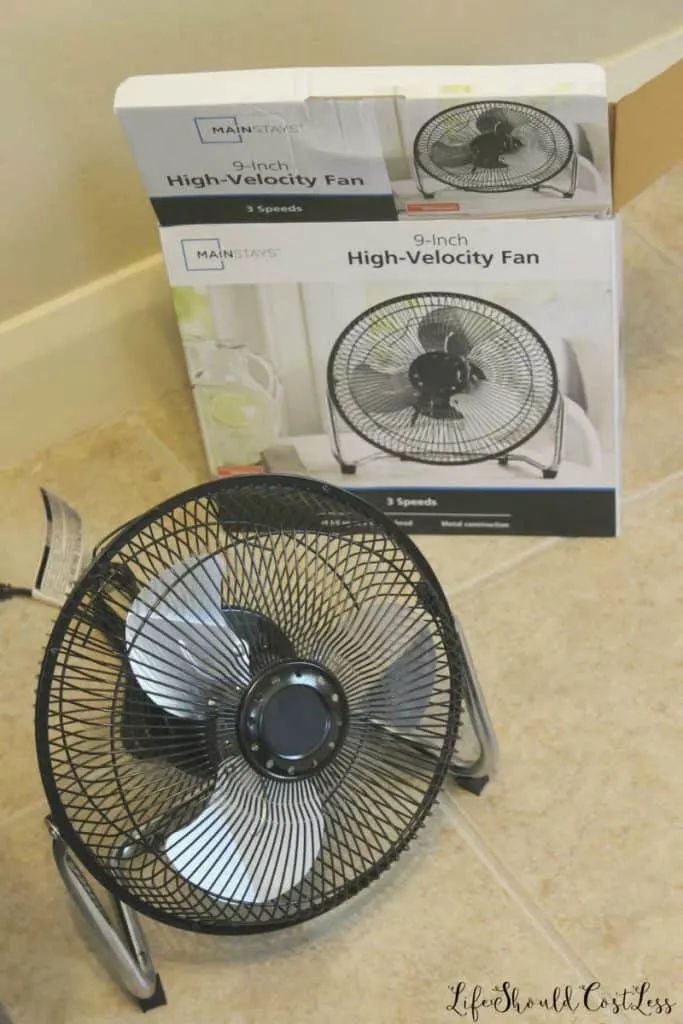
Finding the perfect fans to use for this project was a bit of a beast as well.
I ended up getting these 9″ Mainstays brand fans at Wal-Mart and they fit the buckets so perfectly that it’s like they were made for this project.
I went with 9″ because I wanted to move as much air as I possibly could with these bucket a/c’s.
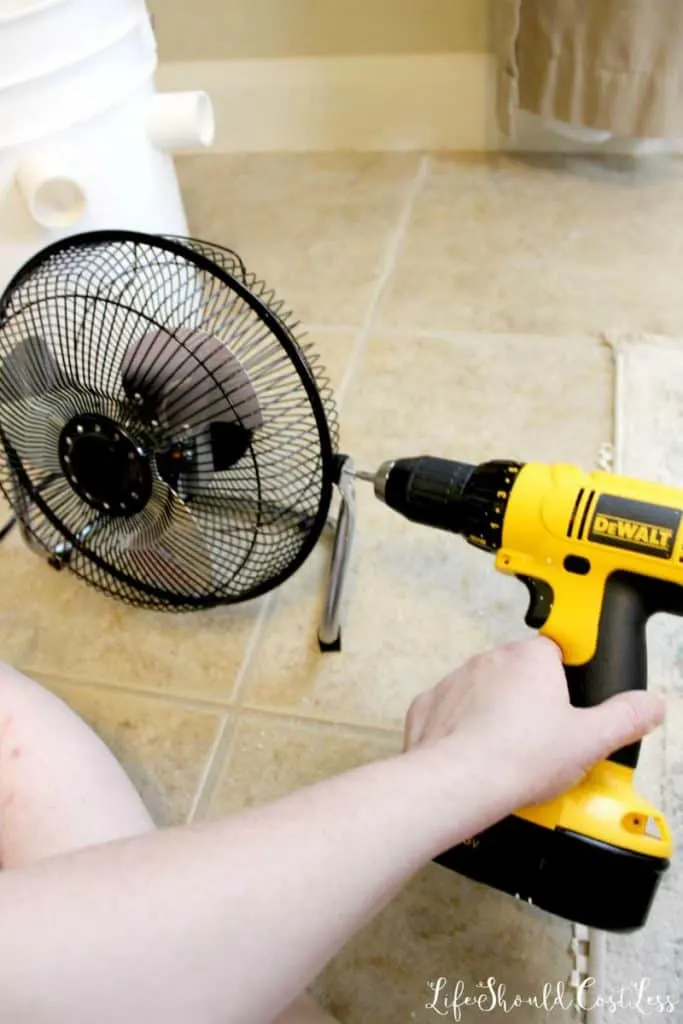
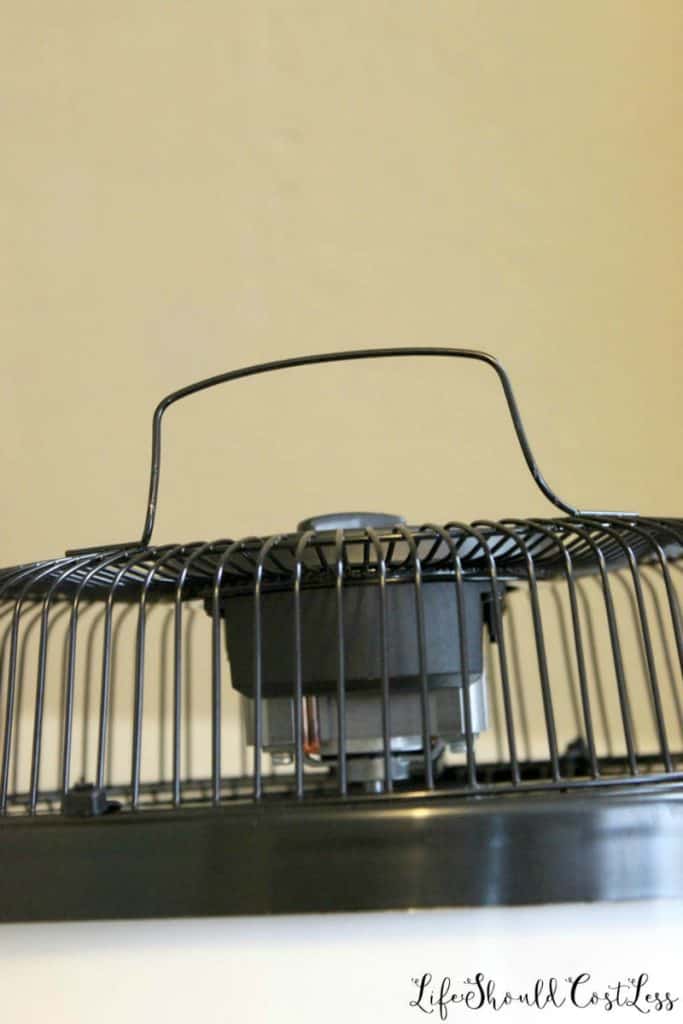
All I did to alter the fans was to take out the screws that were holding them to their stands.

See how good they fit onto the plastic ring lid?
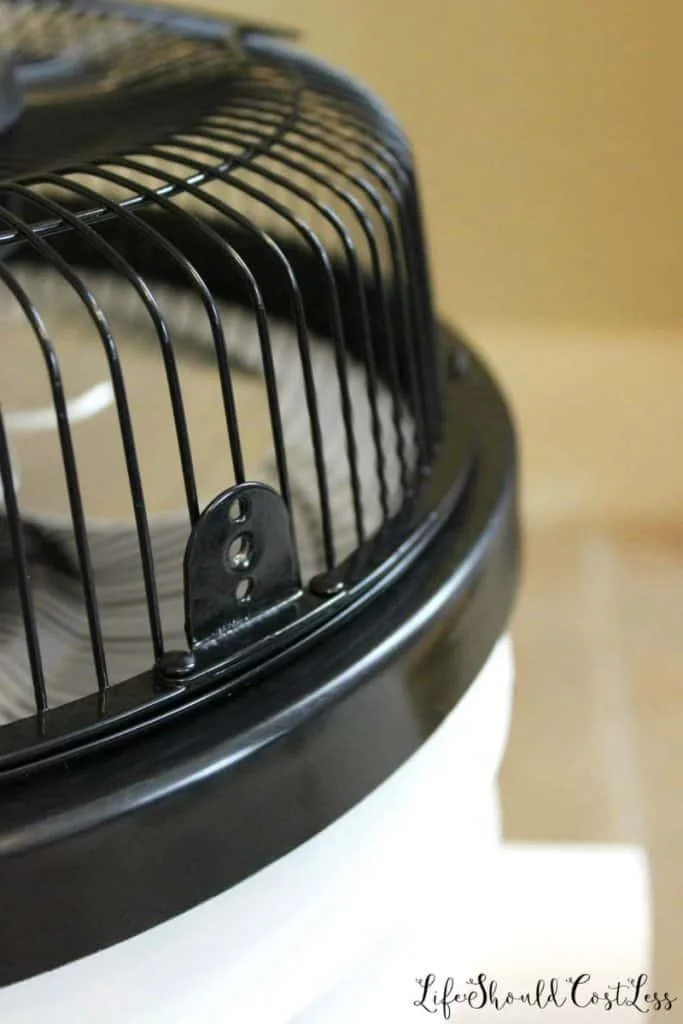
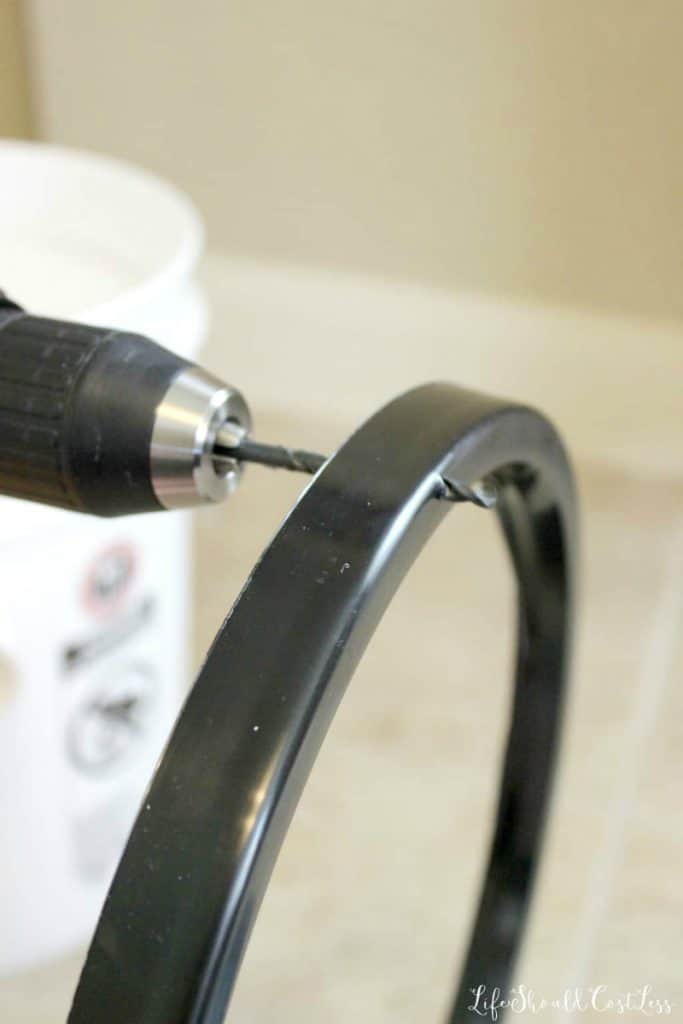
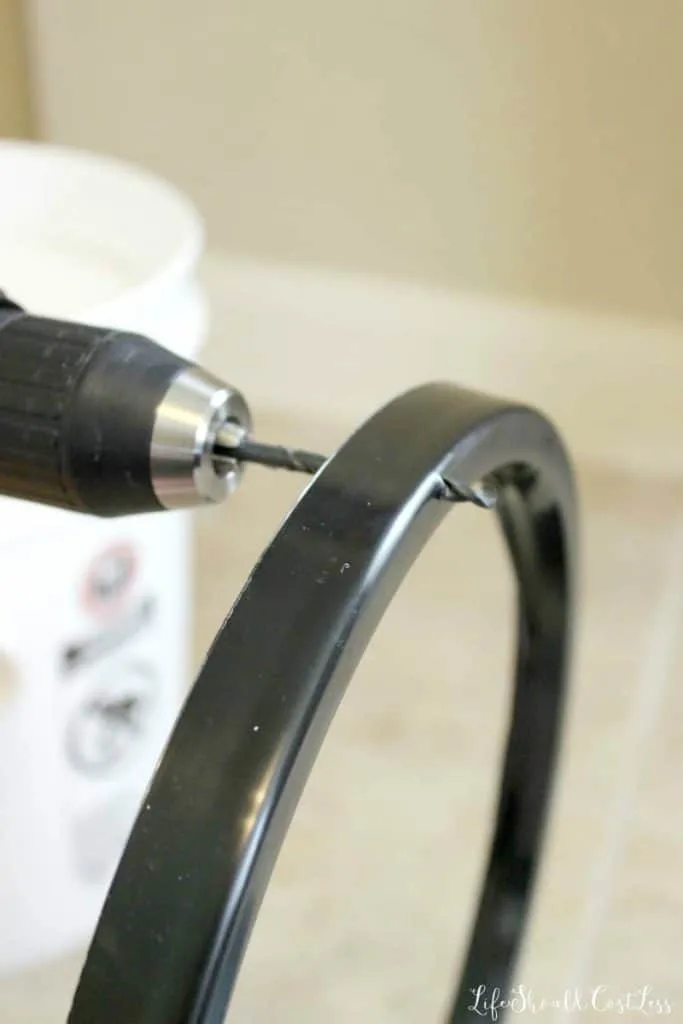
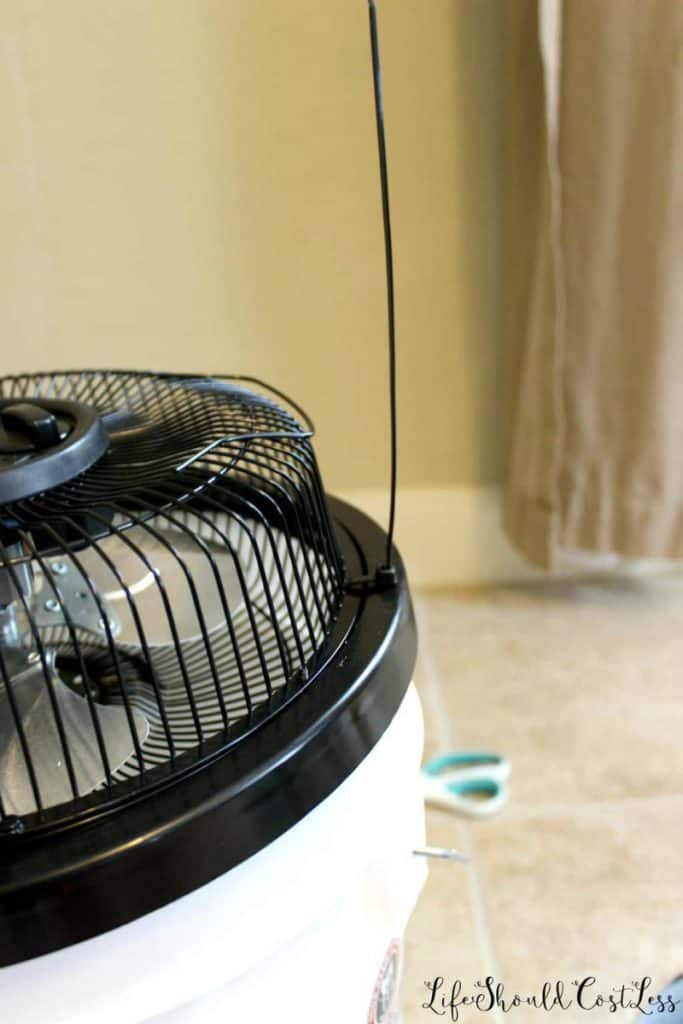
The next thing that I did was to drill four holes into each of the lid rings so that I could zip-tie the fan to the lid ring…
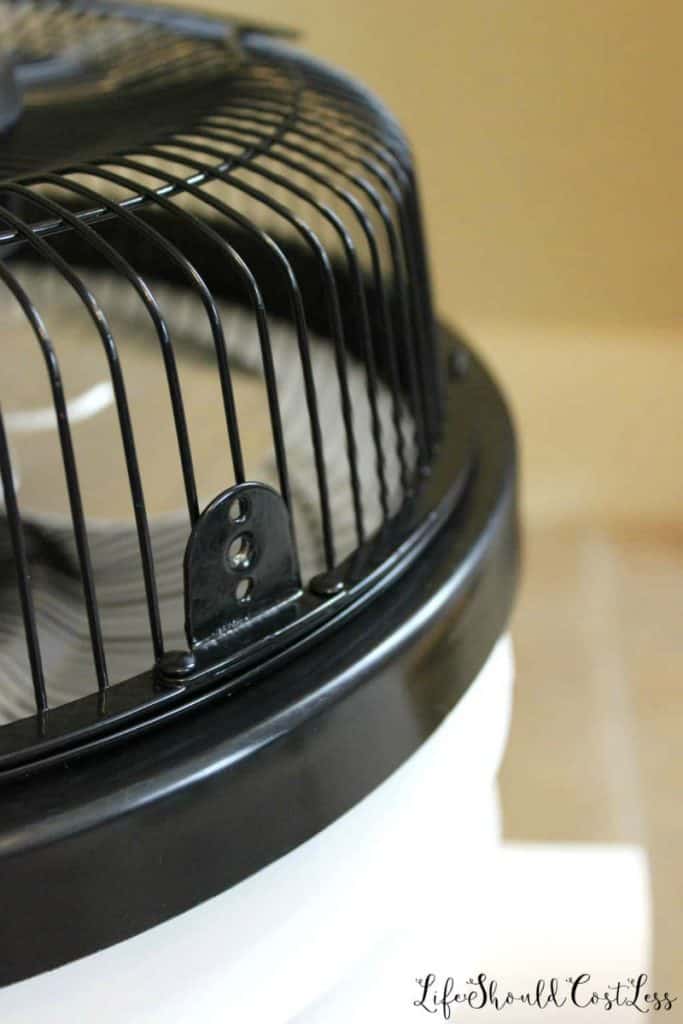
I knew that my kids would be constantly messing with the air conditioner buckets, so I did a little bit of a design alteration to prevent them from messing anything up.
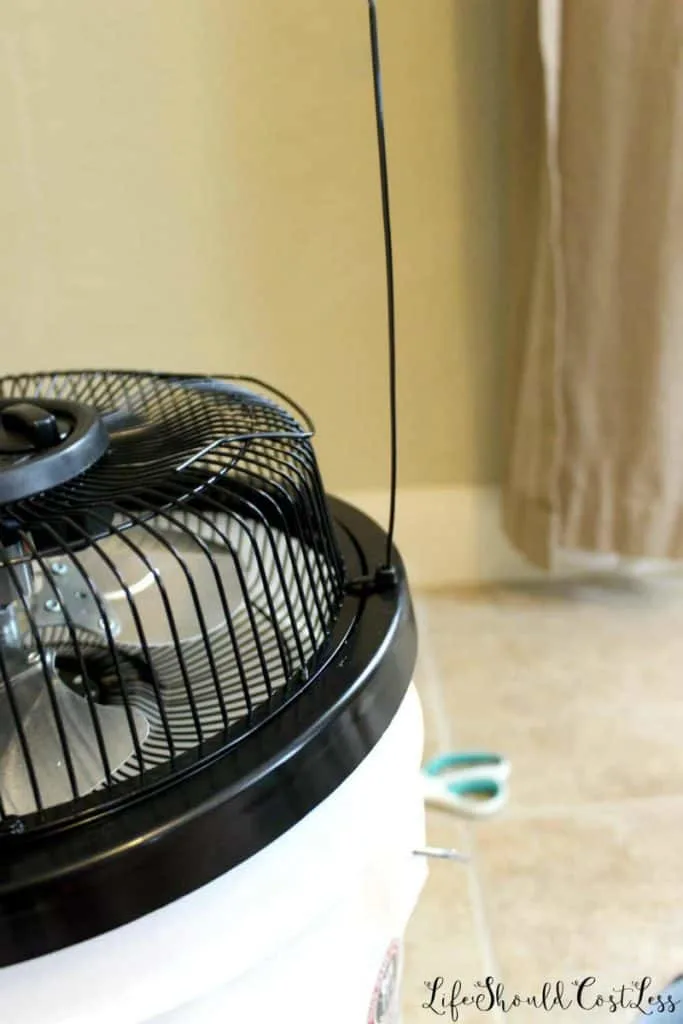

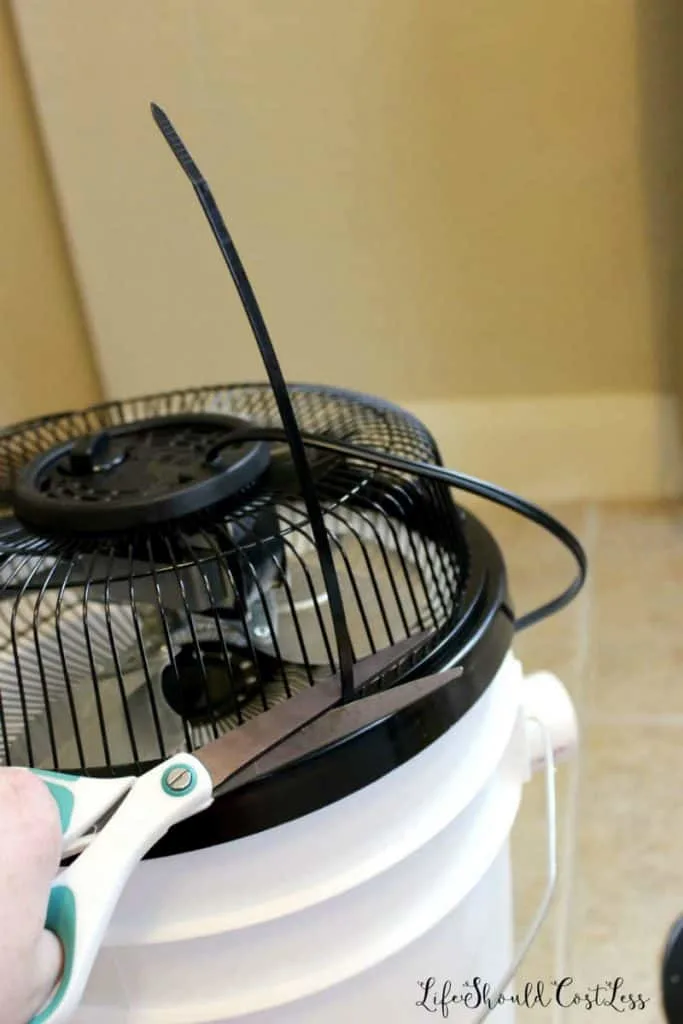
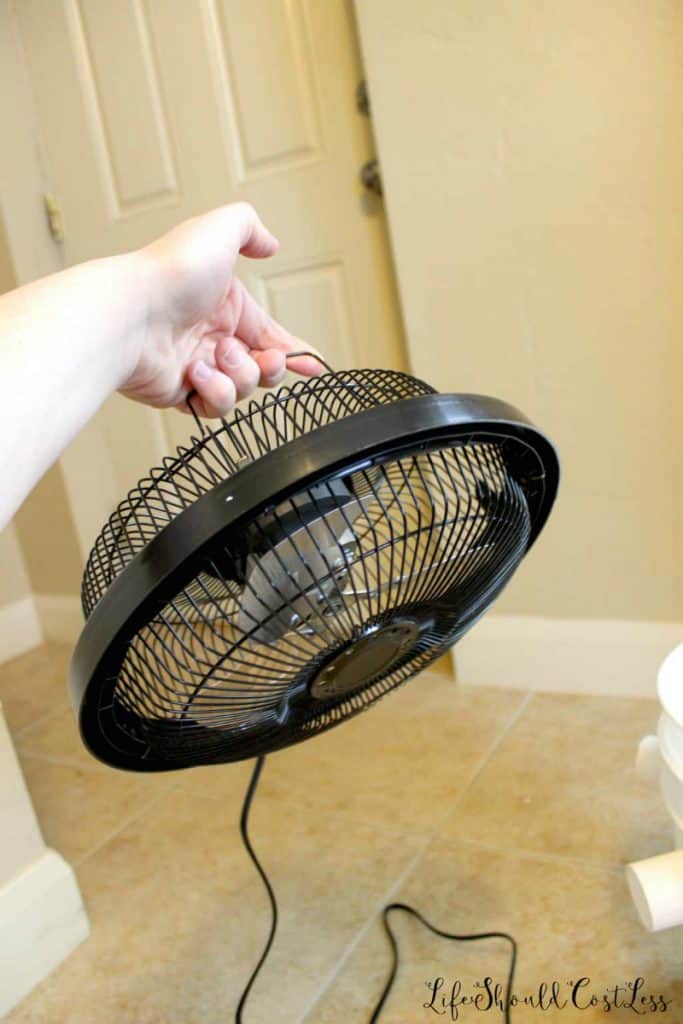
These particular fans have a little piece of metal that I suppose is meant to be a handle…I had to gently (one of the three broke when I bent it because I wasn’t being gentle enough) bend it upwards.
Doing so made is so now I have a super handy handle to pick the fan/plastic ring up any time that I want to with ease…which is necessary when it comes time to swap out the frozen water jug.


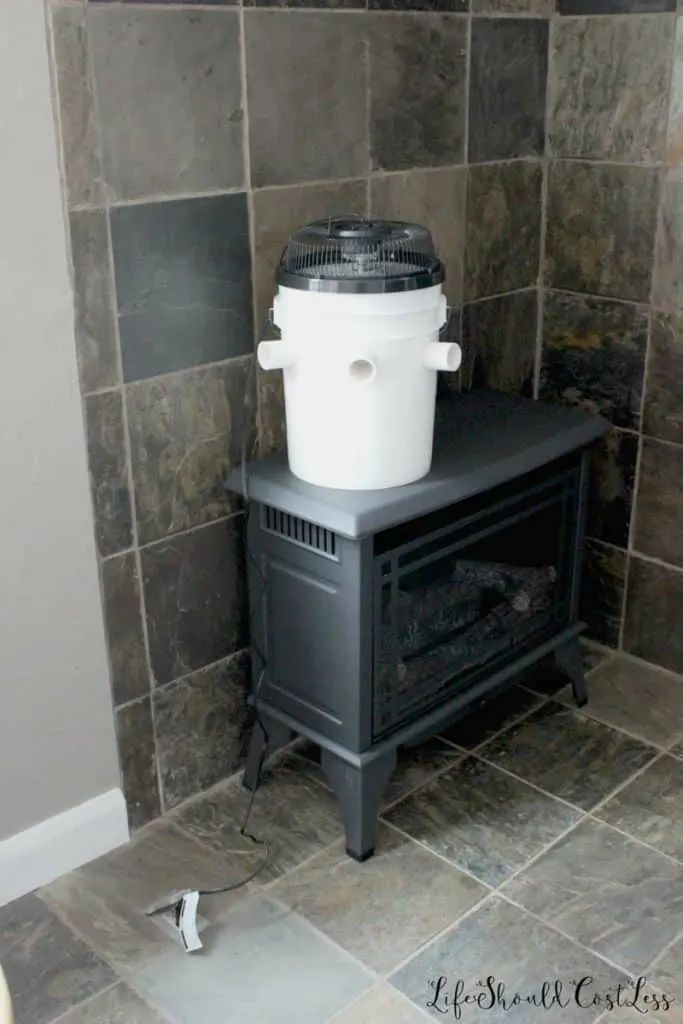
Once the lid was done, so was the whole project, so I threw a gallon of frozen water in there and fired it right up.
Keep in mind that it’s smart to have several gallons of water frozen at once so that when the current one thaws, you have another one ready to go to keep cool.
The ice lasts for several hours, depending on the temperature where it’s placed, but just giving that tip so that you know what to expect.
I have been super happy with how it turned out too! It’s very functional and I have already noticed a difference with the main house air conditioner kicking on far less than it did before…which was my goal.
I wanted to make these A/C’s to try to supplement the houses main A/C because it’s so much cheaper to operate a fan than it is to cool a hole house with an old inefficient central A/C.


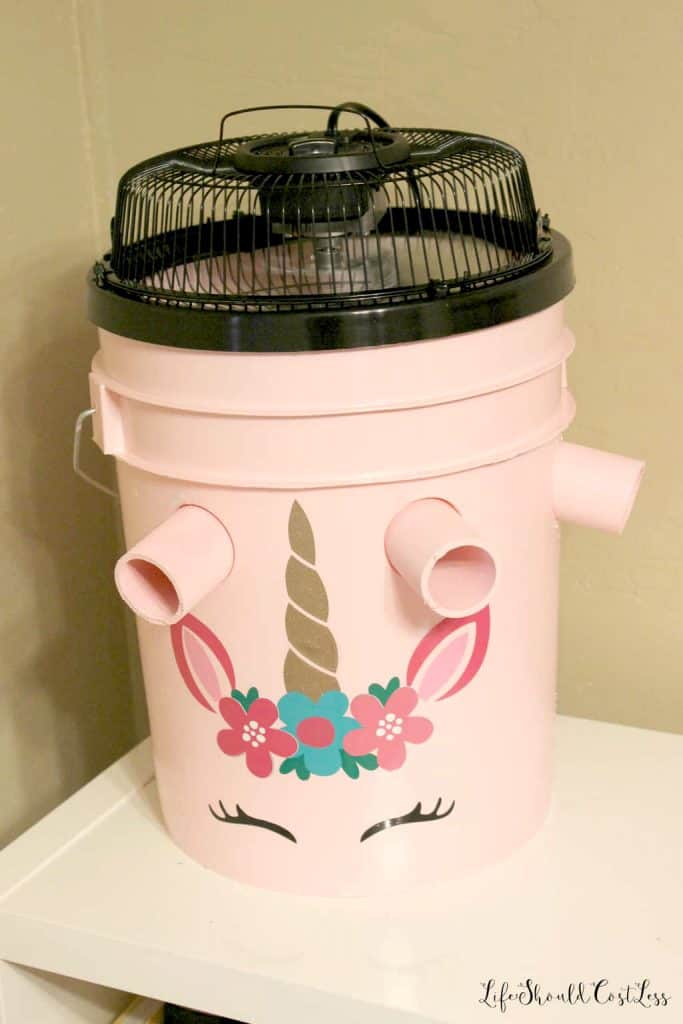
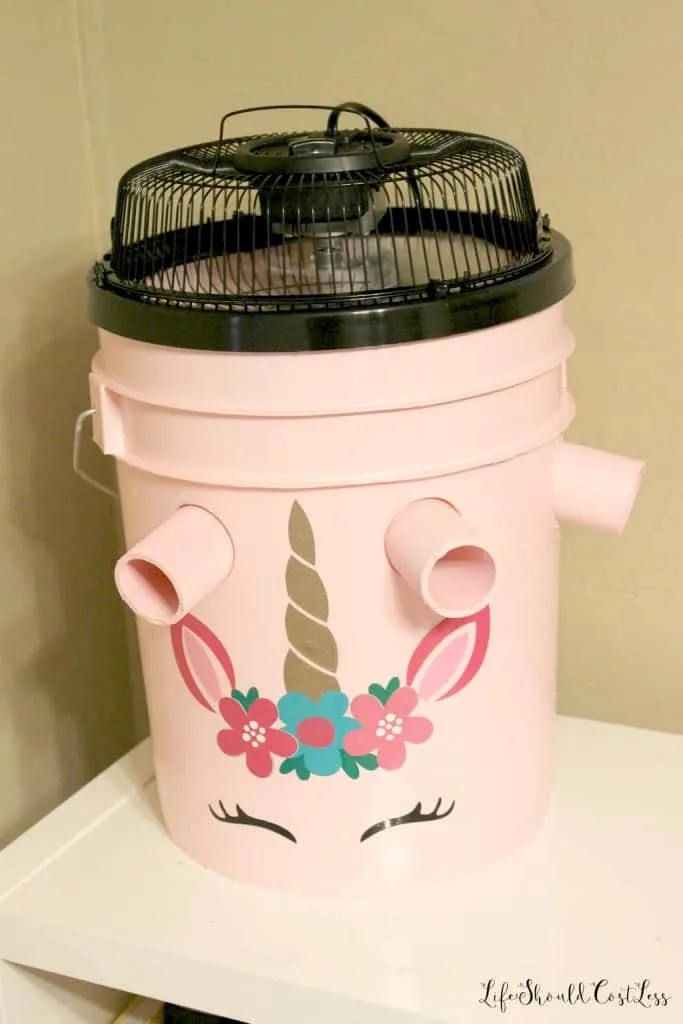
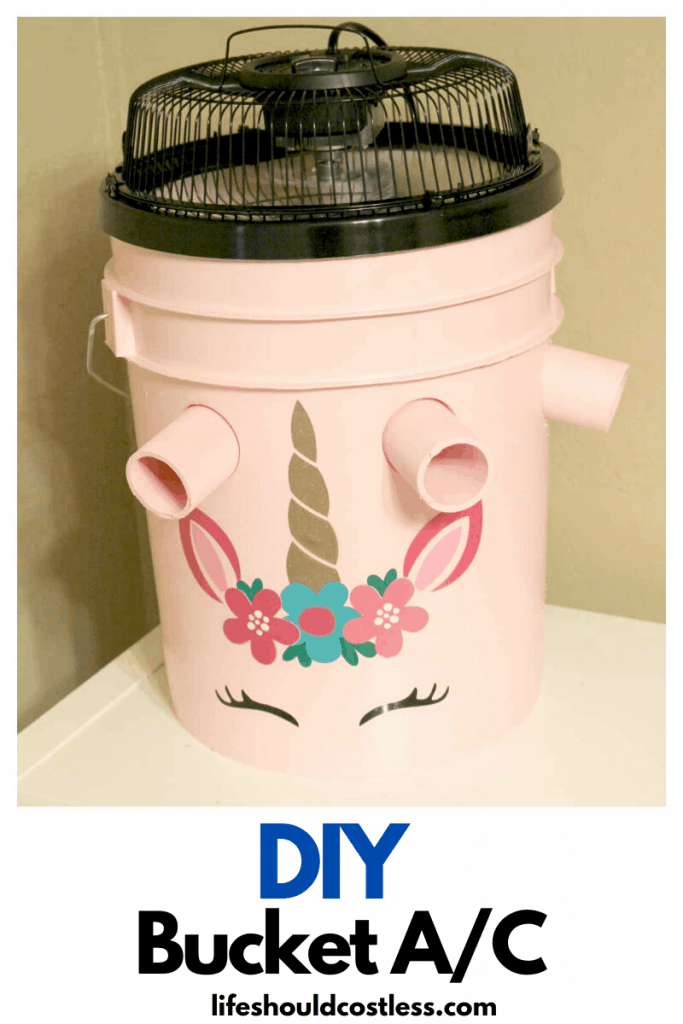
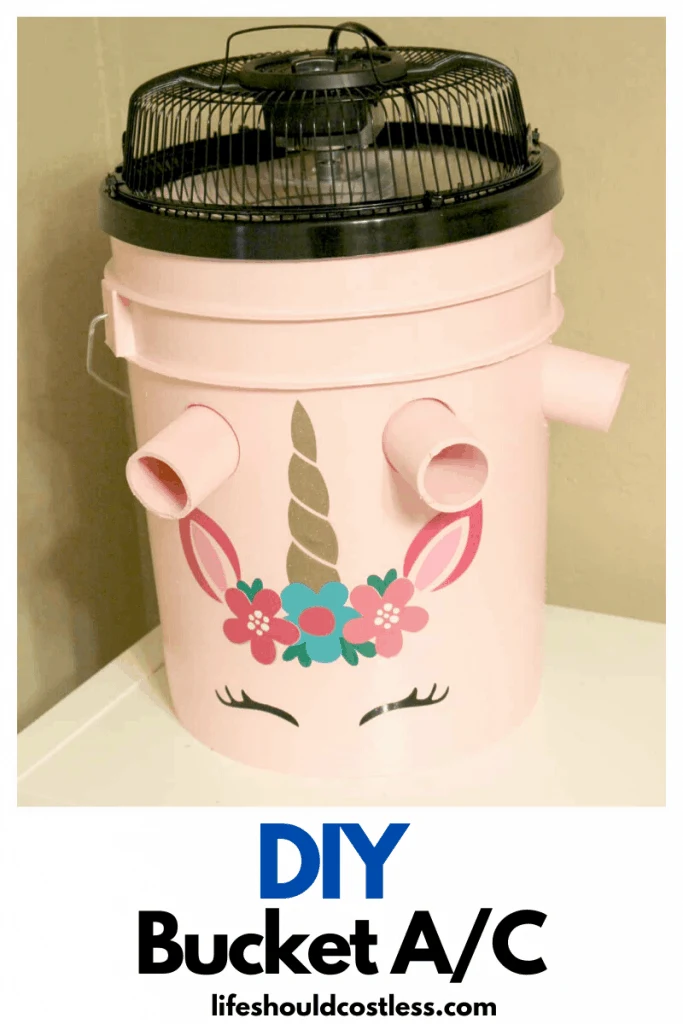
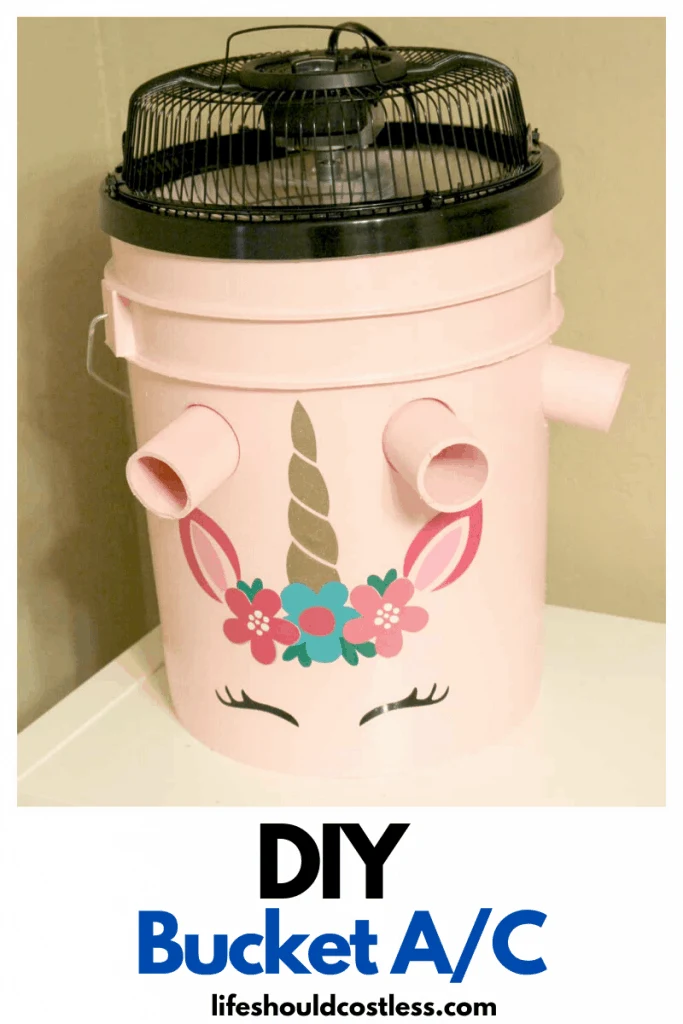
If you want to take it one step further to make it a bit more of a decorative piece, here is an idea for what I did to make it cute for my kids room.
I painted it and added a cute unicorn sticker to match my kids bedroom…and the kids LOVED it!
What do you guys think? They’re a little less ghetto than lots of the other tutorials out there, right?
I had a surprising amount of fun making them (I love having a project to work on) and am excited to see how much of a difference they make in cooling my house this summer and for many summers to come.
I made three because my cottage really is not that huge, and I was able to strategically place them throughout the house to keep the cool air flowing through the entire home.
If you don’t paint them, you could actually easily bust one of these out in less than a half hour…so don’t feel like you have to wait for the weekend to come to do one, honestly gathering the materials, and figuring out where to get everything was the hard part (half of which I’ve already done for you), so get right to it!
Update After Prolonged Usage: How well do bucket air conditoners work?
After having “redneck air conditioners” in use for a couple of hot seasons, I can say that these definitely help in cooling a home.
Realistically, they will only really drop a room’s temperature by a few degrees/help maintain a cool home.
So don’t go thinking that if you live somewhere that it is really hot that these are all you’re going to need to stay comfortable… unless you have a super tiny home that is well insulated, or have lots of these units running at once anyway.
I have found that bucket air conditioners seem to work best when the fan is set on a low speed because it allows the air to cool more before it gets released back into the room.
Another thing that I thought of after-the-fact: If you know how to rig these to run off of a solar panel of some sort you really could get them to save you even more money.
*If you’d like to check out my entire DIY section, go here, I have some other fun projects I have done there too.*

Printable Supply List For Building Bucket A/C Unit
Save money on your electricity bill by building your own portable bucket A/C unit.
Materials
- Five Gallon Bucket
- 9" Fan
- 1&1/2" PVC Pipe
- Tape
- Marker
- Zip Ties
- Gallon Jug Of Frozen Water
Tools
- Hole Saw Set
- Cordless Drill
- Drill Bit Set
- Hack Saw
- Tape Measure
- Sanding Block
- Utility Knife
- Scissors
That’s all I have to share with you all today! If you’re confused at all about how I explained something, there are several similar tutorials on Youtube, so go there if by some chance I didn’t go into enough detail.
Thank you so very much for stopping by my blog, which helps me support my kids! Please make sure to share this post, via social media, or even send my url link via email, to anyone that may find it helpful. Thanks so much! ~Sarah

How To Follow & Support This Site
- If you would like to subscribe to my email list, go here.
- Make sure to follow along via social media, by going here.
- If you would like to learn how to really show your support to this site (at no cost to you), go here.
- If you would like to make a direct donation to the site, go here.
Here are several of my other posts that you’re also going to like/find super handy:
For those of you that would like more options of “pinnable” images to share this on Pinterest, here you go. Thanks so much for the support!:


* Please note that this post was originally shared to this site on 05/30/2018 and has since been updated to improve user experience.