How to get a non-fraying edge when cutting ribbon.
10shares
I decided to update this post, so while I have been adding the finishing touches to my neighbor Christmas gifts this year, I snapped a few more pictures to add to this one.
I think that every serious crafter should know how to cut ribbon so that it won’t fray. I can’t tell you how many times I have been walking through a craft fair and booth after booth of hair bows have had ribbons that have just been cut with standard scissors and they just don’t look quite as good as they could. Rude observation, I know… Anyway, I just know that when a ribbon starts to fray, my kids or really any kids will mess with it until it looks ten times worse, so for those of you with children like mine…this post is for you!
*Hey there, thanks for stopping by my website. This article is super old, so it has been archived as I no longer update it…so proceed if you wish…but it is definitely not my best work. Please stop by my home page, here, and see some of my better content. Thanks! ~Sarah*
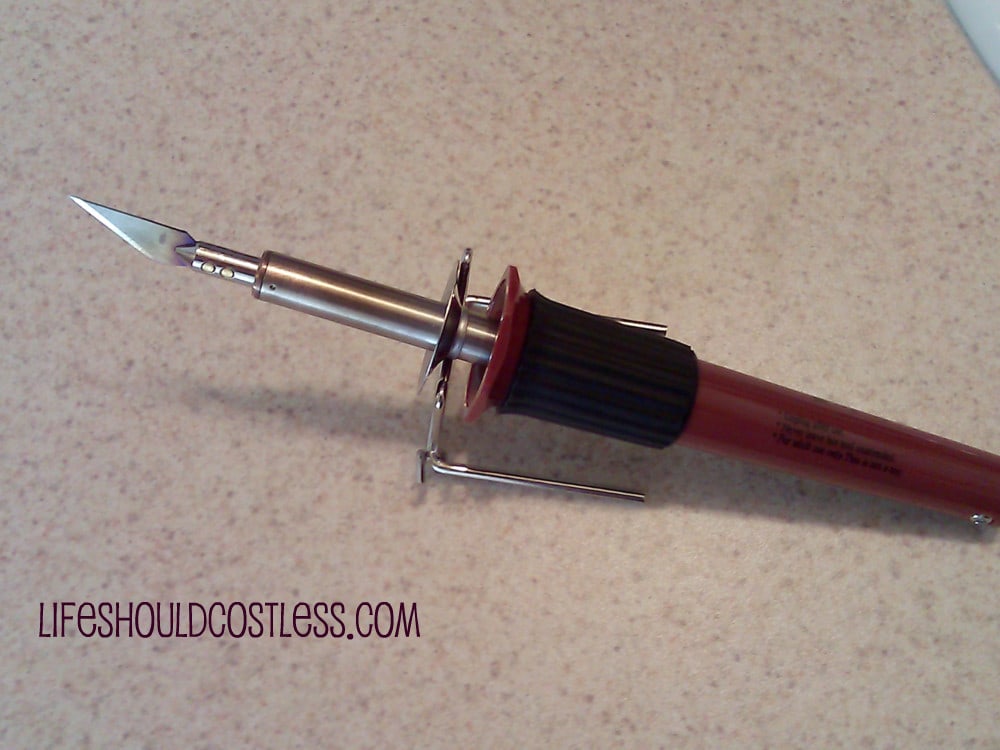
I had to stick with some of my older pictures for the tutorial because my tools for this project are looking pretty beat up, so I decided that the old ones will suffice…for now, until I buy a new hot knife anyway.
*Oh, and just a side-note, this method can be used for cutting webbing as well.*
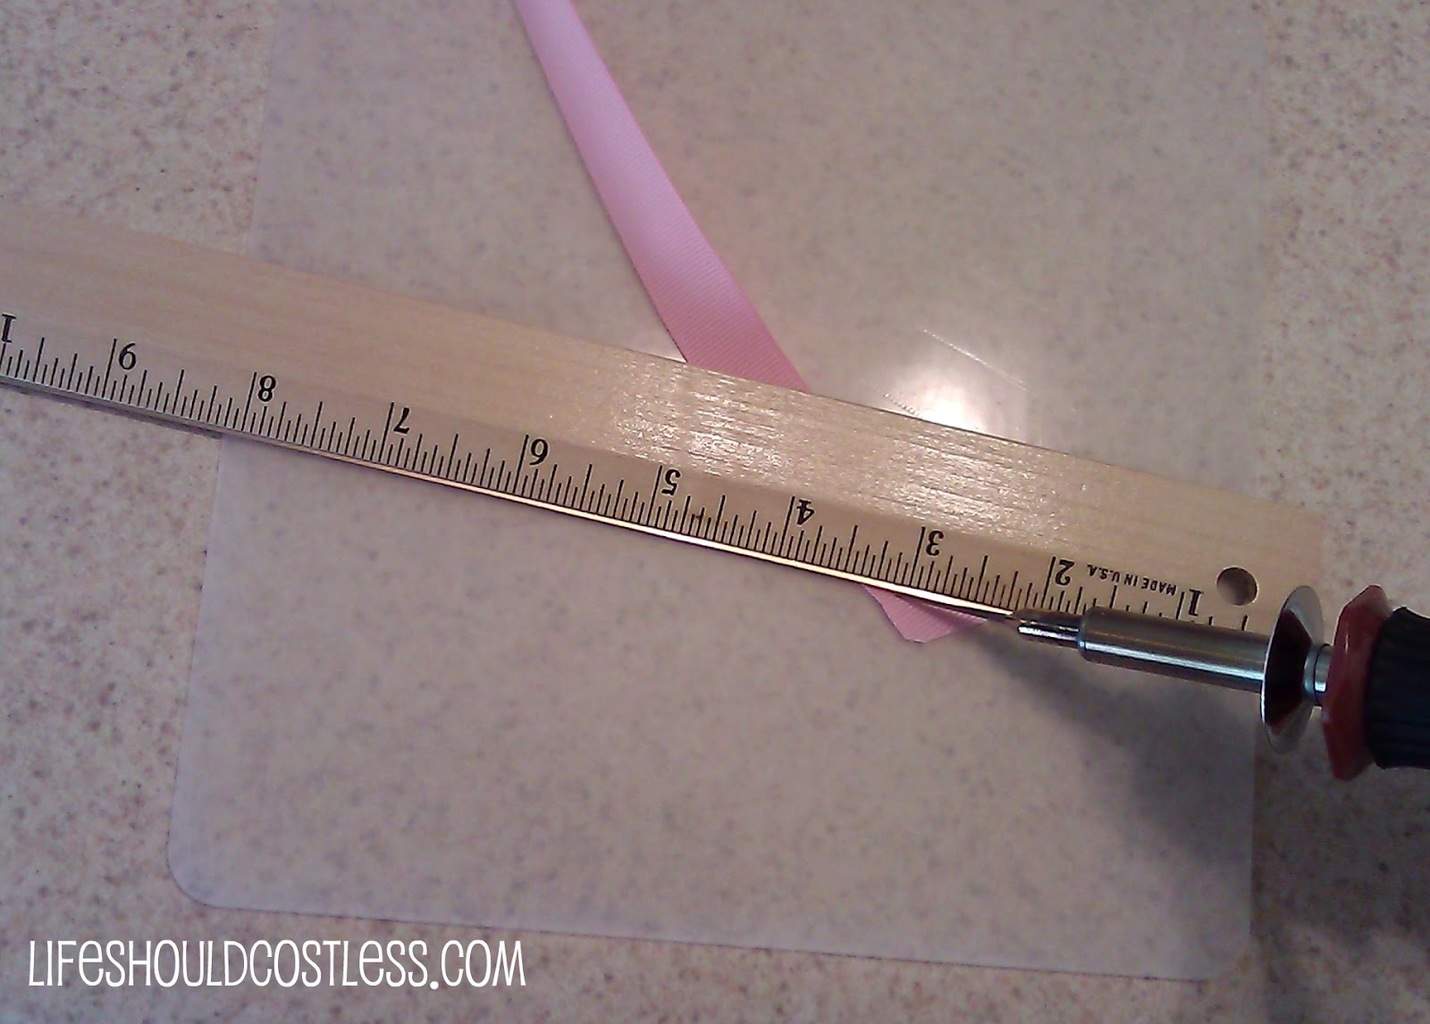
(I used a glue gun pad because I have yet to invest in a glass mat. It will shred it over time though, so I do need to buy one.)
Now you are ready to begin.
First, plug in the Hot Cutting Knife and allow it to heat the required amount of time as per your hot knife’s instructions.(mine takes about 4 minutes but I like to wait just a bit longer than that).
Finally, slide the Hot Knife across the metal edge of the ruler slowly, allowing the knife to lightly burn the edges of the ribbon as it cuts. It may take a few tries at first to get the result you want, but you’ll get better at it.
There you have it, a non-fraying edge for all of your projects that require ribbon (this shot was from my neighbor gift). Your craft projects,or gift wrapping, will take on a whole new level of awesome! I know that mine have.
Also, If you were wondering what my neighbor gifts were…yes I actually got around to doing neighbor gifts this year, shocker, I know! Here’s what they were:
The last couple of years I’ve seen people making home-made Vanilla Extract for their bulk Christmas gifts, and I wanted to make some but I also wanted it to be a little more exotic than just your standard Vanilla. So, I bought some Tahitian Vanilla Beansand made some. Being LDS, and having never even tasted an alcoholic beverage, I felt pretty nervous walking into the State Liquor Store to buy some Vodka for these…I felt the way I imagine a nun would feel walking into a brothel..lol! Anyway, I think they turned out pretty cute and I went with the way of making the Vanilla with the bean inside the bottle so that every time it gets half-empty they can refill it with Vodka and it will last them a good 4 or 5 years.
My ribbon was just the cheap stuff at Wal-Mart (it was a little more difficult to cut than the nicer ribbons I’ve used). It took about 14″ of ribbon to tie these bows around the bottles.
I bought these labels hereand just designed and printed them myself…after the 3rd trip to Fed-Ex/Kinko’s and them still not being able to get a non-pixelated print, I just decided I’d do it myself for cheaper.
A good (morein depth) tutorial I found for making Vanilla Extract is here.
*Please note that this post was originally shared on this website on March 11, 2012 & has since been updated to improve user experience.


 edge when cutting ribbon.")
 edge when cutting ribbon.")


.
and just designed and printed them myself…after the 3rd trip to Fed-Ex/Kinko’s and them still not being able to get a non-pixelated print, I just decided I’d do it myself for cheaper.