In February, for a Super Saturday (a craft day we do with the women at my church) I was put in charge of a project that I had never even heard of. It was making a knock off of those In a Pikle emergency bags using a hot pad (similar to these). The proto-type that I made was not the greatest (I didn’t have the cash to buy a hot pad better than one at Dollar Tree, so options were limited to say the least) but there were, surprisingly, still several ladies that signed up to make them. They turned out pretty cute, but I decided that I wanted to make something a little bit bigger for myself later when I had the time.
*Hey there, thanks for stopping by my website. This article is super old, so it has been archived as I no longer update it…so proceed if you wish…but it is definitely not my best work. Please stop by my home page, here, and see some of my better content. Thanks! ~Sarah*
After mulling the idea around in my brain the last couple of months, I figured out how I wanted to make one (from scratch) and ended up making several as Mothers Day gifts this year. By using only materials that I had on hand, I was able to make 5 of these (one for me too) for zero out of pocket. I thought I’d share the process, including some suggestions to make it easier, in case anyone else would like to make one too.
Warning! Freakishly long tutorial ahead…at least for me.
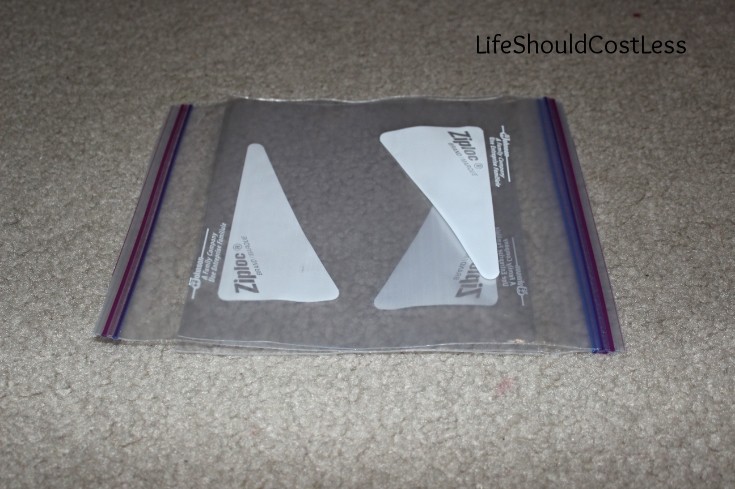
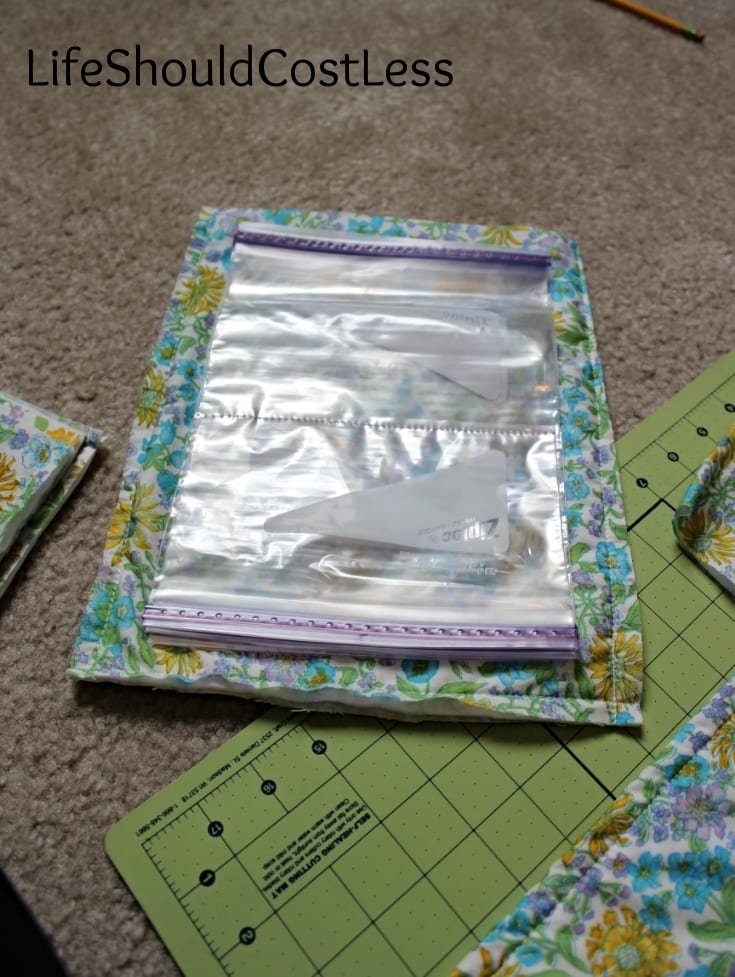
I started out with eight 1 Quart Ziploc brand freezer bags. I went with Ziploc because I think that they will last longer than the ones that have the zipper. The zippers seem to fall off or break pretty easily so this one seemed like a no-brainer. You may also be wondering why I didn’t go with snack bags and that is because they would be a huge pain to sew in (and try to get to look good in the process), and I wanted pouches just a bit bigger.
I snipped off a little bit of the extra plastic by the zipper so that I would have more space for contents in the bags.
Next, I staggered the bags so that there were 4 on each side.
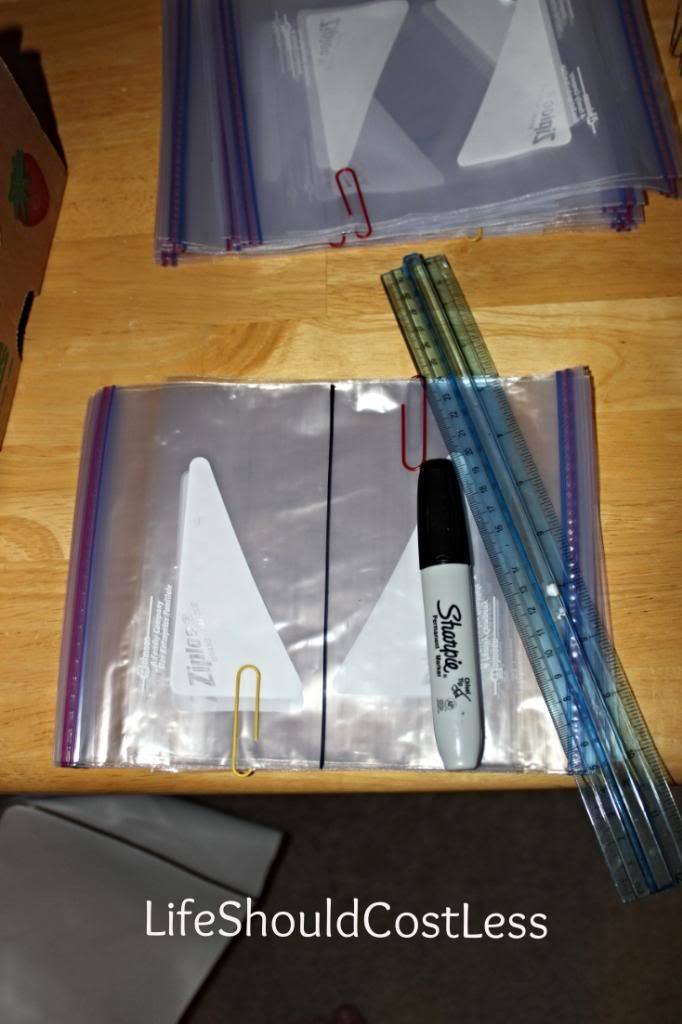
I used paperclips to hold the bags together so that they’d be easier to sew. Then, using a ruler and sharpie I drew a line down the center of the bags so I would be able to sew a straight line.
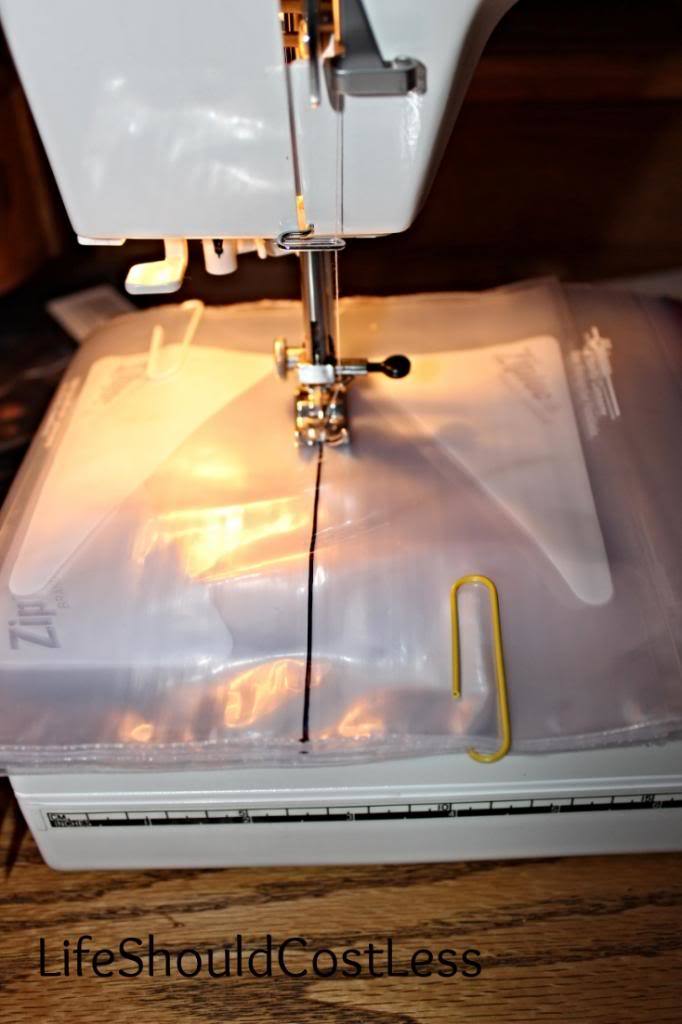
Next I sewed the bags together. This part is crucial to getting good results. You could just sew them directly to the clutch, but they slip all over the place, even with the paper clips.
This is just a shot of how it looks with the bags sewn together.
Next you will need to trim off the excess baggies. Try to get it as close as possible without cutting into the portion of the bag you need. *An idea to be less wasteful here would be to maybe add some photos, a first aid chart, or maybe a list of phone #’s and addresses for emergencies to that extra plastic area so that you have it “laminated” and sewn in. Obviously that would need to happen before you sew them together.*
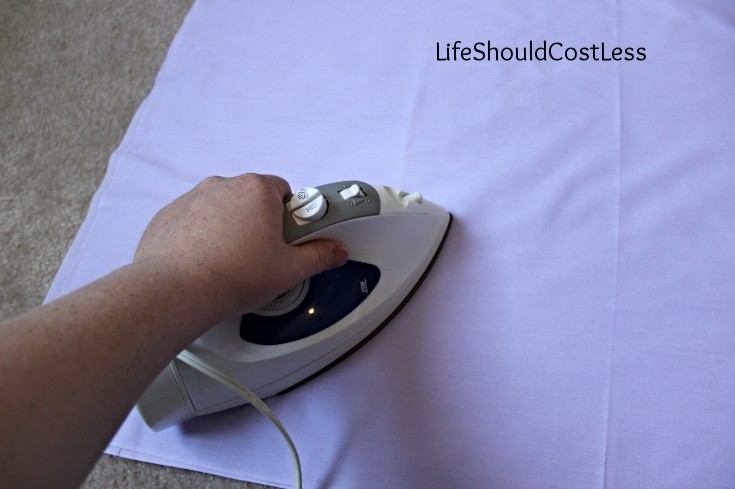
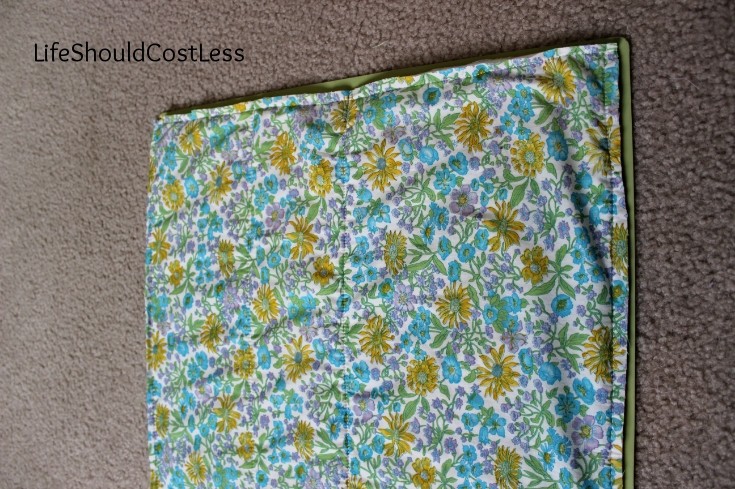
The baggies are done and set aside. Now to make the clutch. I started by washing, drying, and ironing my fabric.
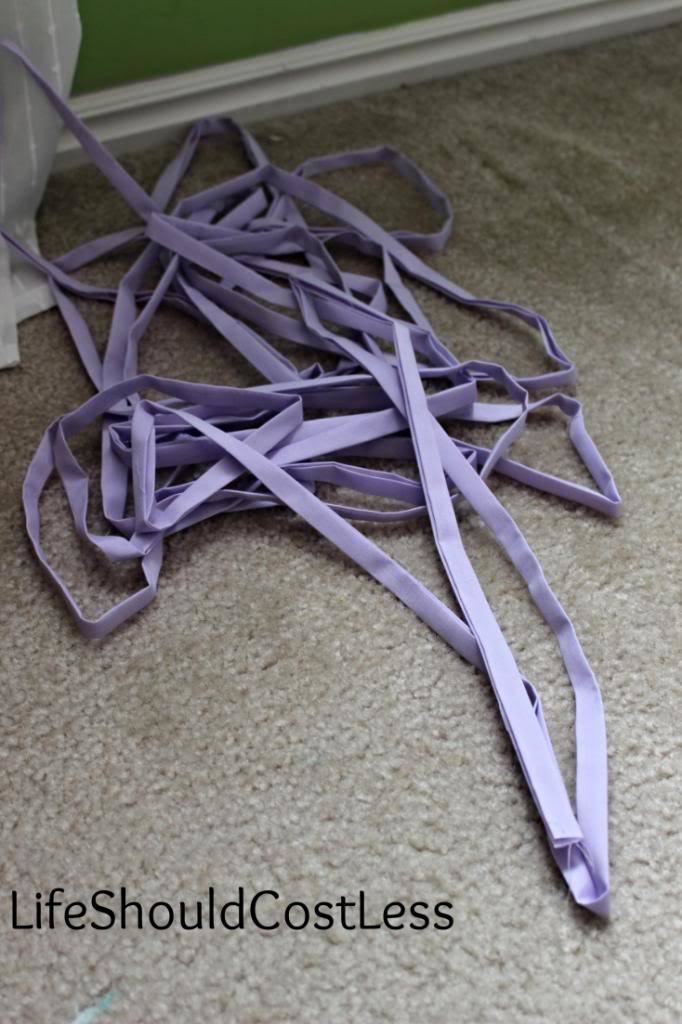
I decided to get the most tedious part, with the fabric, out of the way first. I cut 2 inch strips and made my own bias tape. If you’re not sure how to do that you can view this tutorial. I made a bit too much but that’s ok, I can use it for a future project.
On to making the body of the clutch. All I did was use some left-over felt (from my “upcycling sheets to make kids matching bedding on the cheap” post) as the lining and sandwiched it between my fabric of choice. Make sure that the right side is facing out.
With the tension on my sewing machine on the loosest settings, I sewed a few lines across the fabric (basting it together) to keep it in place when I’d need it to stay put later.
I cut out the five clutches that I would need using my bags as a guide for how long and wide I would want them. I made these have about an inch(ish) of room around the edges. It ended up being a good amount. I’ll do the same if I make any more later.
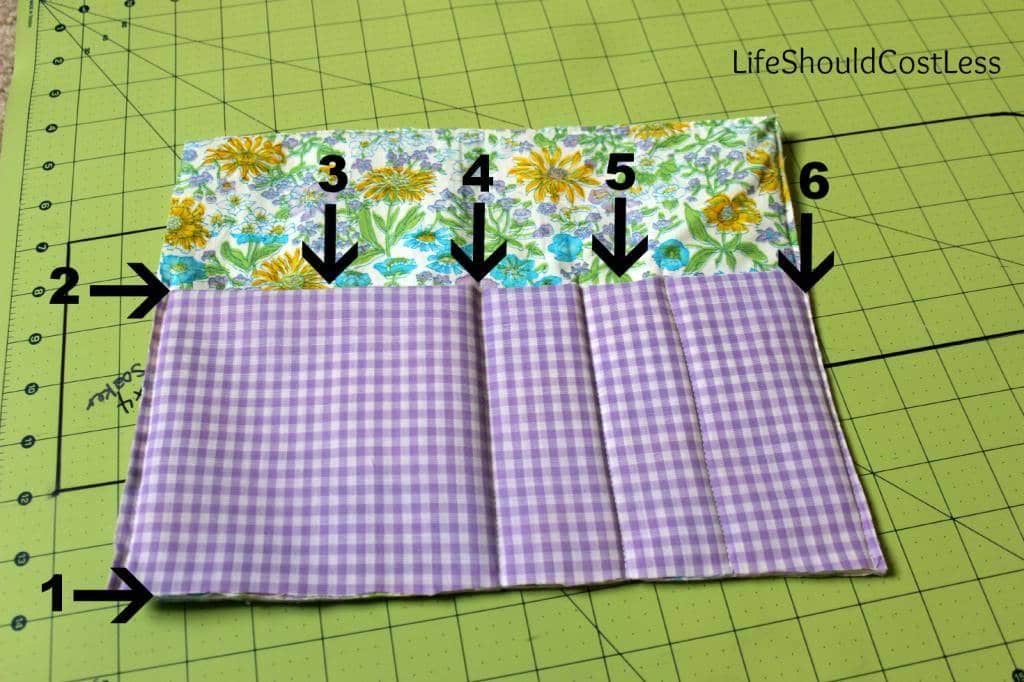
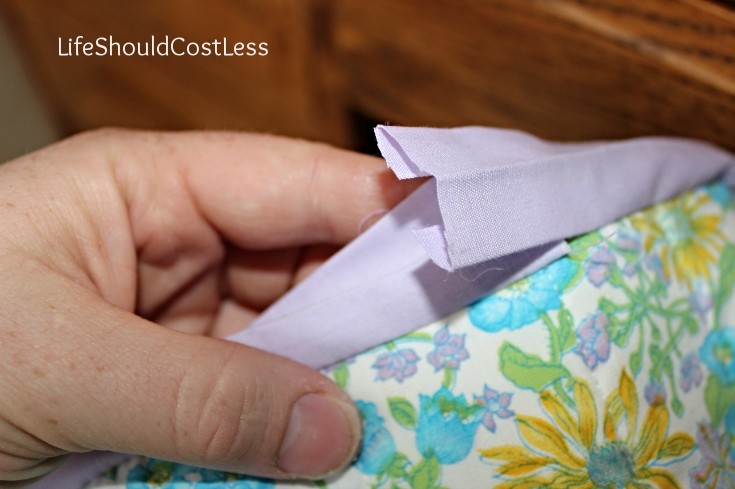
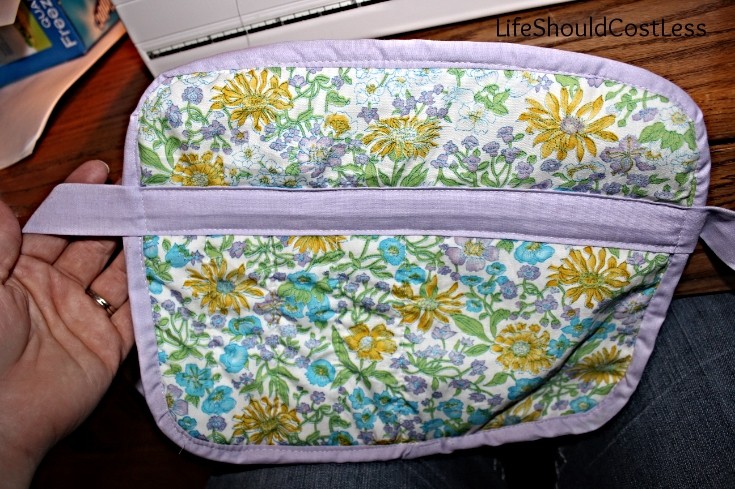
Next was to make the pockets. I took this piece of purple & white gingham fabric and folded it in half. # 1 shows the raw ends of the gingham. #2 Is the edge that was folded over. #3 Shows that I went with a large pocket for the left side. #4 Is a stitch down the center to hold it all in place. #5 Shows smaller pockets on the right side to be used for pens. #6 Shows that I sewed the gingham on the edges just to hold it in place so it wouldn’t go all crazy when I sew in the bias tape.
(I hope this is all making sense.)
Next I curved off the edges.
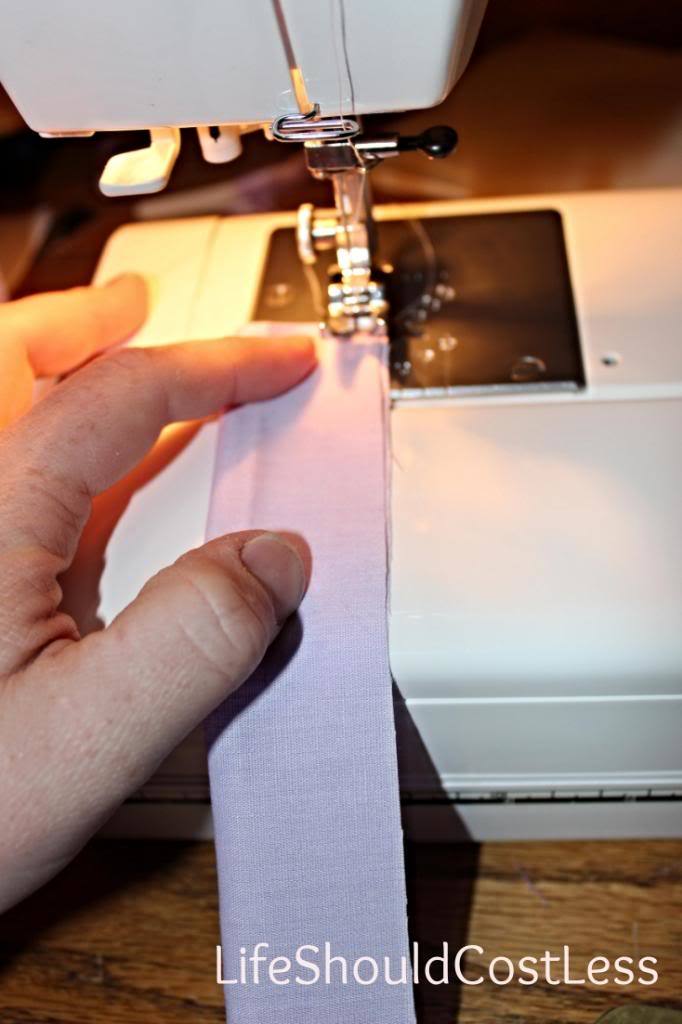
Then sewed on the bias tape. Here is a tutorial for how to sew on bias tape…just in case you need it.
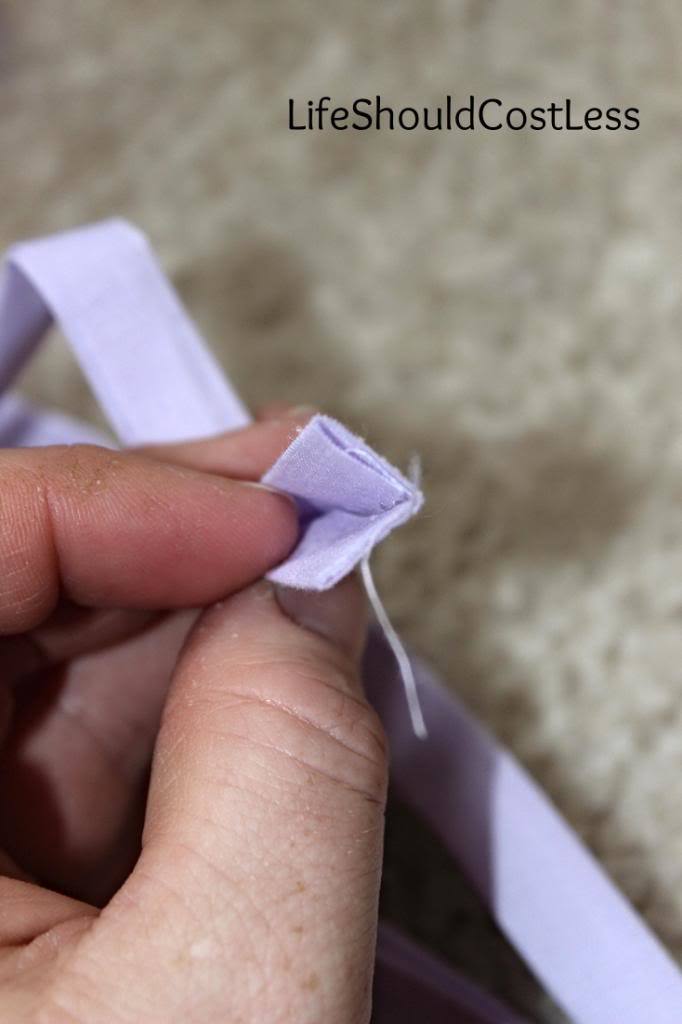
I finished off the bias tape by folding this end over, to hide the raw edge, and carefully sewing it in.
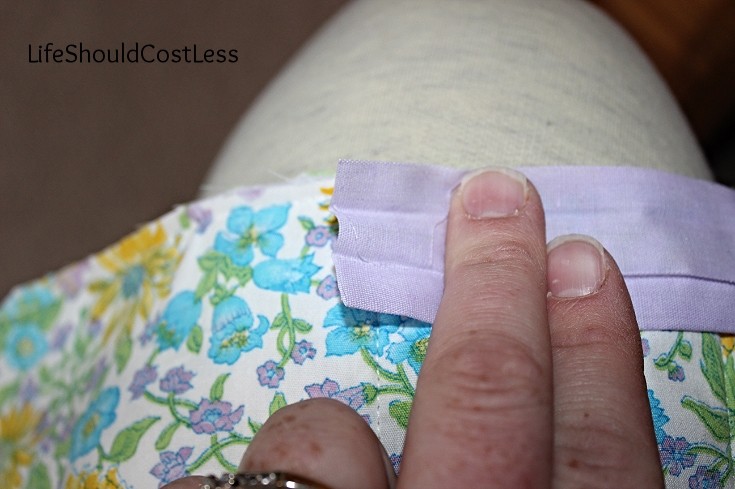
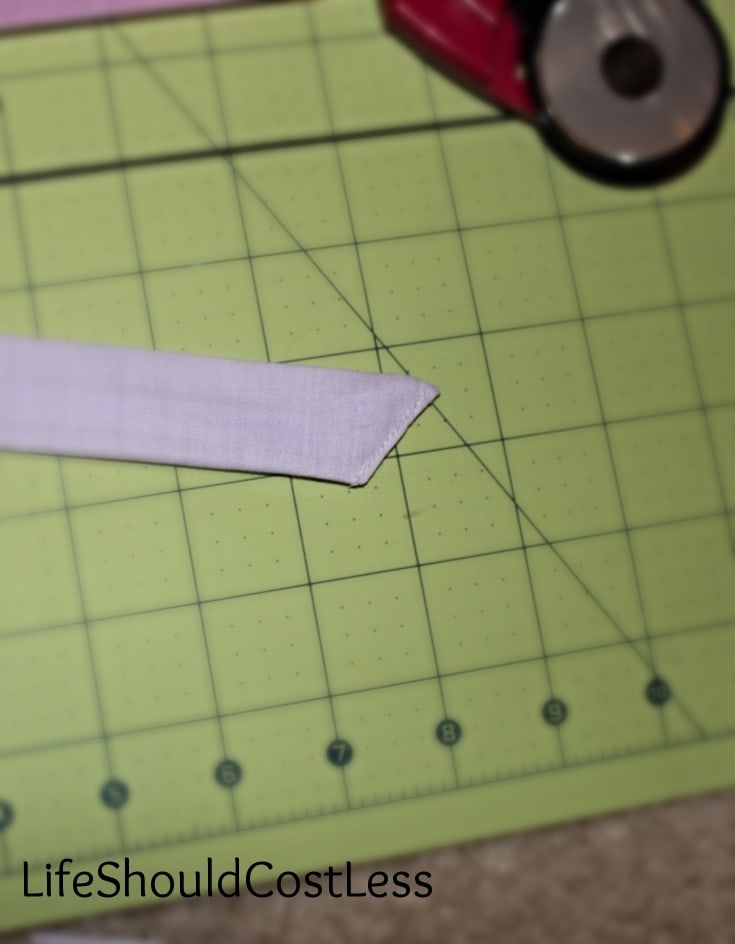
I used a 3 inch strip to make the closure “ribbon” for the bag. Which is just a tied bow. The length for this was determined by the width of the clutch when opened. I did 3 times the length of the clutch.
The three inch strip is folded in half and then sewn together on the raw edge.
Next I inverted that strip so that the raw edge in on the inside.
Then I laid it flat and ironed it so the seem would be right in the center.
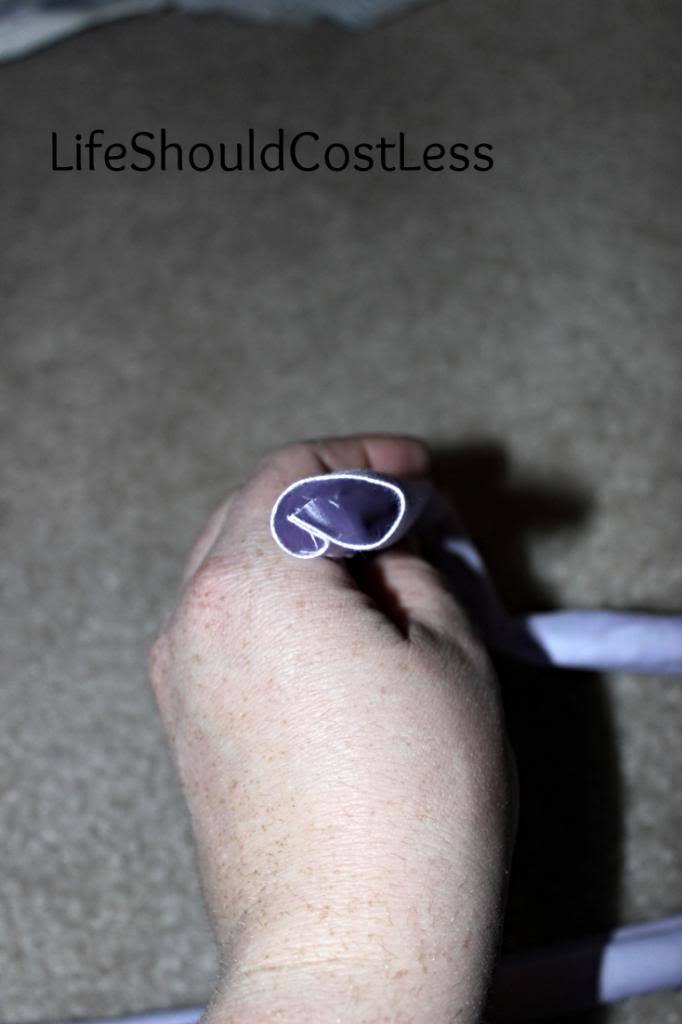
Next I tucked in both ends on one side.
Then sewed it so that it would have an angled edge, like a ribbon.
I decided where I wanted the closure “ribbon” to be and went with just above the gingham. This step is important so that you can still use the pockets. Otherwise you may accidentally sew them shut.
The “ribbon” was pinned into place making sure that the seem was facing down.
It was then sewn in in a big long rectangle.
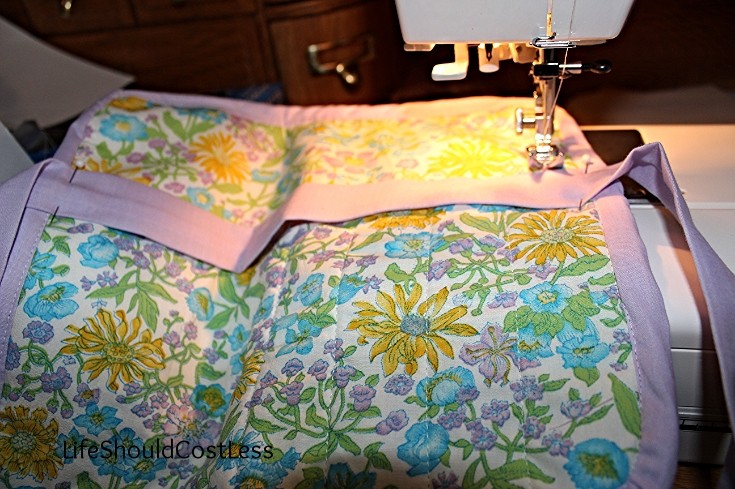
All that is left is to sew the bags in. I flipped the bags over so that the side that has the marker is side down. I used a wide zig-zag stitch and sewed it in the dead center. I decided that using the zig-zag stitch here was best since it’s the only zig-zag stitch for the whole project. That way, if I ever need to replace the bags, it will be super easy to use my stitch ripper on only the zig-zag part and I won’t risk pulling out the wrong stitches. This should eliminate lots of future headache. I’m sure I will wash the clutch once the bags have been removed, before I sew in the new bags.
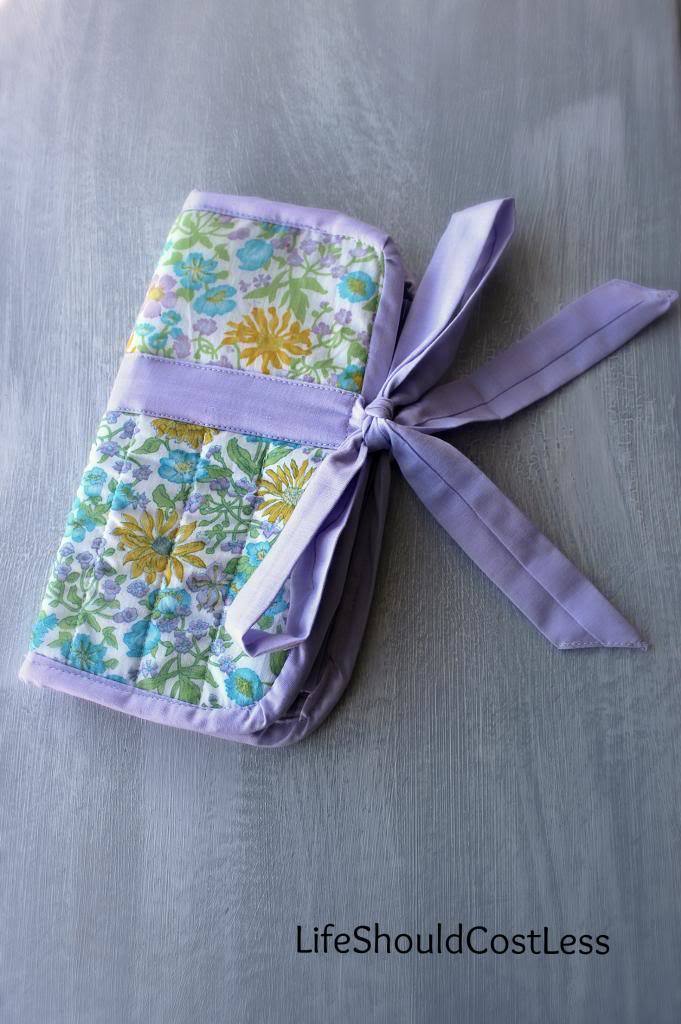
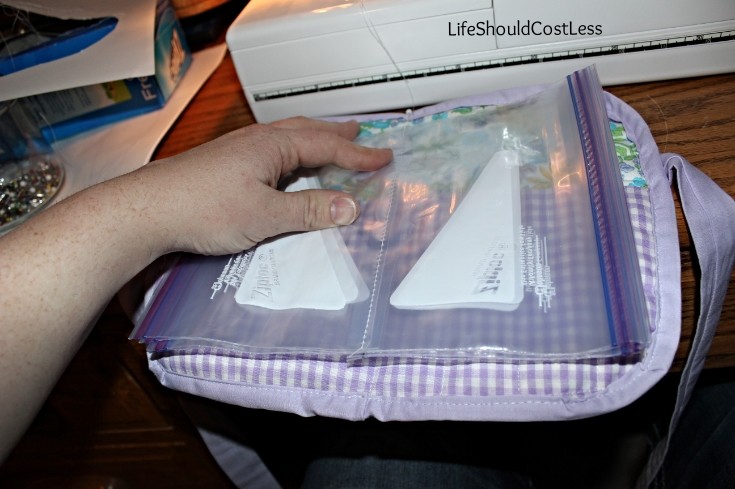
Here is the final product opened up.
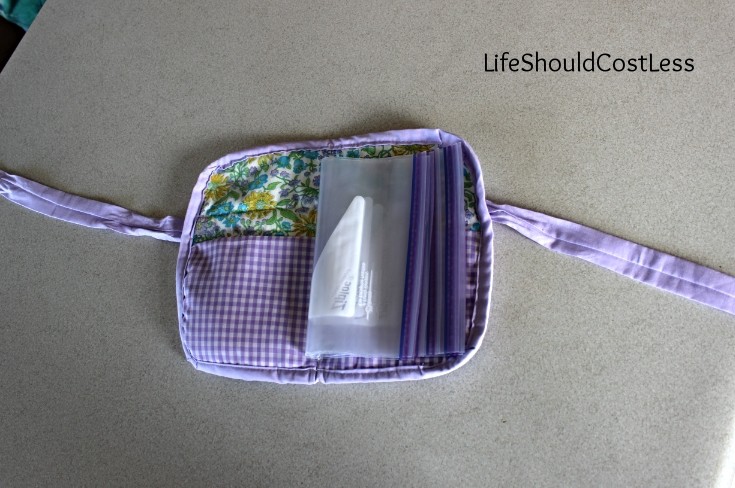
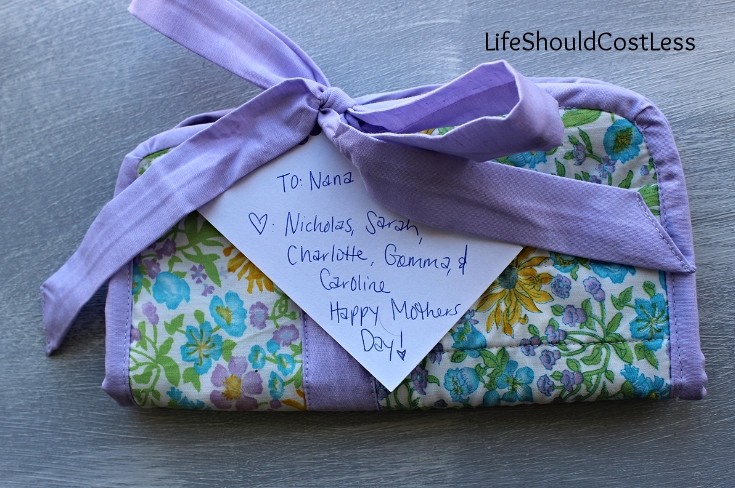
Here it is with the bow as the closure.
I decided that it doesn’t need wrapped to be given as a gift since it has a bow on its own. I just used a recipe card, punched a whole in it, and tied it into the bow.
Here are some ideas (in no particular order) of what to fill the pouches with. I do suggest getting most things at a Dollar Store if you don’t already have them on hand:
I’m sure you’ll think of other things to add. I’m hoping that my “super technical terminology” 😉 did this project justice so that you all can make your own too if you’d like. I’d love to hear what you think.