Have you ever had a project that ended up having so many issues come up that you wanted to throw in the towel and just leave it incomplete? That has been this particular project for me. Nearly anything and everything that could have gone wrong with it has, which means that the re-finish that I expected to take two weeks ended up taking a little over three months. Yikes! Would you believe that one of those “things” was my car breaking down and it and the trailer got stranded near Park City for almost a week? Oh man was it has been frustrating!

I guess it is a good thing that I am too cheap to replace my trailer and knew that I just had to keep rolling with every punch that came my way and eventually it would get done. So here is the reveal…finally.
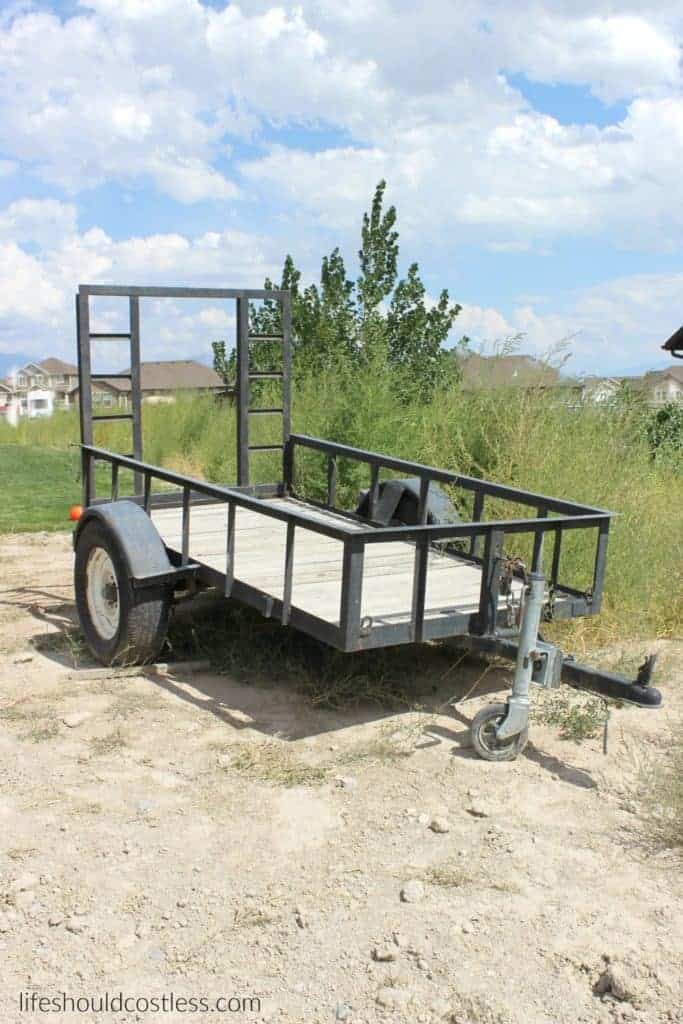
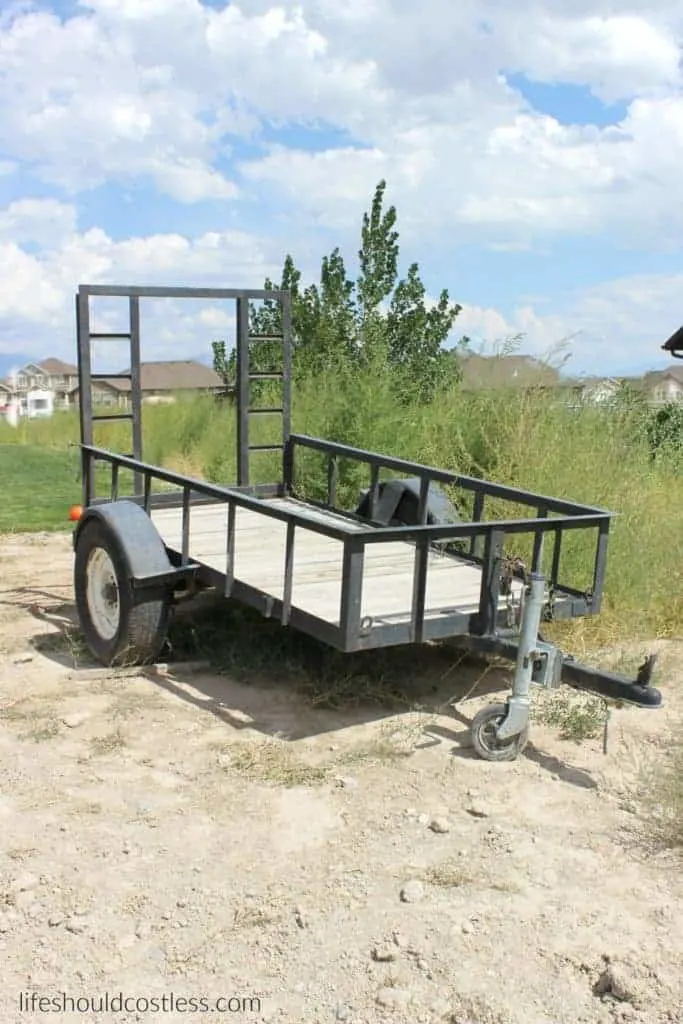
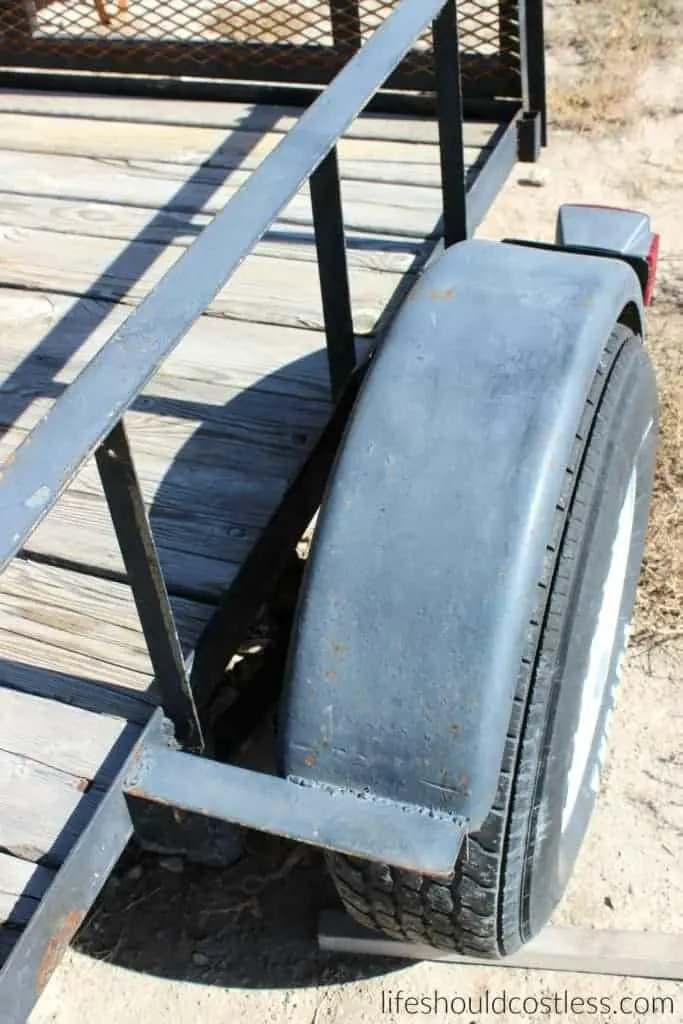
We bought this old utility trailer used, on the classifieds, a few years ago and it has been a good little trailer, but it has been starting to look pretty beat-up.
These Northern Utah winters do a number on anything that gets left outside so I decided that I better get to refinishing it before winter hits so that we won’t have to replace the wooden boards along the bottom next year.
Otherwise the Utility Trailer was looking sad enough that I was starting to get embarrassed any time we needed to take it anywhere.
In an attempt to make due with what we have, after I had decided that it was going to cost about one third as much to refinish it the way that I wanted to rather than buying a new one, I got to work.
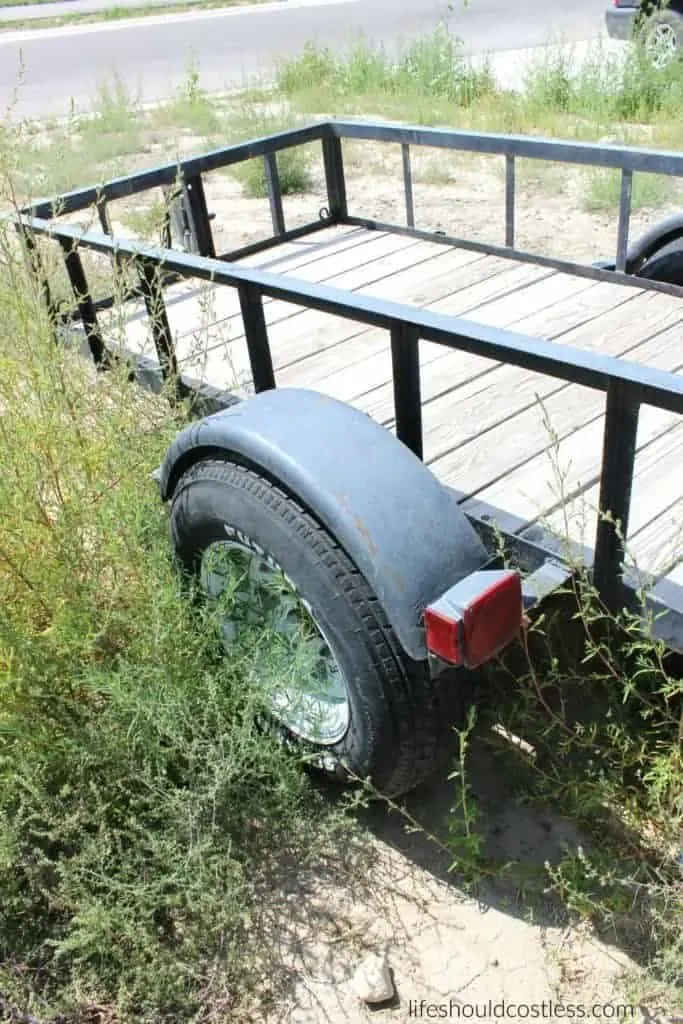
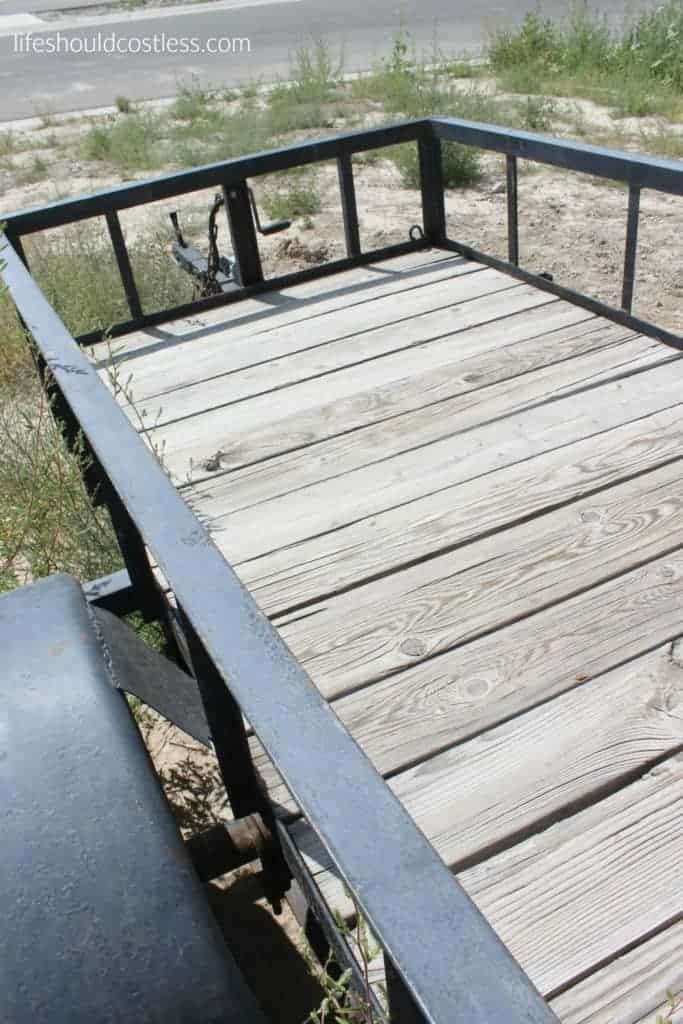
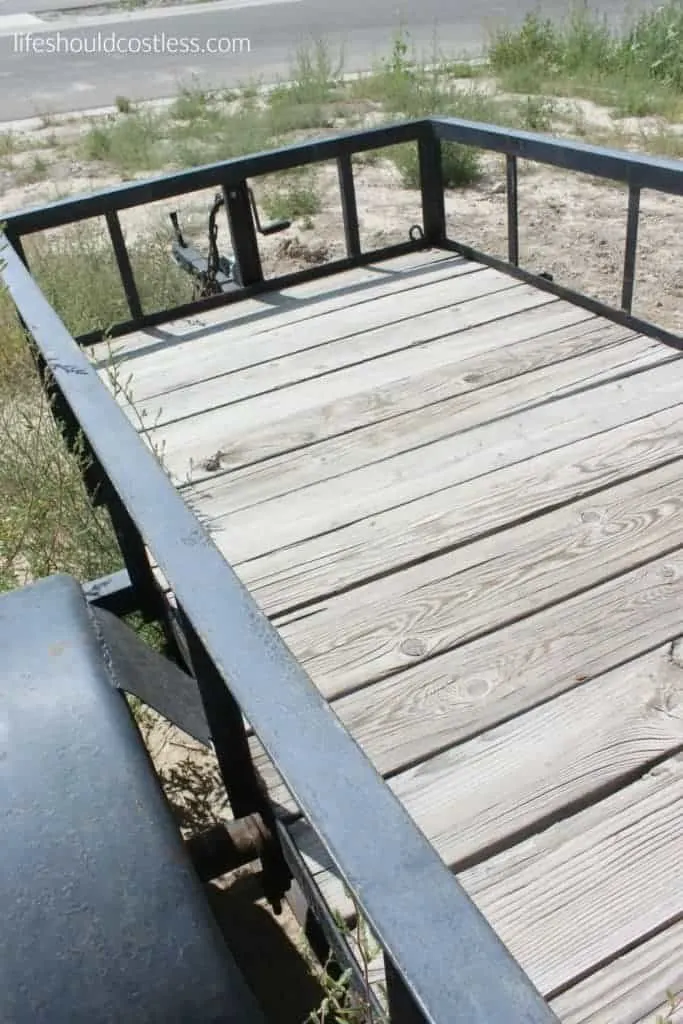
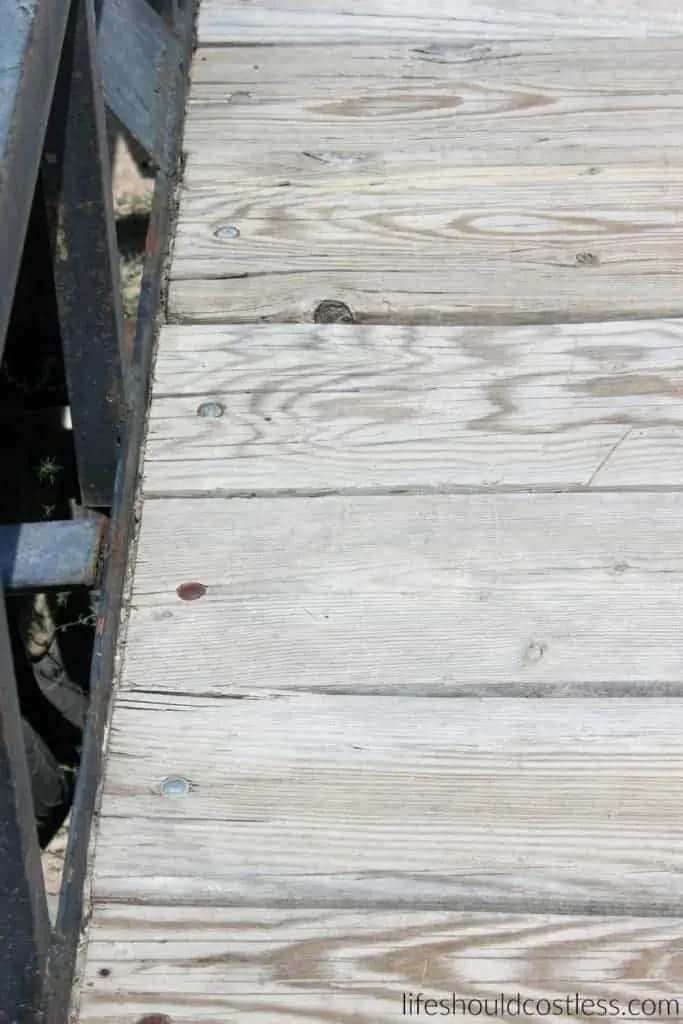
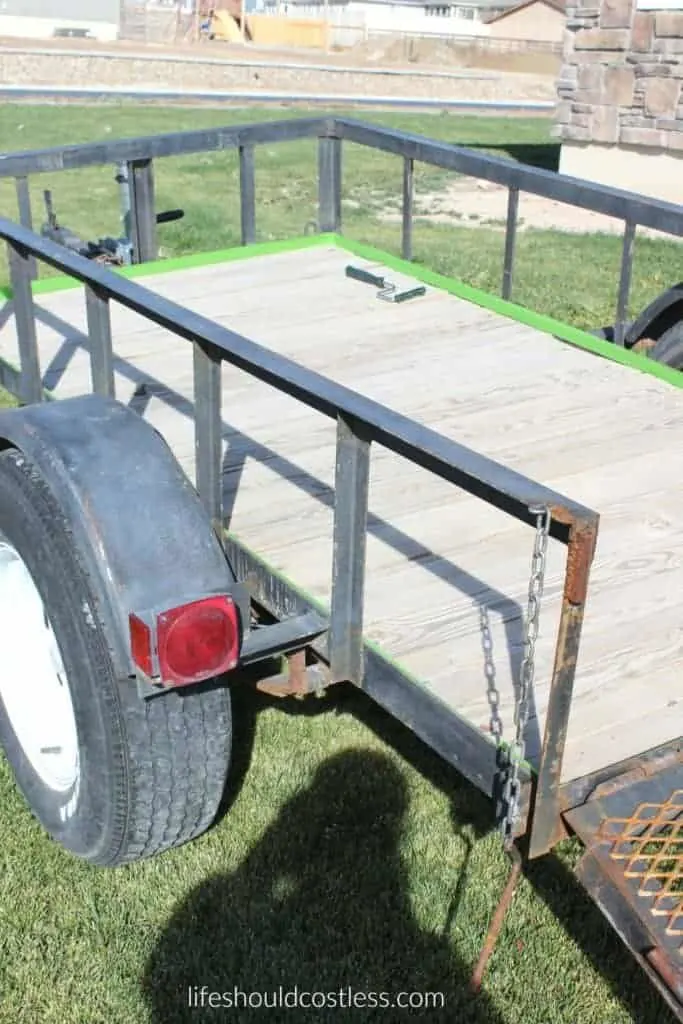
Here are some before pictures, so you can see that it was looking rusty, chipped and faded, and the boards were quite weathered but still strong.
Don’t mind my weedy yard…we are working on the needful landscaping right now and eventually there will be a drive-way there, but for now we’re rocking the weeds.

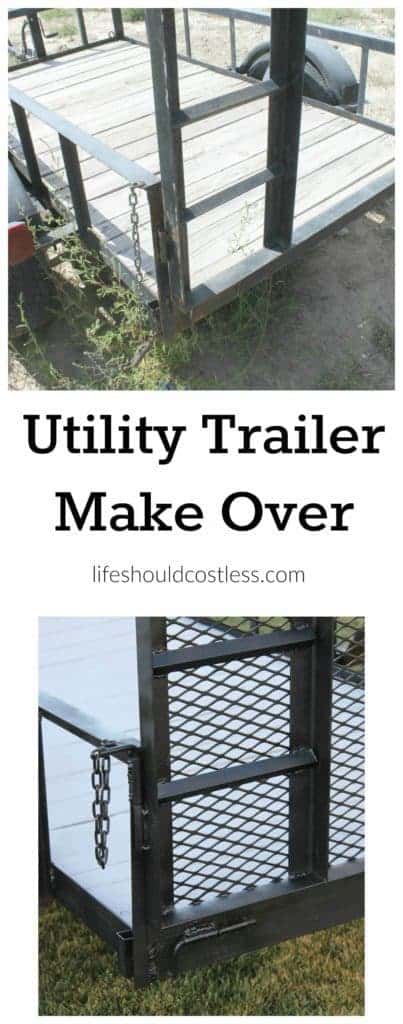
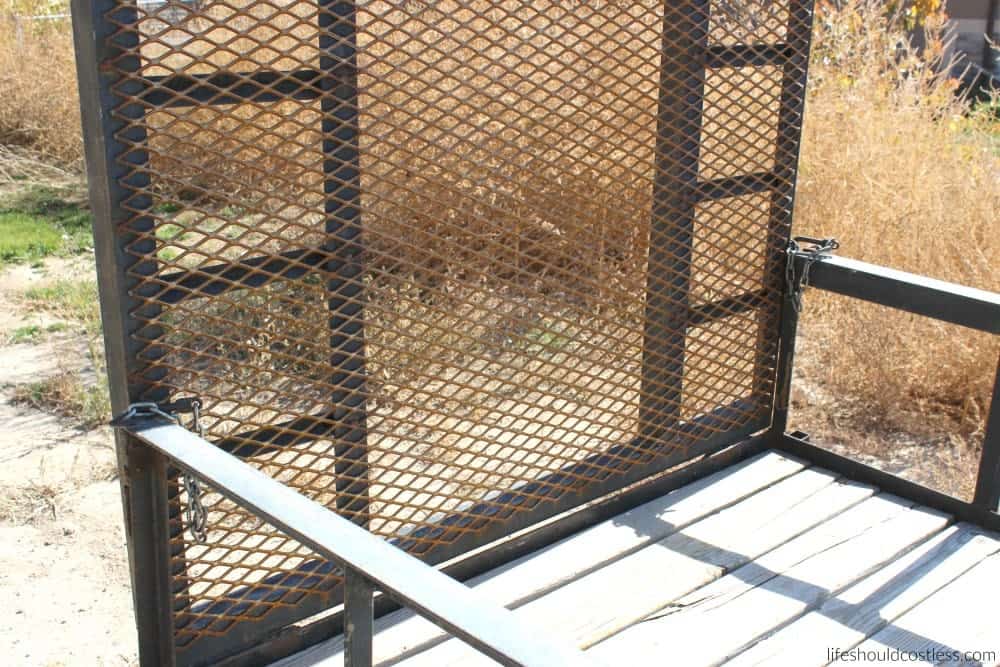
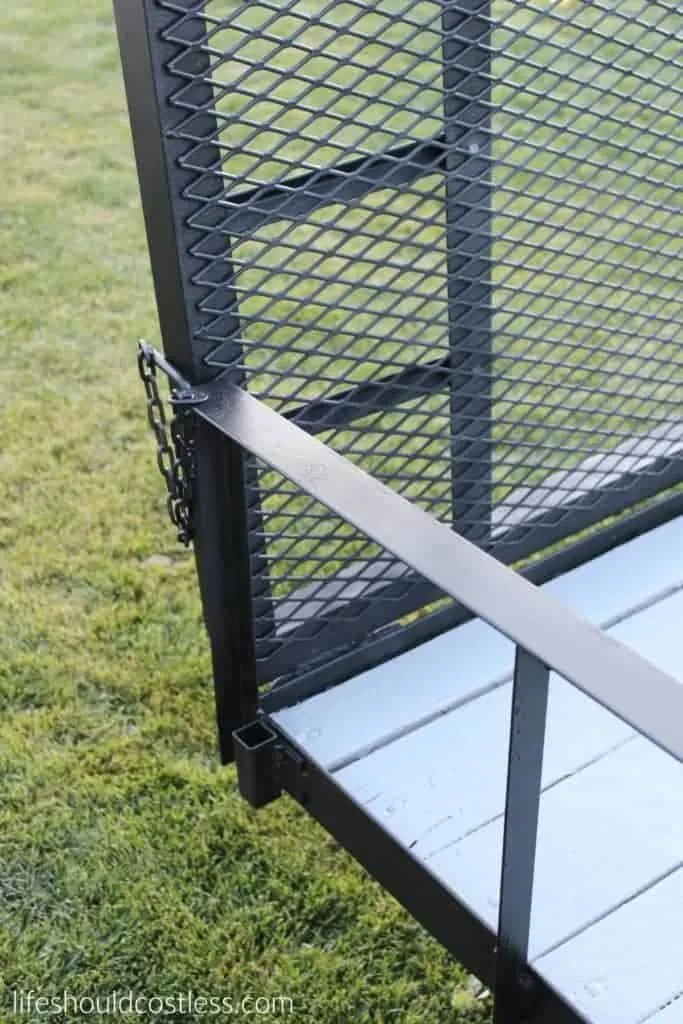
With the ramp/gate on the back the way that it was, it made it really hard to get things up it when you needed to wheel anything, so I had my neighbor add some mesh to it and fix a few welds. He did an awesome job too!
They look better than the original factory welds on the other places on the trailer. Plus, having mesh on a Utility Trailer just looks better ,in my opinion, which is a feature that I would have insisted on if we were to buy a new one.
It was my one functional aesthetically pleasing splurge on this re-do.
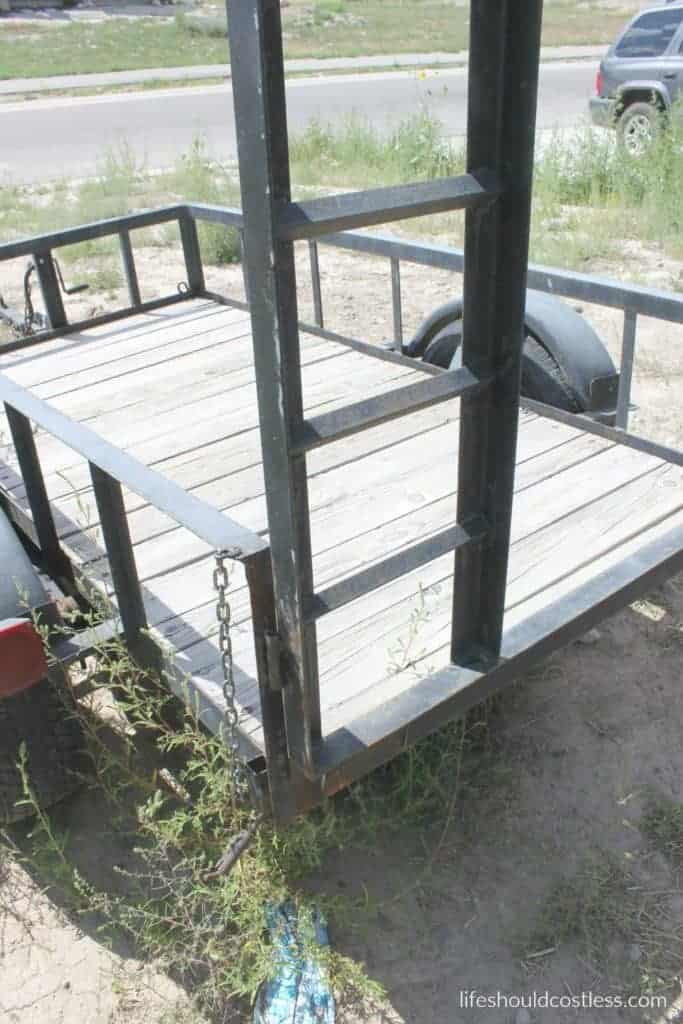

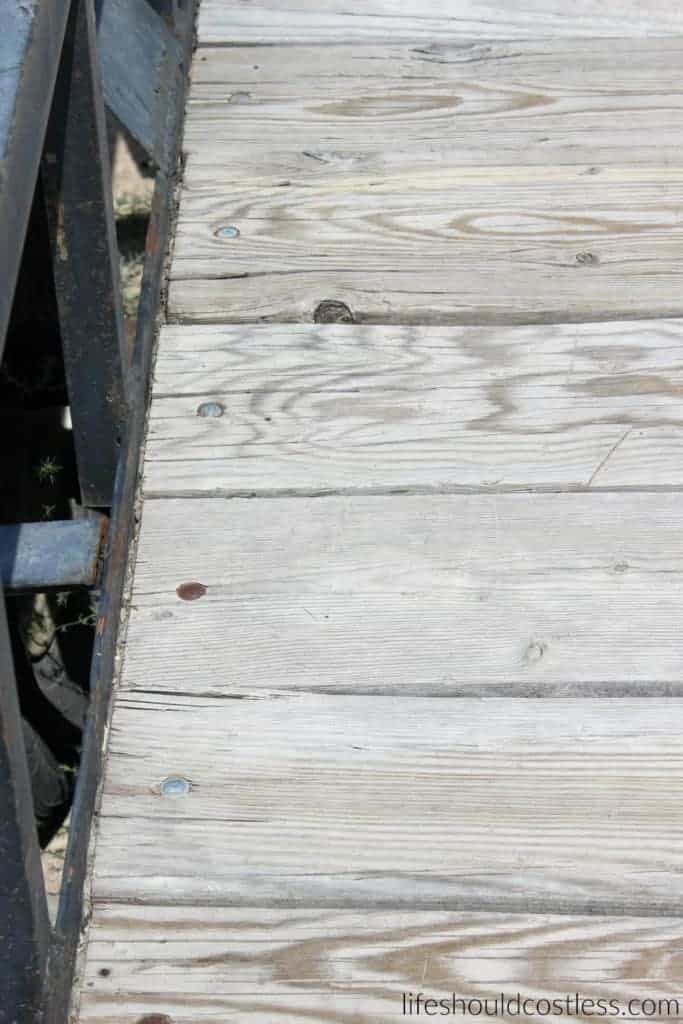
Here are some better shots of the wood deck, so that you can see it is kind of cracking in some places. It really needed some love.
Here is what it looked like once the mesh had been added, plus I’m showing you more of the rusty spots and faded black paint.

*I’ve got links to several other helpful posts down at the bottom, so make sure to keep on scrolling!*


One of the many hiccups that I encountered when redoing this trailer came when it was time to prep the wood.
I had every intention of taking off each individual board, sanding it really well and then treating it (and repainting the bolts black), but of course…wouldn’t you know that when I laid down under the trailer I discovered that almost every single bolt was bent so much that I could not even remove them without ripping the boards apart…so I went with plan B.
Which consisted of me using my orbital sander and climbing onto the bed of the trailer to sand down all of the boards.
I was surprised by how quickly that went. I’d say I sanded the whole bed within twenty to thirty minutes.
Before I cleaned up all of the saw dust I went around all of the “black” parts on the metal and sanded out any rough or peeling or rusty spots.
Then I swept it all out and wiped it down with paper towels, so that the paint would stick better, and it was ready to start painting.
Another problem I ran into was that it was really windy any time that I wanted to paint so on a particularly windy day, that I needed to make at least some progress on, I used my house as a shield and parked it somewhere that would allow me to paint the bed.
Even though ideally I would have gotten all of the metal painted first. I taped off around the base of the metal where it meets the wood and got to work.
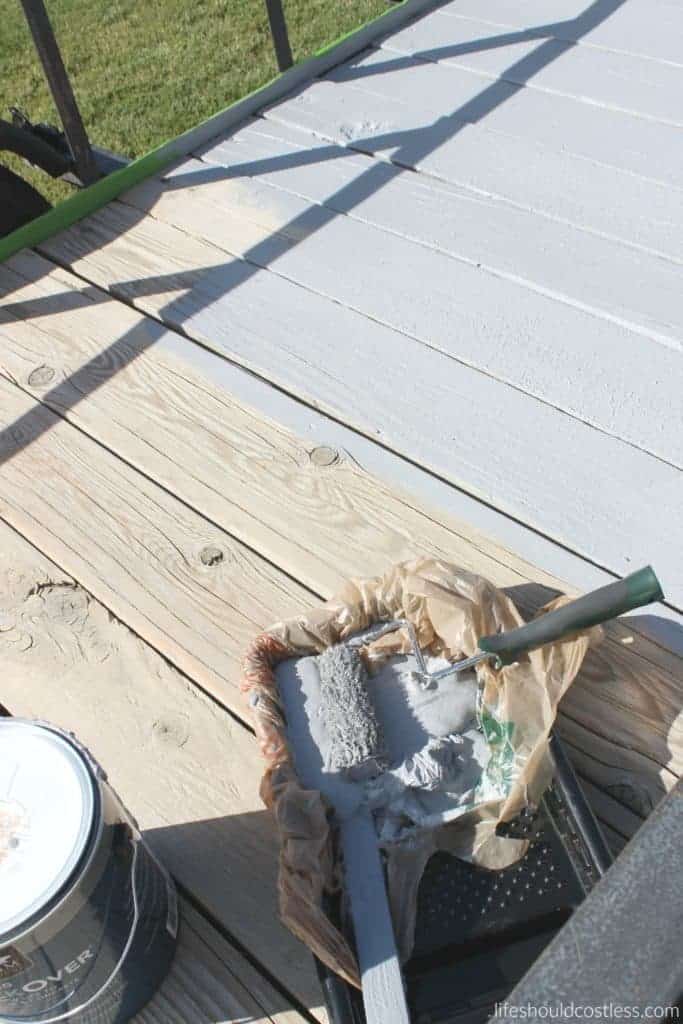
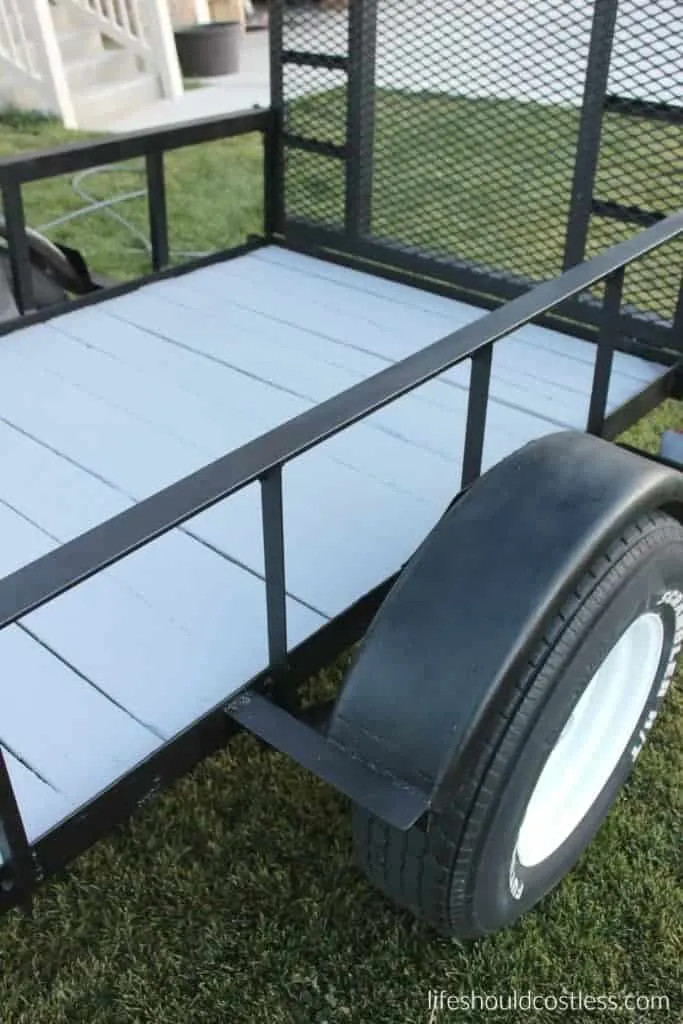
Since Behr Premium Deckover is used to revive the boards on many surfaces…namely decks, I figured “why wouldn’t it work on the deck of my trailer”?
Especially since it is supposed to revive a deck for 8-10 years or something like that…which should more than offset the cost of the Deckover in added life to the boards.
So I bought a gallon in the color Stonehenge, which turned out to be way more blue than the gray than I thought it was going to be, and got to painting.
The stuff, if you get the textured kind, feels like you are working with some runny wet cement.
The label suggested that you need two coats so for the first I went right to left and then, when I was finally able to do the second coat, I went left to right.
I did it that way to hopefully get the best coverage possible since it is easier to spot places you missed when viewing it from another angle.
That part took about a half hour for the first coat and only fifteen to twenty minutes to do the second coat.
Oh, I forgot to mention that my trailer is a four foot by eight foot trailer, in case you are thinking about refinishing your own utility trailer and would like to know how much Deckover you are going to need.
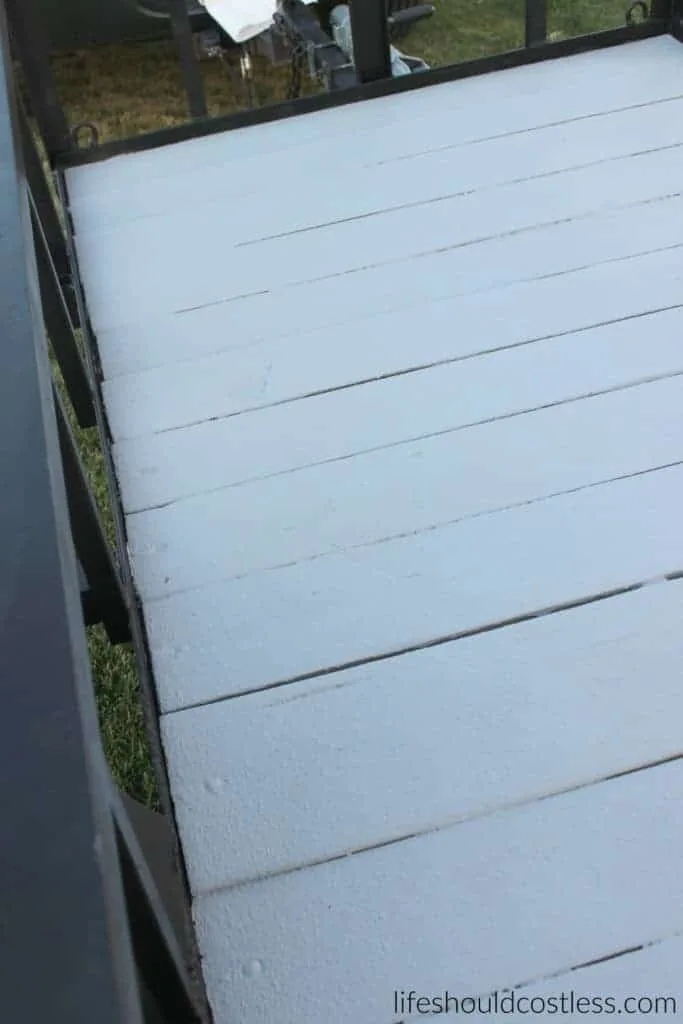
It took the whole gallon bucket! I’m really happy with the way that the Deckover turned out.
I wanted to be able to use the trailer any time we may go camping and not worry about getting slivers if we decided to sleep under the stars.

Here is a shot of how the deck looked after I was done painting it. Oh how I wish that I could have taken it apart and painted it properly, but I did the best I could given the circumstances.
I mostly just try not to look too hard and the places that the Deckover slipped between the boards a bit. That makes me feel a little better about it ;).
Luckily, when I was under the trailer attempting to take off the boards I saw that on the under-side they looked almost brand new still so that gives me great hope that only painting the top, which is the part that will be exposed to the elements the most, will have new life in them and last for years and years to come.

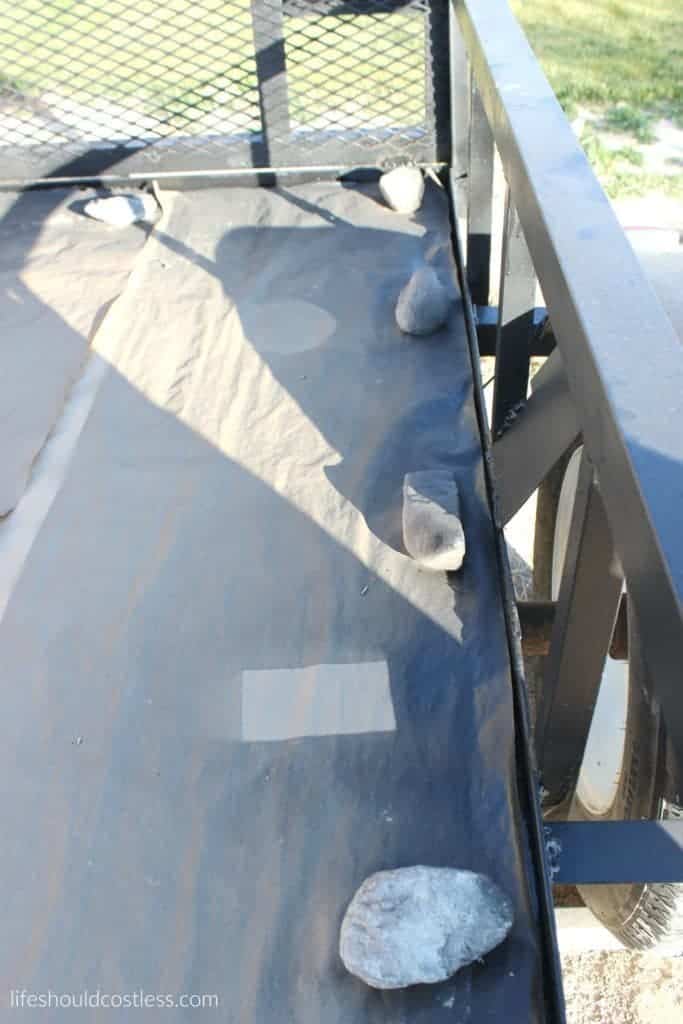
A week or so later, it was finally not too windy to spray paint so I got to work on the painting the metal. I just rattle canned the whole thing and it worked great!
Wouldn’t you know that I ran out of Frog Tape just when I had a few free moments to work on it (I go through Frog Tape like it’s nobody’s business), so I improvised and covered the deck with brown paper to protect the deck and used rocks to hold it down where I would have used the tape.
The rocks worked just fine.
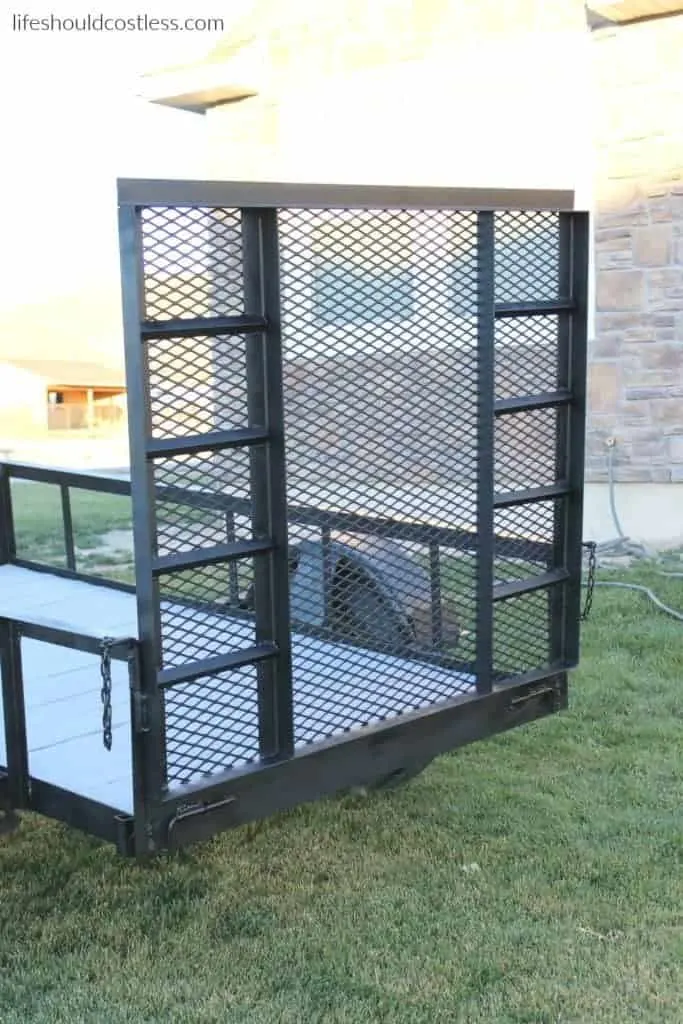
In case you were wondering about what kind of paint that I used for the metal, it was Black Krylon Maxx , in a satin finish.
I didn’t want it to be too glossy and it seemed to cover the old paint quite well. In fact, I ended up only doing one coat on the body of the trailer, with a touch up and the only part that needed a full two coats was the gate with the mesh.
I attribute that to the fact that the mesh hadn’t already been painted black, so it makes sense that it needed more paint to get the same coverage.

I really don’t think that you guys need much direction on how I rattle canned all of the black areas and the mesh. It’s pretty much just common sense.
I was just really careful to make sure that I covered anything that should not be getting paint on it.
Ideally, instead of sanding it down myself and spray painting it, I would have taken the trailer somewhere and maybe gotten it sandblasted and then repainted , but I figure that if I was going to spend that much money I may as well just get a new trailer…which wasn’t going to happen any time soon.
As usual, I made due, but just prettied it up a bit with my budget in mind.
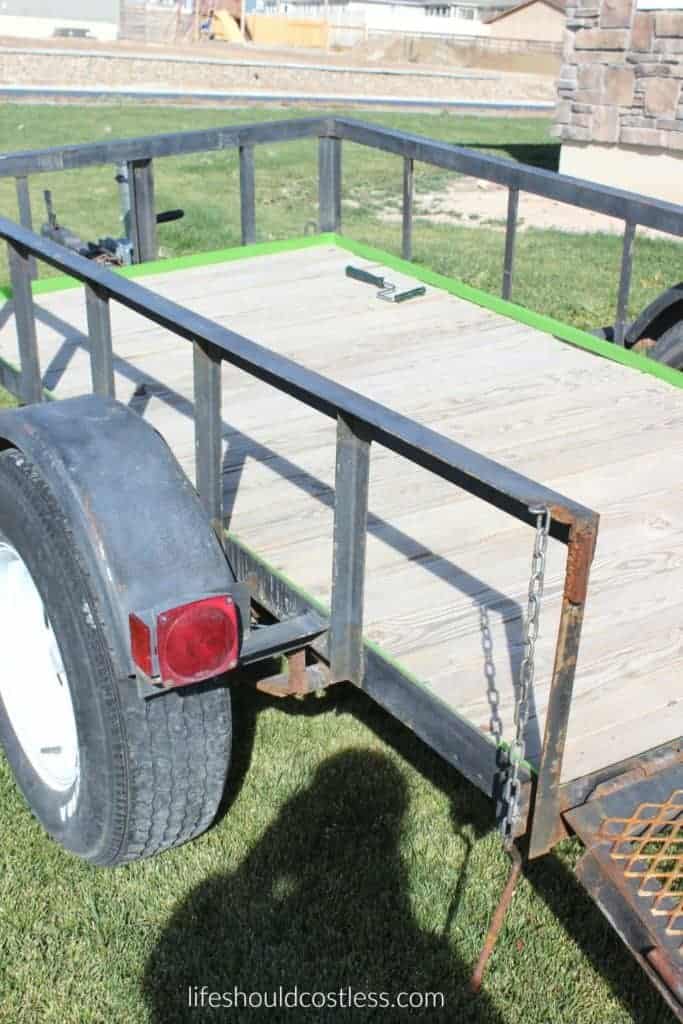
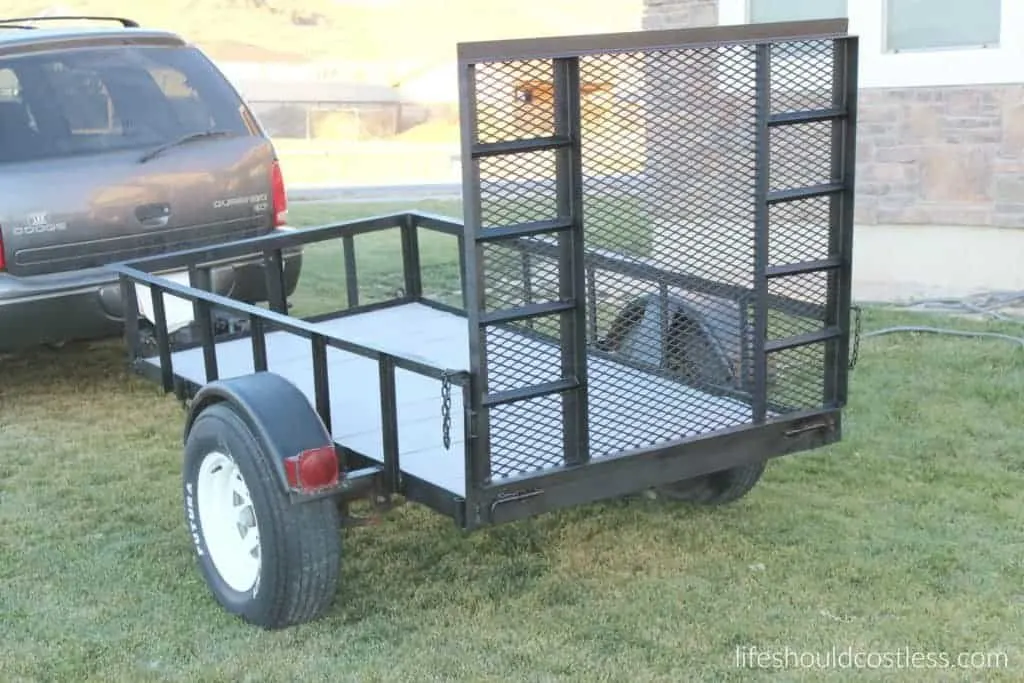
The painting was done, so now it is time to show you a bunch of after shots!

I’m not delusional, I know that it is far from perfect, but I am pleased with this much progress!

My favorite part of the trailer revamp, of course, would have to be the mesh on the ramp.
No regrets here at the small added expense because it brings so much more functionality and looks so much better.
If I had not needed to get any welds fixed, I am sure that I would have done without, but needing to get the welds fixed turned out to be a good thing…I think that kismet is the right word for that.

Here it is completely finished, as much as I am going to finish it, at least this time anyway. I am sure that it will need some touching up and such throughout the years.
I forgot to tell you all that I also sanded down, taped off, and painted the white part of the wheels. They were super rusty and I felt it was necessary.
The white paint that I used for the wheels was Krylon Maxx Bright White in a satin finish.

Now that the trailer is looking so much better I really need to get the towing package installed on my new, to me, car so that I don’t have to pull it with the older uglier car (plus I need to sell that car).
Talk about a first world problem…I know, I know. Anyway, what do you all think? I personally think that it is a night and day difference.
Scroll back up to the top and take another look if you don’t agree. It’s kind of crazy, and the sad thing is that since it took me so dang long to do the make over, my husband didn’t really notice too much of a difference.
I guess that at least now I have the pictures to prove just how drastic of a change it really was.
There were so many problems with this project that I think that the absolute best part of it is that I am finally done! Sheesh!
It seriously made me wish I was incredibly wealthy so that I could just get rid of it and never look back…but who am I kidding?
If I were wealthy I probably would need a much larger trailer than a little rinky dink 4’x8′ one, you know, to haul all of the toys that we would have. A girl can dream right?
As per my usual request, if you liked this post please make sure to share it on social media! It is now easily shareable on Pinterest, Twitter, and Facebook!
Thank you so much for stopping by my blog and hanging out with me! I am hoping that I gave you all ideas as to how to refinish your trailer, or if some of you wanted to make a little extra money on the side, it wouldn’t be too hard to try to find some cheap second-hand trailers and flip them…just a suggestion. Have a great day!~Sarah
P.S. This project cost me between $200-$250. Which is about 1/3rd or 1/4th of what it would have cost to buy a new trailer. Not too bad and that was even with getting the welds fixed and adding the mesh.
You May Also Like (the pictures are links):


*Posted 11/12/2016