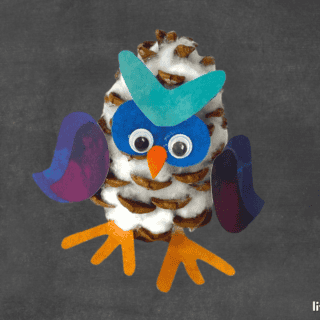
Hi there! Join Sarah on Facebook, Pinterest, and/or Subscribe to keep up with what’s new at lifeshouldcostless.
Please excuse my lack of posting these last few months, my family just went through a move and between pre-packing, staging, deep cleaning daily after 4 little kids, selling a house myself, house-hunting, packing, moving, and settling in a little, I have had to put my blogging career on hold a bit…for sanity’s sake. So, now that the dust is settling I am gearing up to get back into the swing of things.
Boy do I love a good up upcycle project! Making something new out of something old is not only green, but it’s fun to see what you can come up with. Plus, who doesn’t have old décor hanging about that could use a good repurposing? I know that I have a few boxes chock full of various decorations that I have just gotten tired of looking at over the years so it’s time to either send it to a thrift store or make something new out of it. Which brings me to showing you all what I made… even if you don’t like what I did, keep reading because there is a 10% off coupon code for anything at The Shabby Store (a super darling Etsy shop that you will fall in love with and they have much more than just shabby-style stuff).
I started out with two décor plaque-thingy’s (don’t know what else to call them) that both no longer match my homes color scheme and “the stockings were hung…” sign only has four hooks and we have a family of six now so it doesn’t really work for its intended purpose anyway. All I had to do was remove the hardware on the front, patch holes, let it dry, sand, and dust them. Then they were ready to get dressed up a bit.
I added beads around the edges, just like in my picture frame make-over post (where you can find instructions).
That was followed by two coats of Americana Decor chalk paint in Relic. I made sure to get in all the cracks and crevices between the beads and such.
Next came a thick dry brushing of Americana Decor chalk paint in Primitive. Followed by a light dry brushing of Americana Decor chalk paint in Everlasting. Not sure how to dry brush, just google it. *I let it dry well between each color.*This was all completed with two coats of Americana Decor wax in Clear.
I love this product, but the wax will dry in yellow clumps if you use too much, so make sure to use thin coats. I’ve also had great success with tinting it with a few drops of whatever my final color of paint was to prevent the yellowing.
Next I let it cure over night and then added the hardware to the front. I got my hooks from The Shabby Store, (they are listed as white distressed swing arm hooks with matching screws..in case you want to get the exact ones I did) I’ve been drooling over them for months and finally made them a priority in the budget. It was quite necessary since the only coat closet in my new house is by the garage door. I’m not going to make people that come over walk all the way over there (especially in winter) just to put their things away and I don’t want people hanging everything over the banister. Also, the only towel bar in our master bathroom is in the water closet portion of the bathroom instead of the same room as the shower…which is super wacky and you don’t want details of what germs I’m worried about being all over my towel if I use that towel bar;).
The original hanging hardware was on the back of both plaques still, so I left the original on the “simplify” sign as it was pretty heavy duty already and had to swap out the hardware on the other sign because the hooks are iron so it is pretty heavy to begin with plus they’ll need to hold the weight of whatever is hung on them. I used some Heavy Duty Keyhole Hangersand then just some heavy duty wall anchors and screws. *If your screws for the hooks are a bit too long, just put a little hot glue over where they peek through in the back so that it won’t scratch up your wall.*
I’m super excited with how they turned out! I hope it got you all excited to make something old into something new…even if you need to find an old sign at a thrift-shop to refinish, it’ll still be a fun project. Anyway, I’m sure you’re wondering when I’m going to give you that coupon code for The Shabby Store. Lindsay, the shop owner, graciously offered it to you, my readers, when I let her know that I was doing this project. The code is SAVE10 and expires on 10/25/2019. It’s good for ANYTHING in the shop and there are so many adorable things that you are sure to be glad that you stopped by (there are also industrial and other styles of décor, so if you’re not into shabby, you’ll probably still find something you adore). Make sure to buy in bulk to save even more money for your projects! ~Sarah
P.S. If you have any friends that would love to buy from The Shabby Store, please send them the link to my post, not just the coupon code…Thanks!
Follow along:


You may also like (the pictures are links):