
When I originally shared my mom’s Family Favorite Cheeseball recipe a couple of years ago, I remember thinking that I was really bummed that I couldn’t figure out how to swap out the cream cheese for plain Greek Yogurt. I wanted the protein content to be really high and also for it to be lower fat, but I knew that the Greek Yogurt wouldn’t be the right consistency and that it wouldn’t really be a ball so much as it would be a soupy mess.

Well, I finally figured out how to swap out the cream cheese for Greek Yogurt with just a couple of extra steps. Something that was a “duh” (slaps own forehead) moment…considering I’ve known how to make my own Cream Cheese and Sour Cream for a couple of years now. I must say that I liked the results even better than I thought I would. I was excited that this version of the Cheeseball is even much tastier than when I’ve made it in the past with fat-free cream cheese.
On to the tastiness!
Printable Version
On to the tastiness!
Printable Version
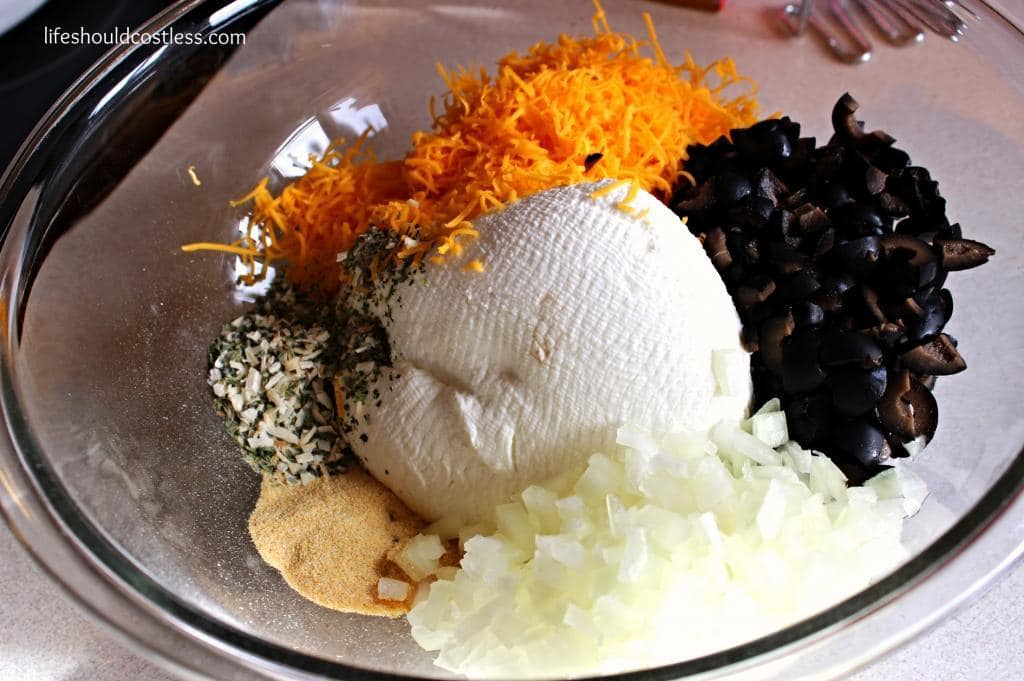
In a large bowl, add the following:
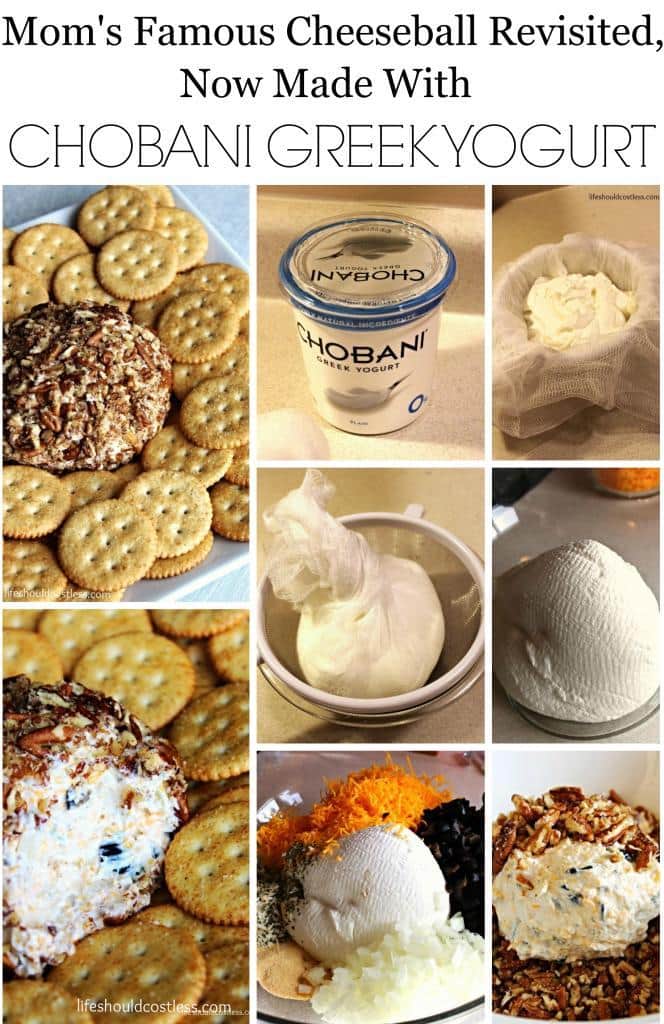
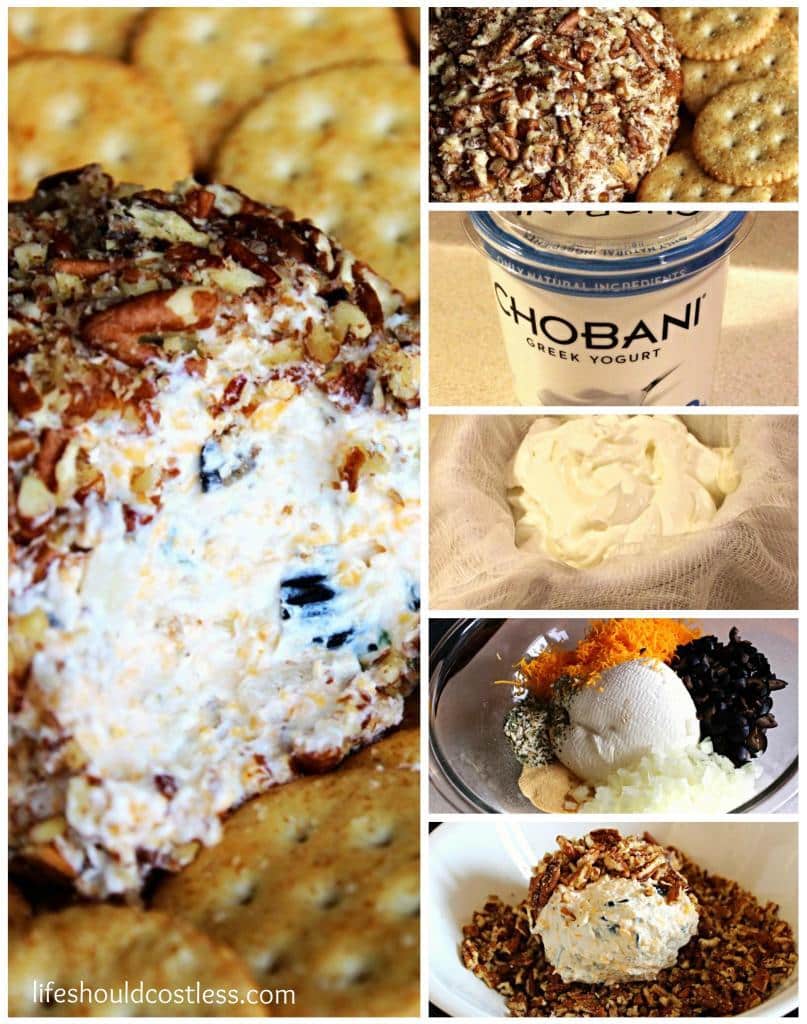
32 Oz Container of Chobani Plain Greek Yogurt, (That has been strained through cheesecloth over night in the refrigerator. See below for instructions w/photos.)
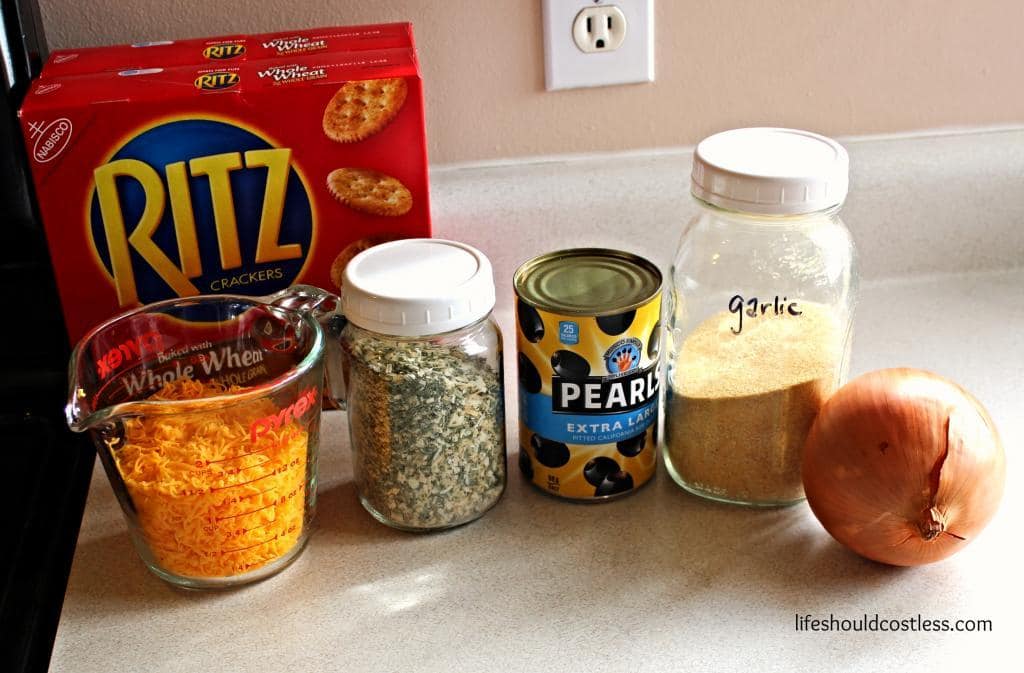
1 & ½ Cups Cheddar Cheese, Grated (medium or mild)
1 Package of Ranch Dressing Mix (or 2 T My Ranch Mix)
1 Can Olives, Chopped
1 T Grated Garlic (½ T if you need to use powdered)
½ Medium Onion, Finely Chopped
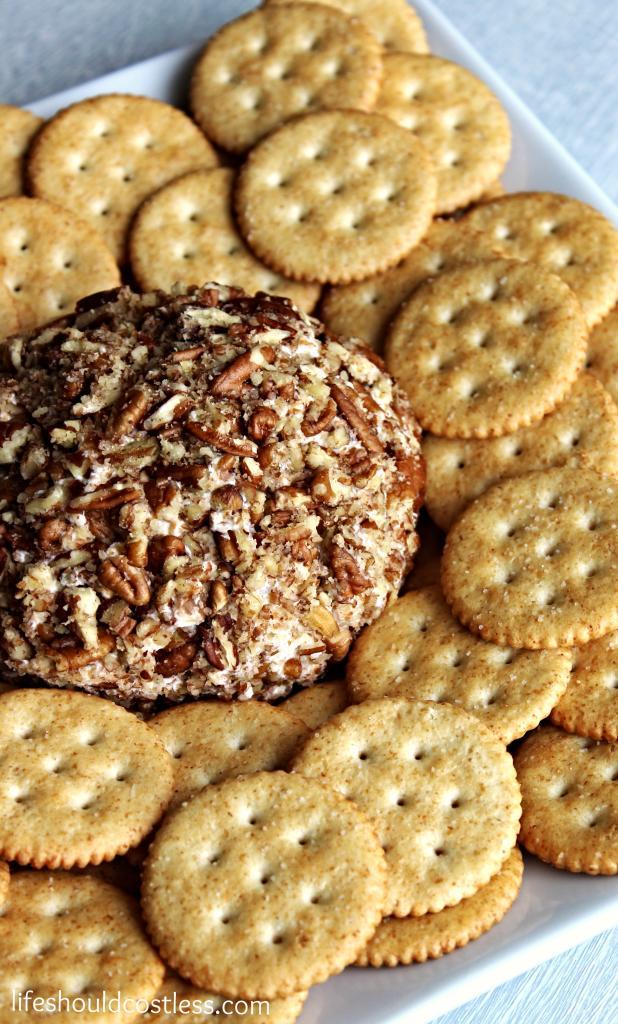
Combine all ingredients in a large bowl. Mix well. Separate mixture into three balls. Then roll in chopped nuts, I use pecans. I serve it with Whole Wheat Ritz crackers, but it’s good with many different kinds! I think that it tastes best a few hours after preparation as the flavors have had time to blend. Keep covered and refrigerate!
As usual, if you’d like to see some photos and get tips to simplify the process, read on:
32 Oz Container of Chobani Plain Greek Yogurt, (That has been strained through cheesecloth over night in the refrigerator. See below for instructions w/photos.)
1 & ½ Cups Cheddar Cheese, Grated (medium or mild)
1 Package of Ranch Dressing Mix (or 2 T My Ranch Mix)
1 Can Olives, Chopped
1 T Grated Garlic (½ T if you need to use powdered)
½ Medium Onion, Finely Chopped
Combine all ingredients in a large bowl. Mix well. Separate mixture into three balls. Then roll in chopped nuts, I use pecans. I serve it with Whole Wheat Ritz crackers, but it’s good with many different kinds! I think that it tastes best a few hours after preparation as the flavors have had time to blend. Keep covered and refrigerate!
As usual, if you’d like to see some photos and get tips to simplify the process, read on:
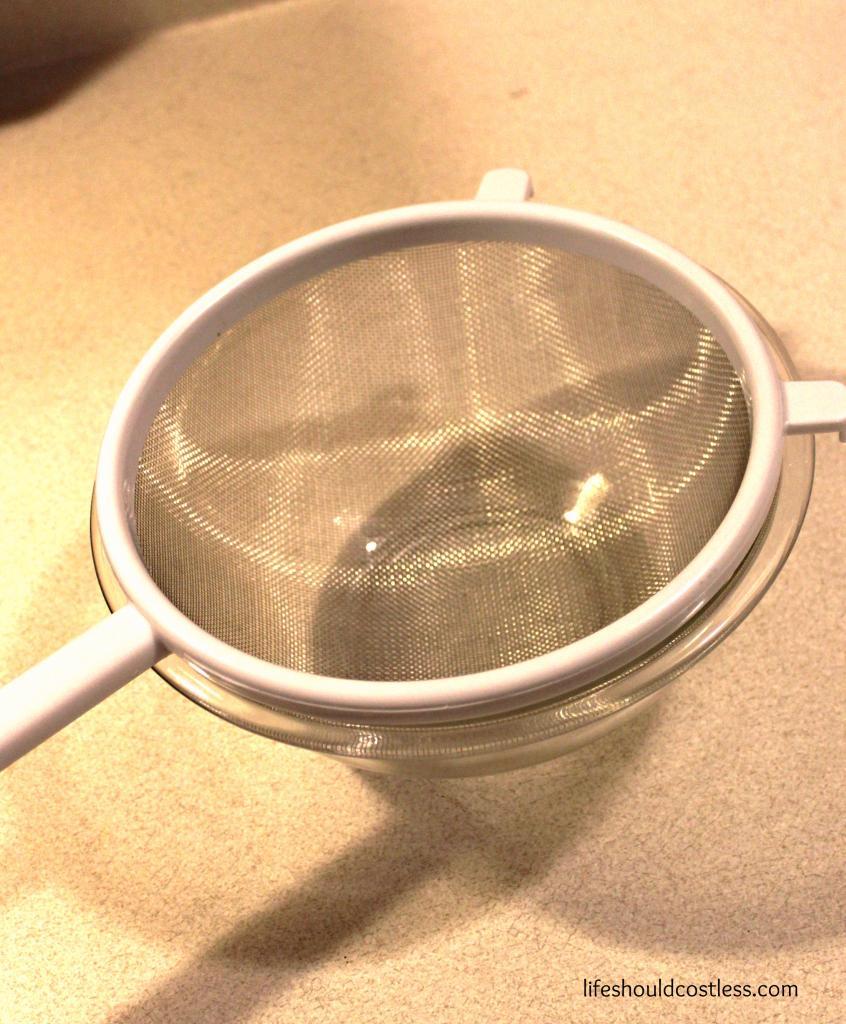
Start out with a deep bowl and a fine mesh colander. There needs to be a couple or so inches between the bottom of the bowl and the bottom of the colander so there is plenty of room for the whey to drip out.
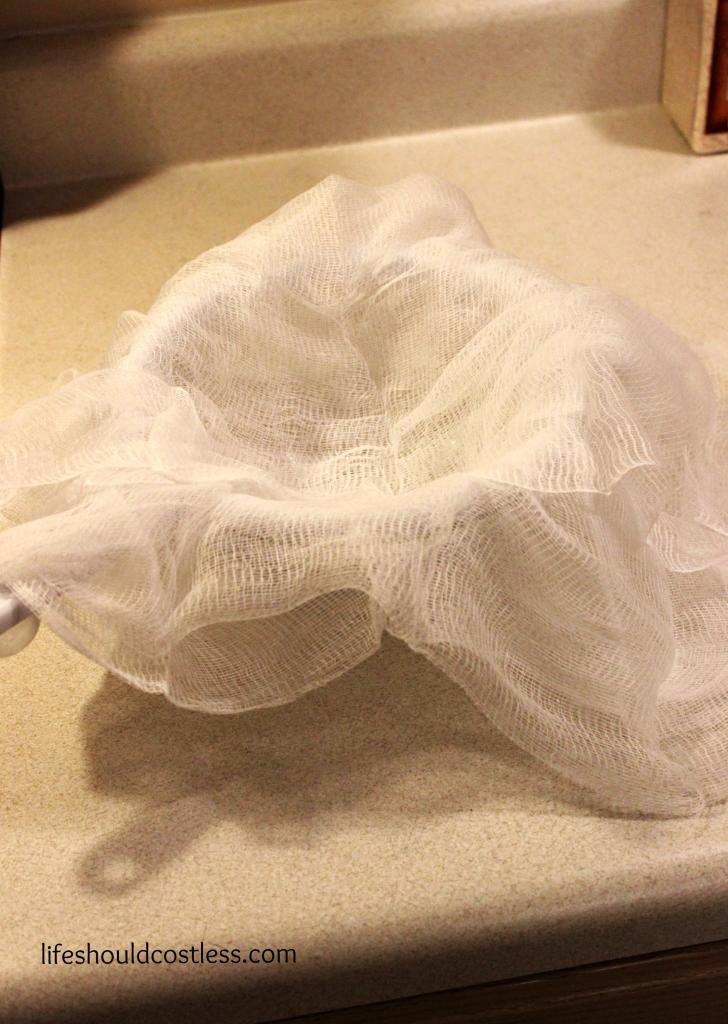
Lay your cheesecloth across the colander. I used four layers.
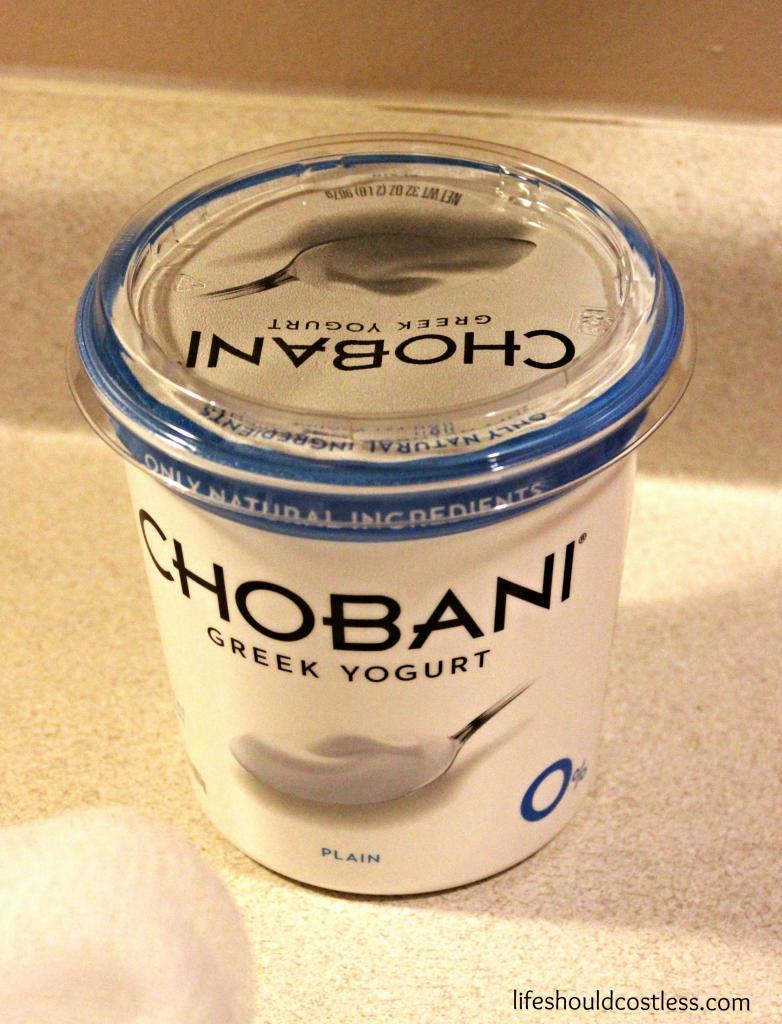
Just showing you the right package of Chobani.

I scooped all of the Plain Chobani Greek Yogurt into the cheesecloth.
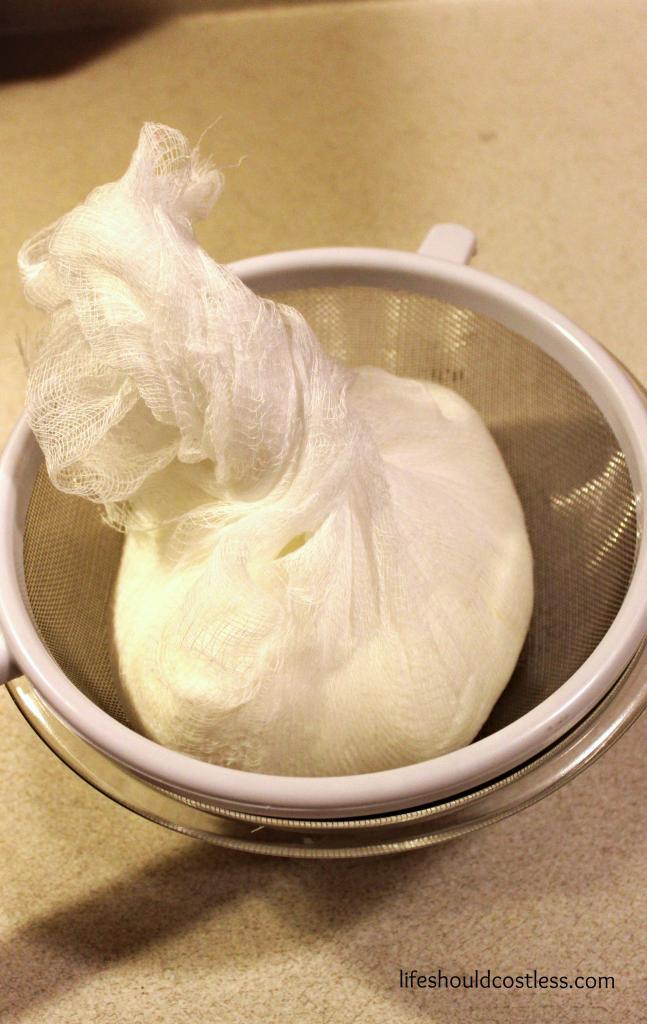
Then wrapped it up a bit and refrigerated it like this overnight.
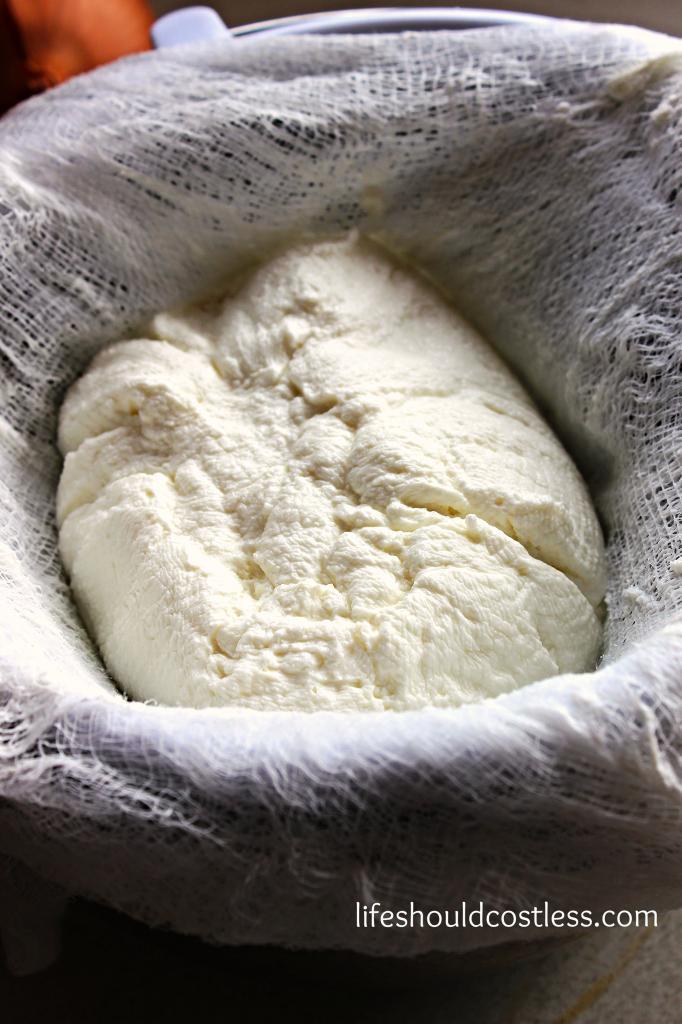
This is what it looked like in the morning when it was done.
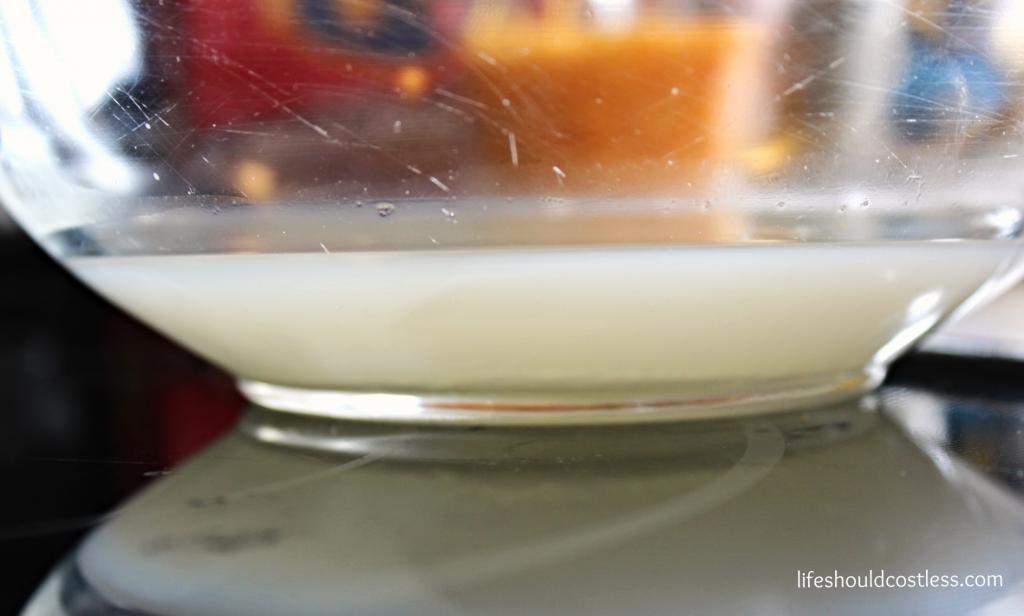
I was actually surprised that there was this much whey that had been strained through. I thought it would be maybe half this much. This is the key step that will make your yogurt the right consistency to form your Cheeseballs.
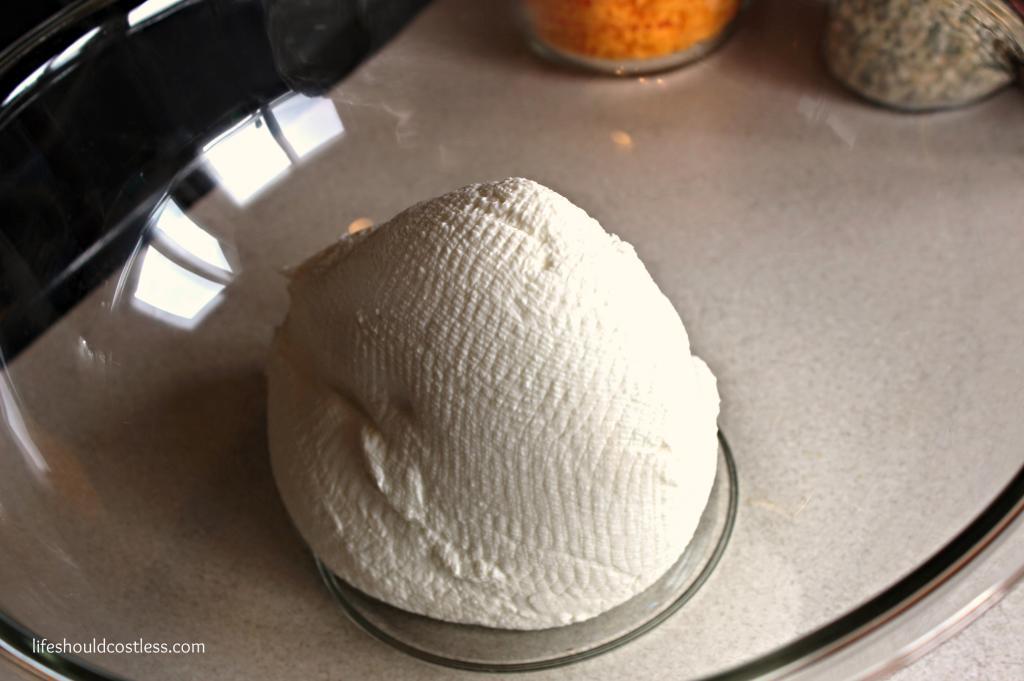
What it looked like in the bottom of my large mixing bowl.
The remaining ingredients all laid out…my pregnant brain totally forgot to get out the pecans for this shot… oops!
Here is everything in the bowl ready to get mixed up. I used a little bit more garlic powder this time, but prefer it with the amount listed in the recipe.
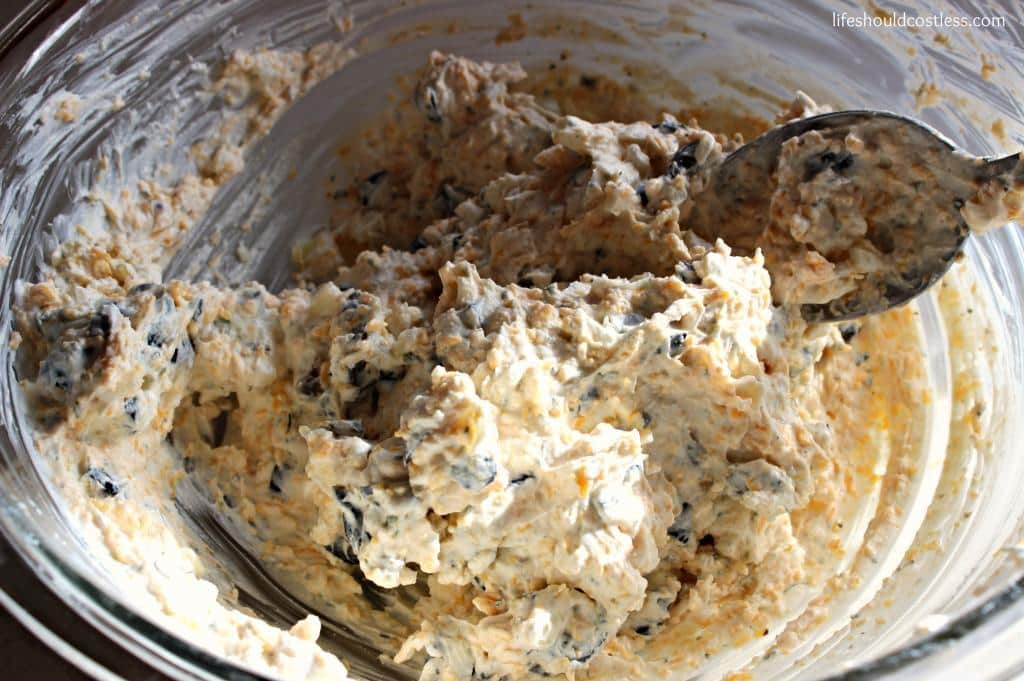
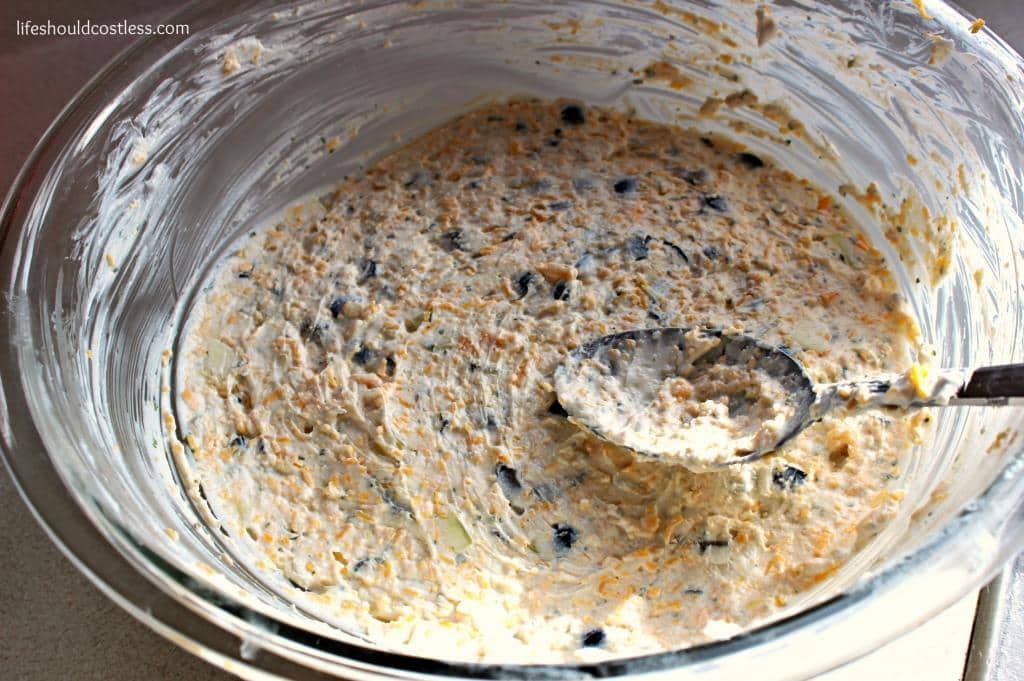
It’s all mixed up! I was pleasantly surprised to find that it was way easier to mix up than the original recipe with the cream cheese.
In order to get the cheeseballs all the same size, I flatten the mixture and spread it evenly in the bottom of the bowl.
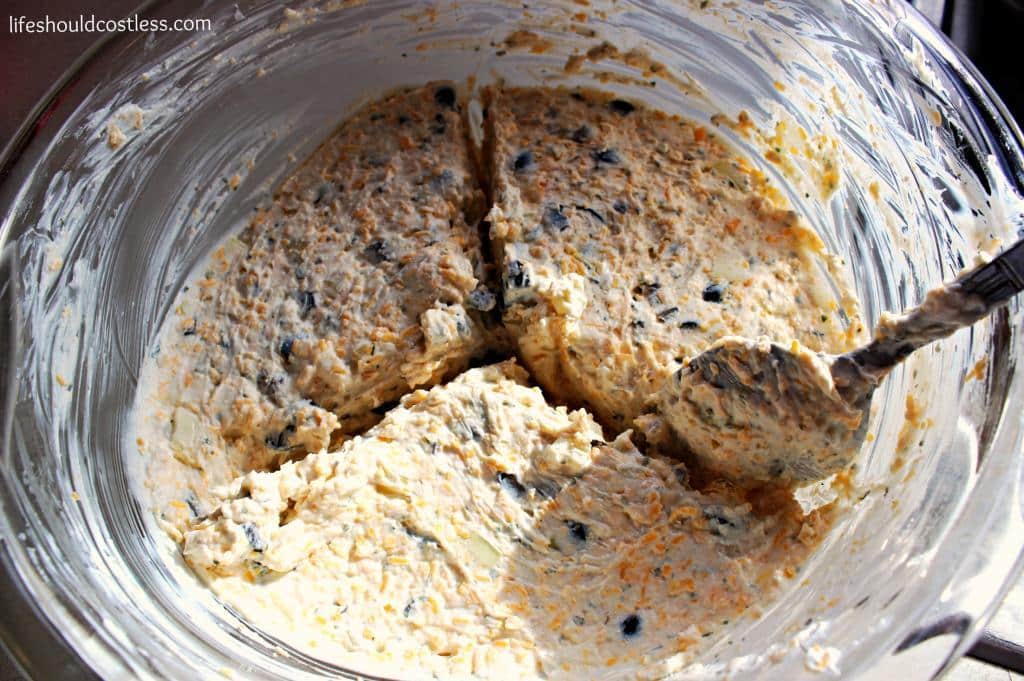
Then divide it into thirds by drawing a peace sign.
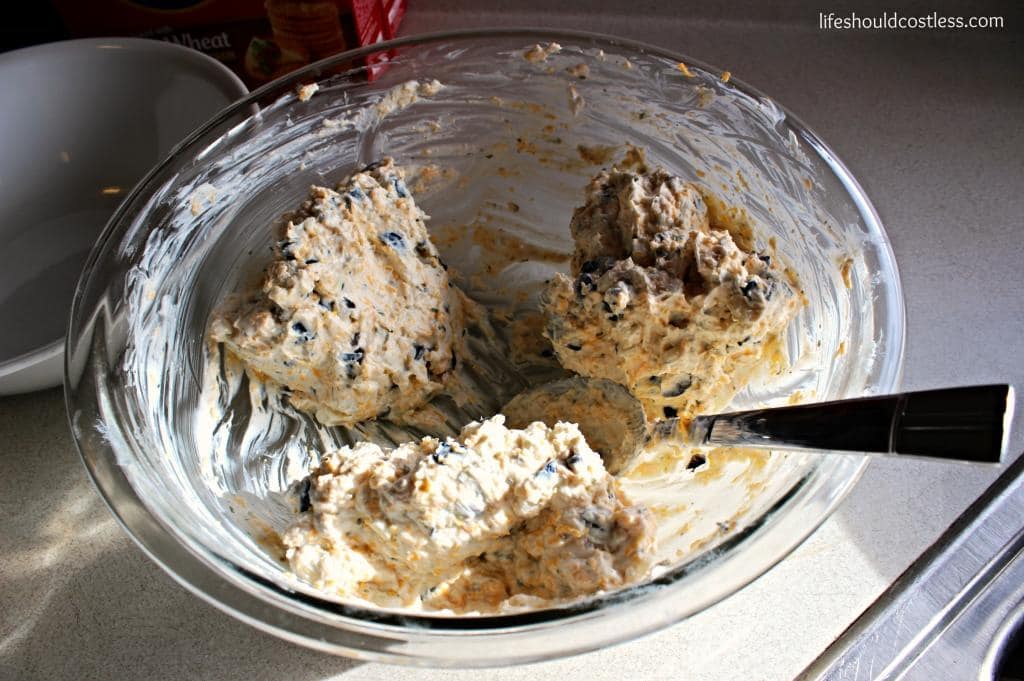
That peace sign then gets each section scooped up into a blob.
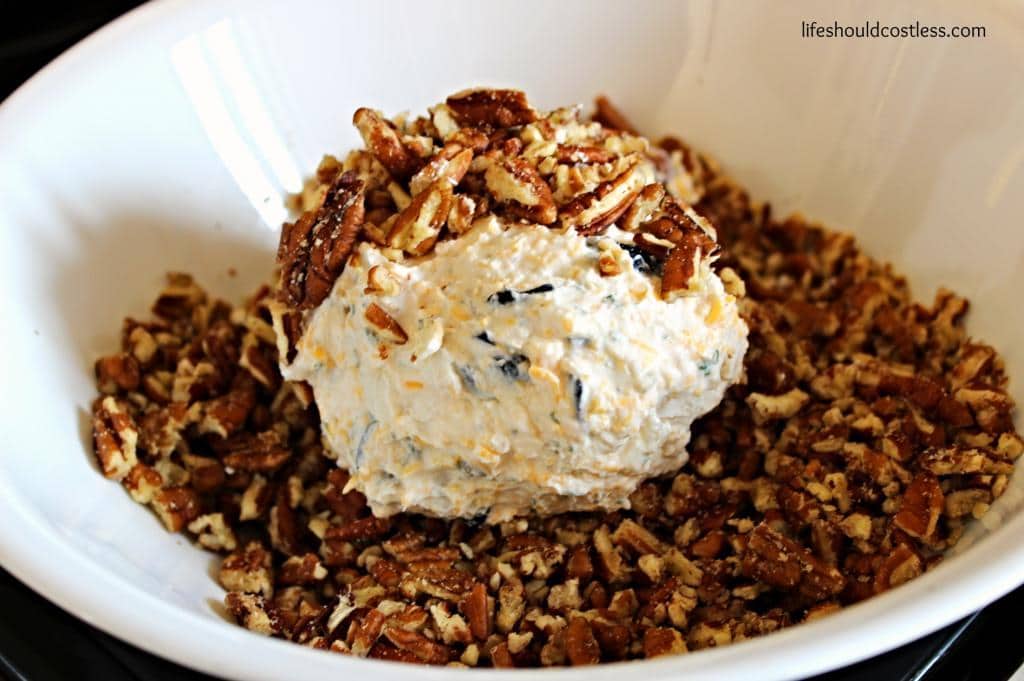
Then form each blob of mixture into a ball the best you can and roll it in chopped nuts.
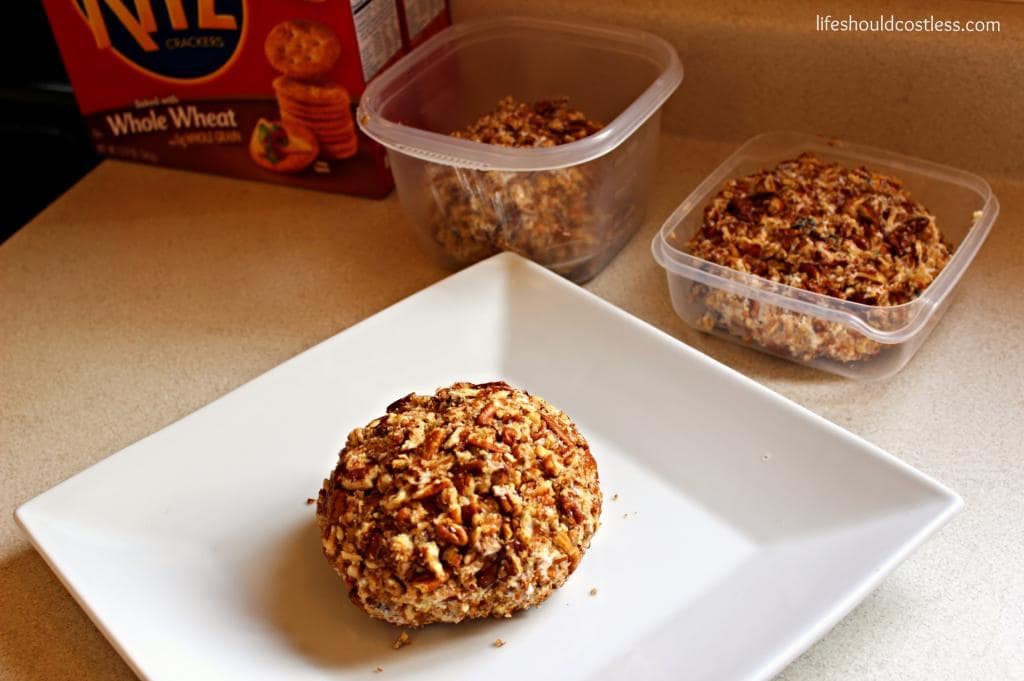
Next is just to put them all in the containers or on the dishes that you are going to use.
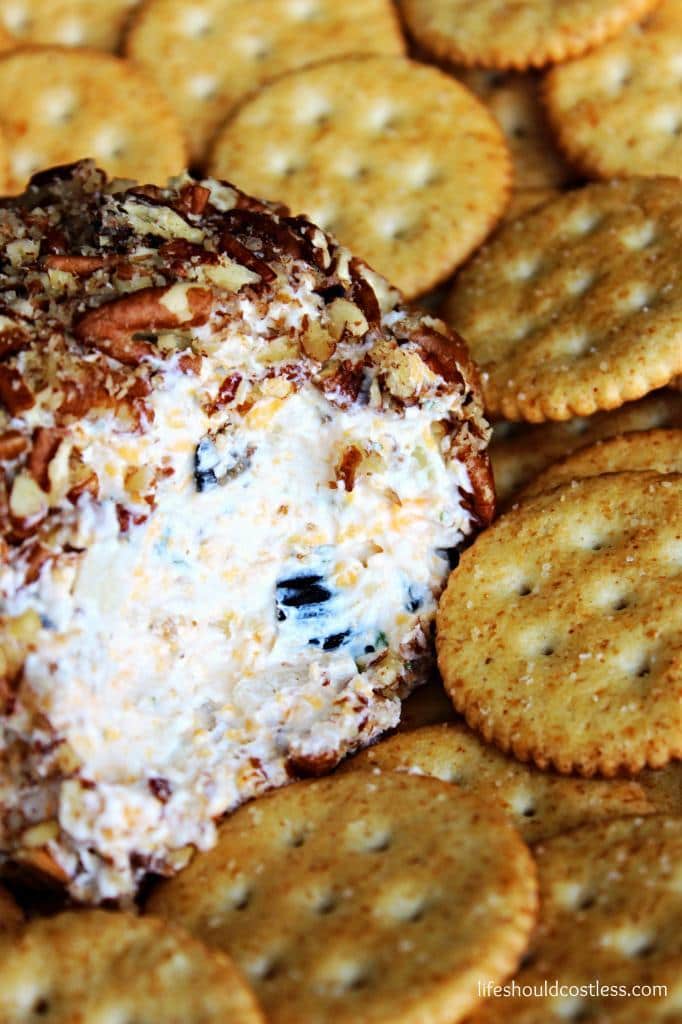
Then enjoy! They really do taste better if you let the flavors blend for a few hours prior to eating them. My girls were being super cute when I was shooting the post pictures so I let them “help” me show you how tasty it is.

My youngest wouldn’t even take a bite of her cracker without some of the Cheeseball on it…she likes it that much! She cried when I took it away… I’m so mean, aren’t I…lol!


This little girl isn’t a big fan of onion or garlic and still enjoyed it enough sit and eat with the rest of us for a good long while.
I hope you like it! If not, at least maybe you learned a new way to make your Greek Yogurt even more versatile. Please make sure to share/pin this post if you do/did! Thanks for stopping by-Sarah.


You may also like (because they are also made with Greek Yogurt):
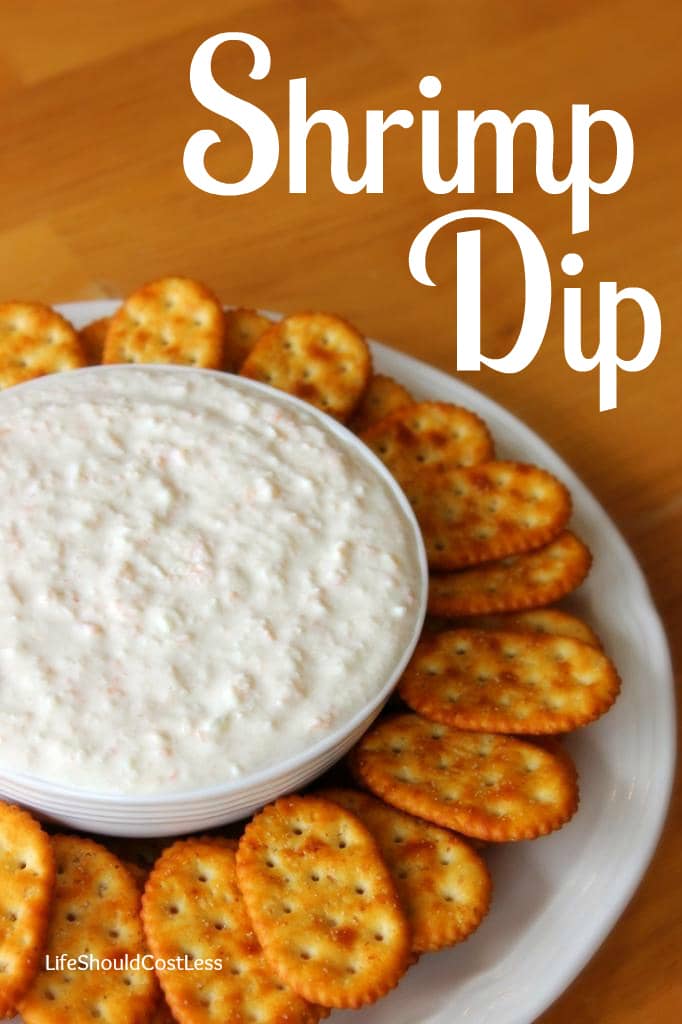

Grandma’s Shrimp dip revisited, now low-fat and high-protein!

Make sure to check out my other website: